Showing posts with label the spotty dress. Show all posts

Saturday, March 22, 2014

On Perfectionism

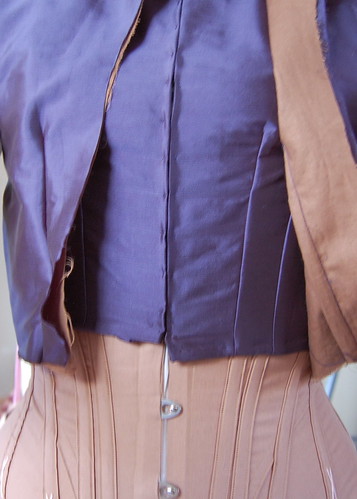
I am not a perfectionist. I'm so far from being a perfectionist that I actually proudly show my friends my non perfectionist work and we laugh. And I absolutely love this orignal natural form bodice on my website because it's made the way I make clothes. The outside--it's lovely! The inside? Well, it's done, isn't it? A few loose threads, sewing that seam by machine twice and overlapping the seams, whipping the seams at not perfect angles to finish them--that doesn't hurt, right? Can I do things like that and other details perfectly? Well, except for decent backstitching in heavy fabric and buttonholes, I pretty much can, but I have no desire to, and I blame that on starting a costume collection early on in my costuming career. Everything I own has a mismatched seam, or piecing, something to make you unhappy. When you think of our costumes as clothes that people would make and actually needed to wear (no two months until the event luxury!) and quite likely would want to remodel, it makes sense to think that they would spend time on the areas that counted--those that showed.

Oops DSCN4505

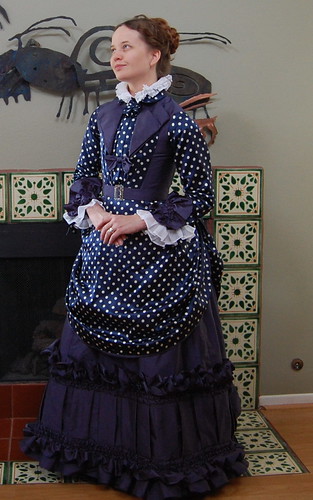
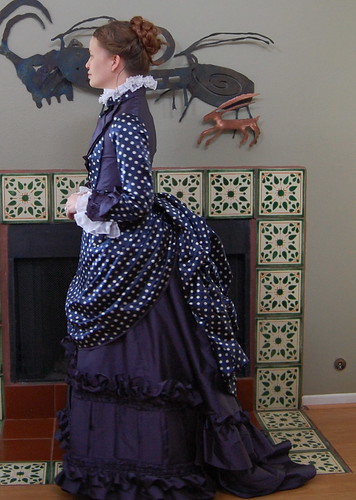
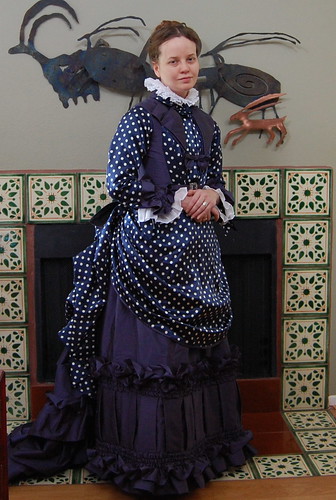
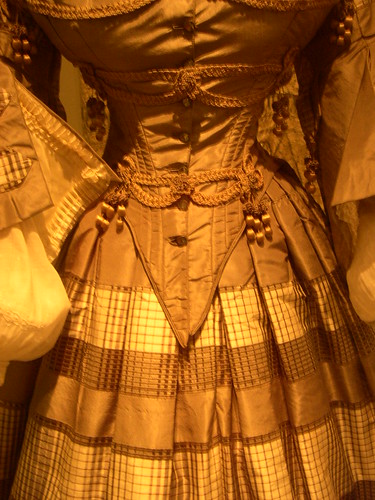
And here we have a dress of mine--the Spotty Dress--and a dress in the Museum of London that's patterned in The Cut of Women's Clothes. And what do these dresses have in common? The fronts don't match.

I measured carefully, and lined things up, and when I sewed the hooks and eyes in, things looked a little off. Not too badly off though, I thought, thinking of having to rebind the hem, or reset the hooks and eyes in case small differences in their placement were causing the issue. And then I tried it on, and well? It was awful. A good, very obvious half inch. Only, it wasn't obvious. This was the underbodice, the overbodice can be seen open in the picture. It wasn't going to show, so, what would they have done? Well, maybe if this dress had been made for the Princess of Wales, they would have fixed it. But I think most Victorian seamstresses would've left it--it does nothing to the structural integrity of the dress, it would take absolute ages to fix, and it doesn't show. And I had already sewn the hooks and eyes in with big, visible stitches knowing they'd be covered. So that's what I decided, and I finished the dress, wonky underbodice left alone. And, I had seen something to back up this idea.

When I saw the dress on the right in the Museum of London, not only was I happy to recognize a dress from a book (It's like meeting a celebrity! Each familiar dress I totally fangirled over), but it had one of the prettiest sights I've seen on an original dress. The point on this gorgeous, silk, highly detailed dress, was clearly not matched. I can only imagine the seamstress' dismay when that happened. But she decided to go with it, and the dress remains lovely.

And back to my dress, if someone would leave a visible mismatch, wouldn't someone also leave an invisible one? Quite often, I think it's the tiny imperfections--mismatched points, stress wrinkles, picked out seams--that make these dresses seem real and remind us that actual people made these. Why not leave those little imperfections in our own dresses too?


Tuesday, September 25, 2012

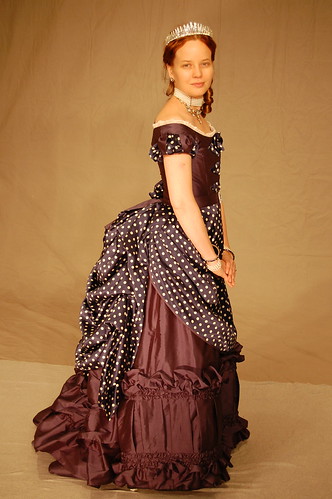
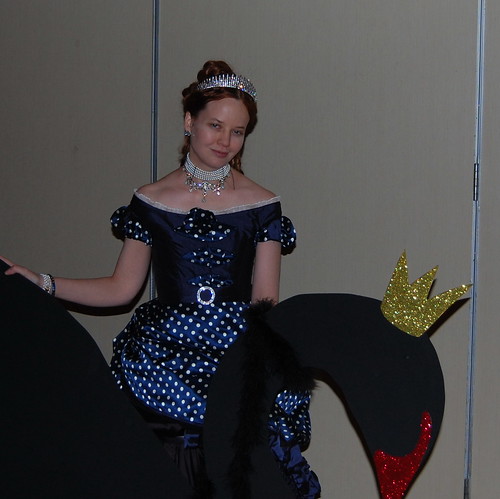
The Spotty Evening Dress

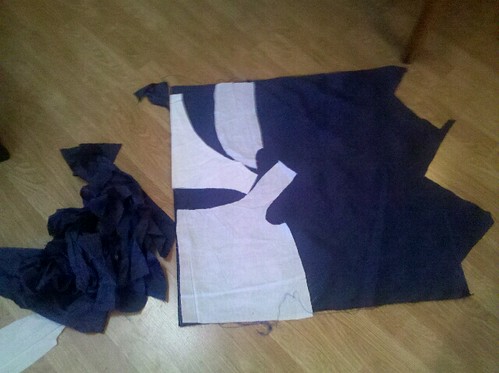
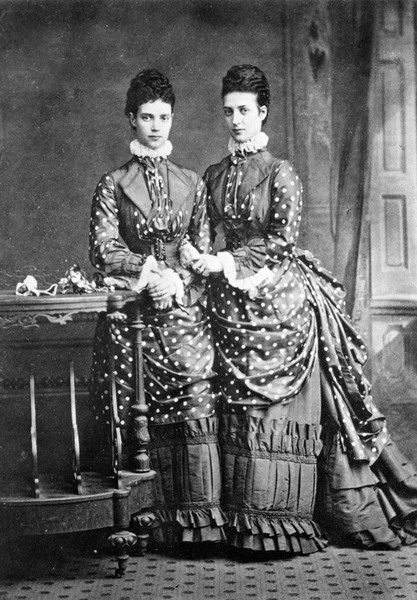
So, if you have a huge, complicated skirt, 18 inches of leftover blue fabric and about a yard of spotty fabric leftover, what do you do? Make an evening version, of course!
Spotty Evening

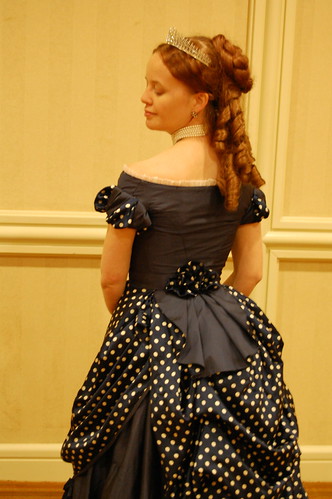
And wear tons of jewelry--including a tiara, choker (the dress is based on one of Princess Alexandra's!), necklace, bracelets, more bracelets, a rhinestone belt buckle, and earrings. What can I say, sparkly is fun :)

Costume College 2011 Costume College 2011

I've said more than enough about construction of the day dress, so I'll just say a little here. The cutouts on the bodice are piped and made the same way as my 1869 day dress.

Costume College 2011 Costume College 2011

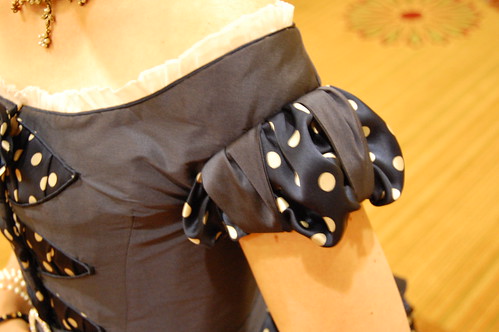
The sleeve is a spotty puff over a fitted lining with bands of blue holding it in.

Costume College 2011 Costume College 2011

The belt has a blue lined with spotty silk peplum and a little spotty rosette. It's just a half oval that I pleated to the waistband.

Fabric

And the amount of fabric I had to make this. What doesn't show is that the bodice pieces are against a cut bias edge.


Costume College 2011

Thursday, August 11, 2011

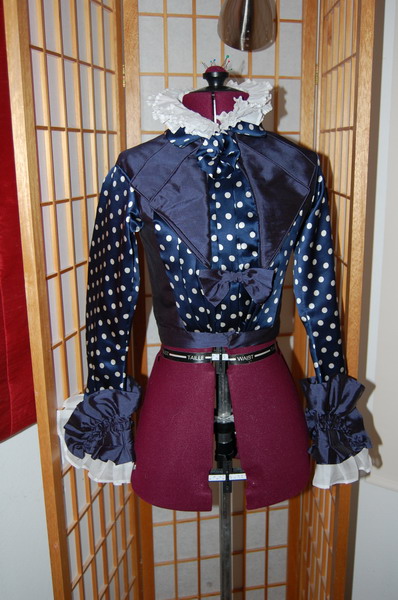
The Spotty Bodice--Construction! Part Five--the Cuffs and Belt :)

First, a note about the overskirt. I took almost no pictures, actually, I don't think I took any until I was done. I'll briefly summarize. The front piece is a rounded trapezoid, and the back a long rectangle. I pleated the edges of the trapezoid and sewed them to the long rectangle, leaving a the seam open on the left side for a placket. The rectangle is faced with spotty silk, since both sides show. The whole thing is lined with Egyptian cotton. The closure is hidden in a side seam pleat. The back is gathered and cotton tapes pull it up into puffs. Not terribly helpful, I'm afraid!

11 April 2011--In which I finish the spotty bodice, and breathe a huge sigh of relief :) My cuffs are a little different than the original. I believe the original was doubled. Mine isn't. Why? One more inch of fabric and I couldn't do the evening bodice the way I wanted to :)
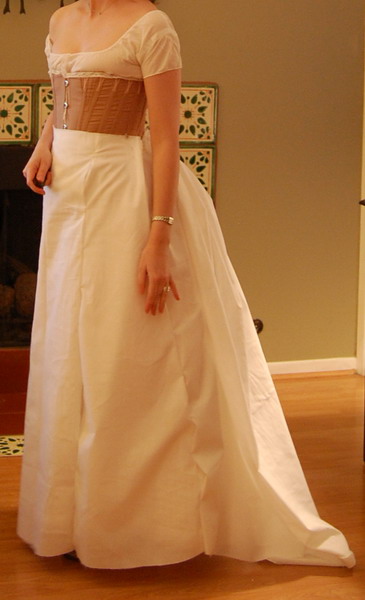
Ok, I still have the belt, but the bodice is DONE!!!


My cuffs are obviously to a different scale. That can be so hard copying. But I like them, and they're very, very, very securely sewn on and I'm out of fabric (if I want to do my evening bodice as planned). So there. Most importantly, I like them :)

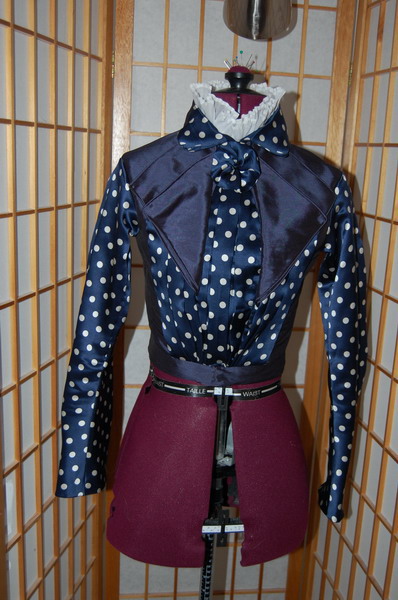
The Spotty Bodice--Construction! Part Four--the Organdy Collar :)

From 6 April--I used my pleated organdy for this, of course, seen in this post. My first attempt made a pretty collar that looked awful on me. The next post shows how I fixed that. You can see the difference in the dressform pictures! The last line of this post includes the epiphany from staring at it too long :)


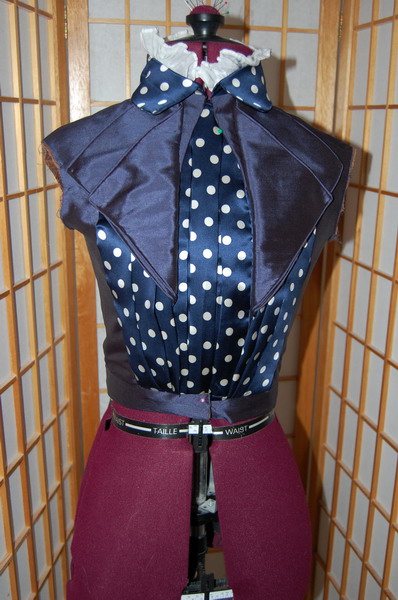
The Spotty Bodice--Construction! Part Three--the Plastron :)

The series continued!

From 3 April--The construction of the plastron here is basically the same way I make 18th century stomachers. I didn't include any comments, as once again, I think the pictures speak for themselves.

The spotty stomacher is done and sewn in one side. Now just hooks and eyes. Unfortunately, I pressed the pleats a little flatter than I wanted to, but it's ok :)


The Spotty Bodice--Construction! Part Two--Lapels and Collar :)

The continued construction. Once again, I'm just copying my original posts with minor edits, the date, and a brief commentary after each date.

From 2 April 2011--For the lapels, we used an antique bodice that I own as a guide. The pictures are commentless--I think they speak for themselves!


The Spotty Bodice--Construction!

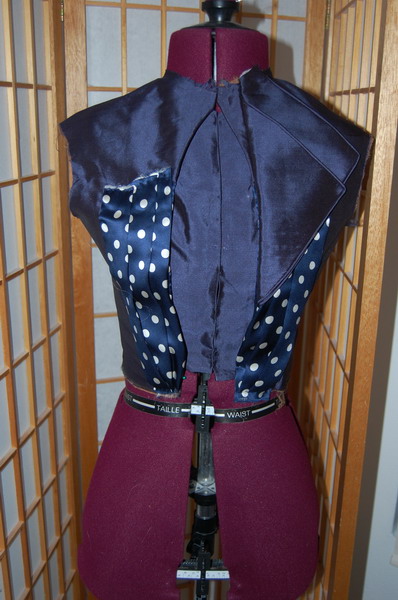
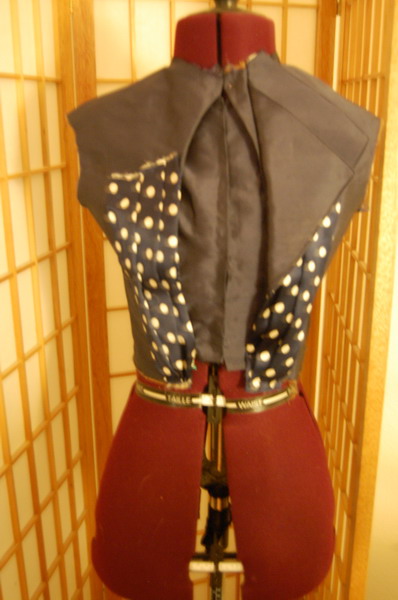
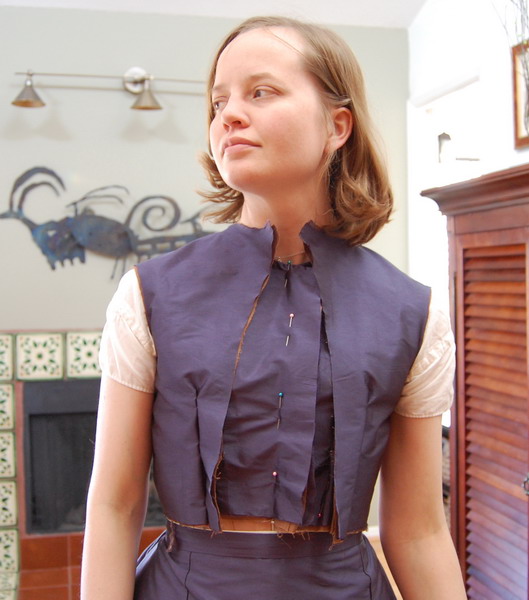
And now, at last, bodice construction! I'm just going to give a slightly edited version of what I posted when I was making it. It is a highly odd bodice, as there is no visible front opening. We managed this by having a center front closure in the lining, a layer that closed over that, but didn't close center front, and a plastron to fill in the center.

This dress at the Met was invaluable in figuring out what to do, as was information about a dress Kat had seen and shared with us.

So here are the entries, not really polished. I think it's interesting to revisit what I was thinking at the time, anyway! I put a little summary after each date to hopefully clear things up a bit :)

From 15 March--This is the first time I tried the finished bodice on, after adjusting pieces of my existing 1860s muslin to give the right look.

Since I had the corset on, I figured I might as well pin in the darts, right?

Remember that part in the skirt muslin where I said imagination is necessary? Well, it's needed here too. Yes, it's the "finished" piece, but trust me, all my bodices look this terrifying in the darting stage!


Saturday, July 23, 2011

Spotty Dress Construction, Part 4--The Skirt

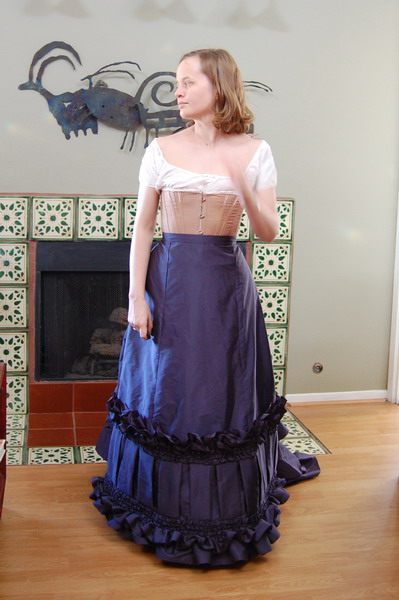
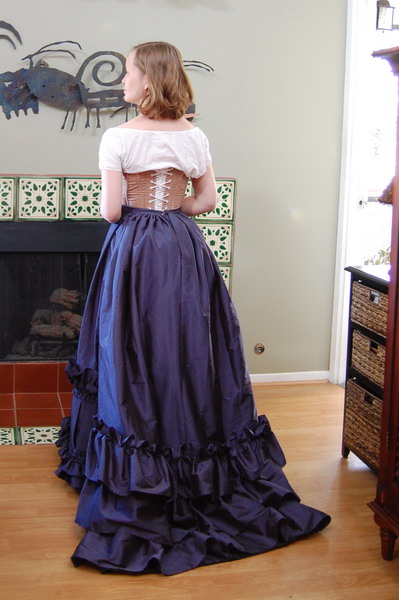
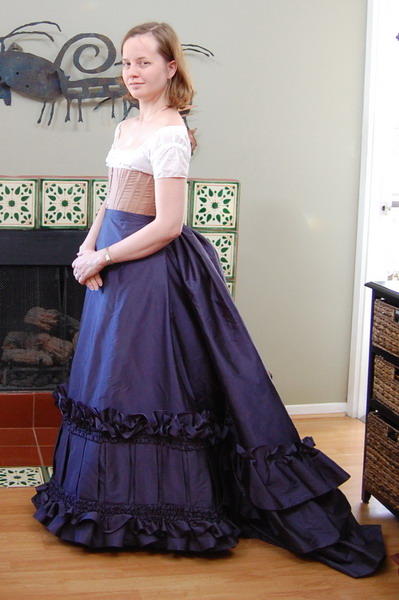
From 15 March. The flounces on the back are just that, flounces. They're hemmed top and bottom and pleated to the skirt. And after much work, the completed skirt!

Coming soon, what in the world is going on with that bodice? You can't see any closures!

Squee!


And in corset news, I used artificial whalebone. Or German plastic boning. And the bloody stuff won't curve out! I've ironed it, it's been on my dressform for days, but no, the tops MUST curve in and feel stupid. Argh. I think I'm going to make the bust on my dressform as big as possible and steam the thing within an inch of its life.

But skirt! Squee!

Spotty Dress Construction, Part 3--The Skirt

Originally posted 27 February 2011

That was a lot more work than I expected it to be!

Anyway, the spotty ruffle is started. I think doubling the fabric was a good idea, and I think the ideas from my last post will work.

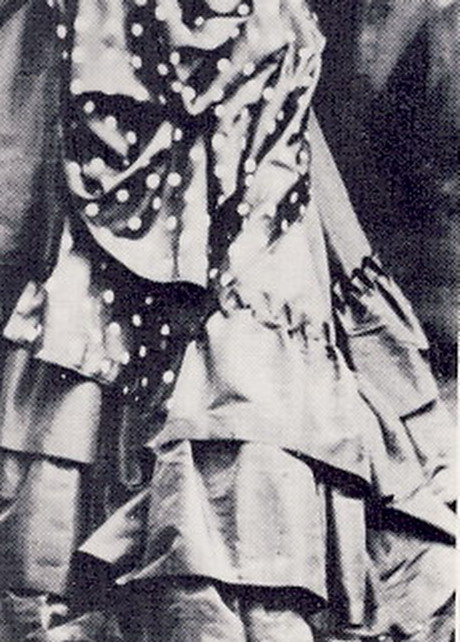
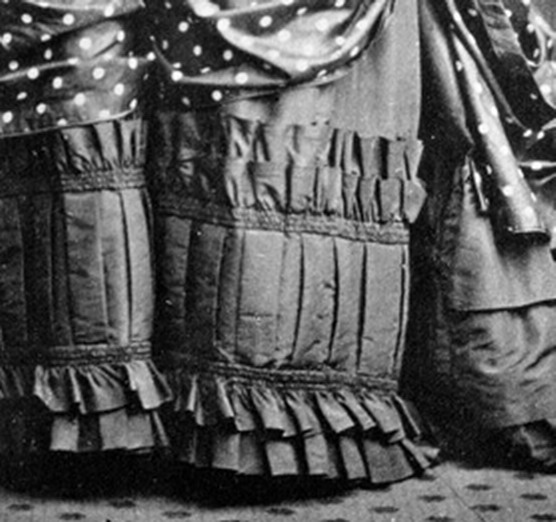
From the pictures, it seemed like the ruffles were just below knee length, so that's what I aimed for with mine. I hope I got it right! It looks so bare up top, but there's no overskirt which really affects things :)


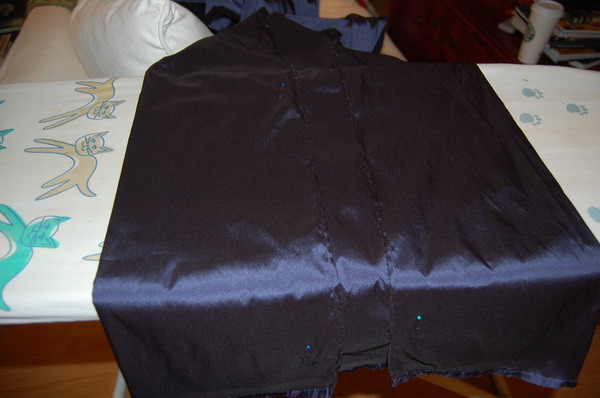
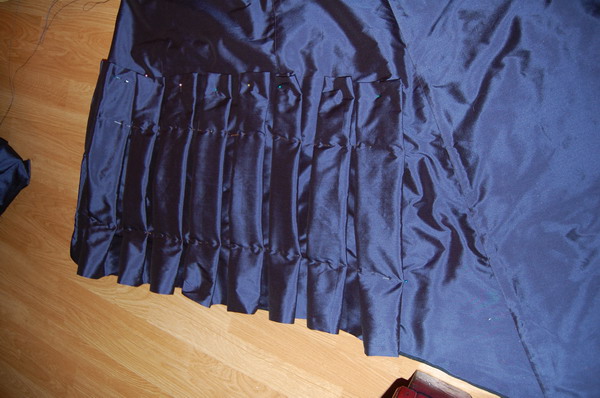
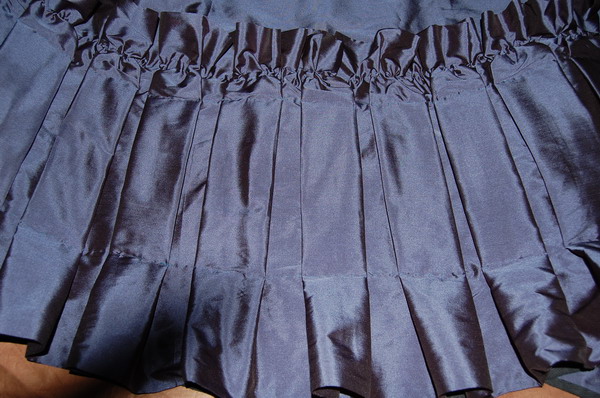
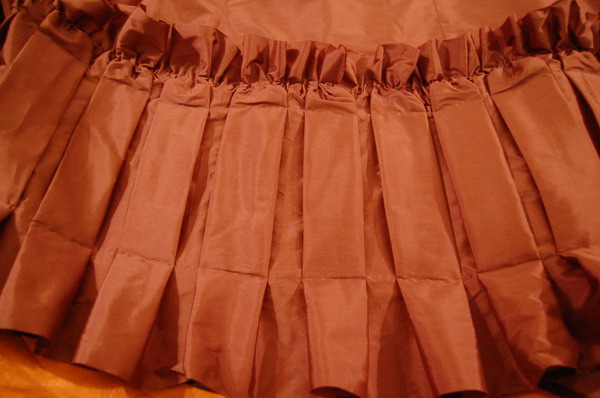
Preparing the fabric. It's about double what I want it to be and the ends are folded in.


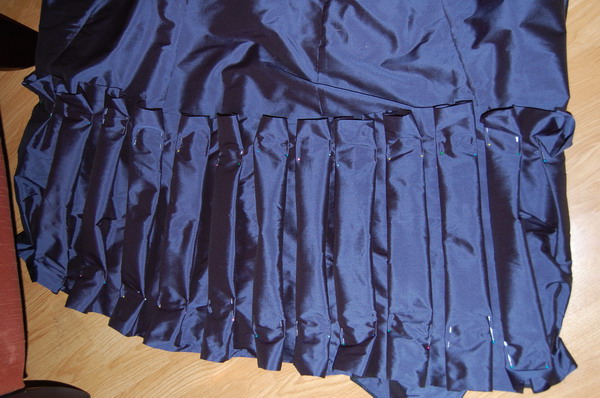
Then the long box pleating process. Notice how puffy they are? That must be dealt with!

I just eyeballed the pleats since theirs were obviously eyeballed as well.


So once I was sure they were reasonably straight, I smoothed them out.


And this was the result. I'll baste it where the pins are, and then put the other ruffle on top.

Once it's basted, I'll lightly press the pleats. I don't think they'll need any stitching in the middle, but they might need some sacque back like reinforcements. I don't think so though, and I really hope not! (ETA: They didn't! So much easier!)

27 February 2011

I was about to cut the flounces for the back of the skirt out. Typical bias cut flounces to be exact. Then I thought, better look at the picture first, especially as this skirt is a fabric hog and I can't afford any mistakes.

I'm glad I did. Except for that scary moment that I thought there were four ruffles--which wouldn't make sense as even numbers look weird--I think I like what I see. One, I think the flounces are on the straight, not the bias as is more common. If you notice, they're sort of just hanging there, not all nice and perky the way bias flounces tend to be. There's a heaviness to them. And also, look at the top flounce. It's smocked. Or something weird. I really like how it looks, but total whimper to doing it. (ETA: We ended up pleating these and found that gave the closest look). It looks like the sort of thing you want to do on the straight of grain though. Hooray for not cutting bias flounces! Of course, second opinions wished for :)


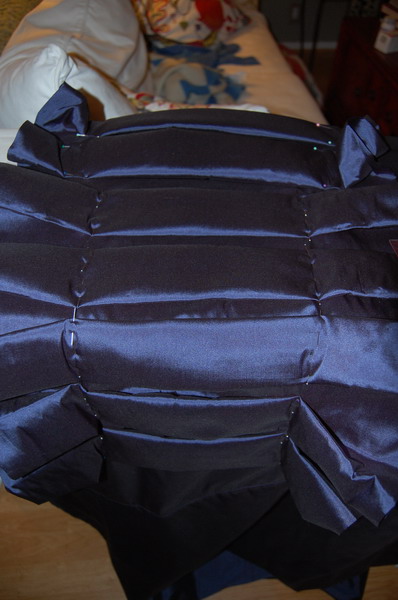
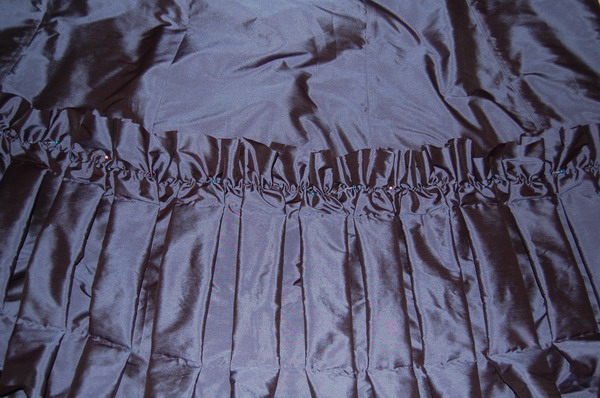
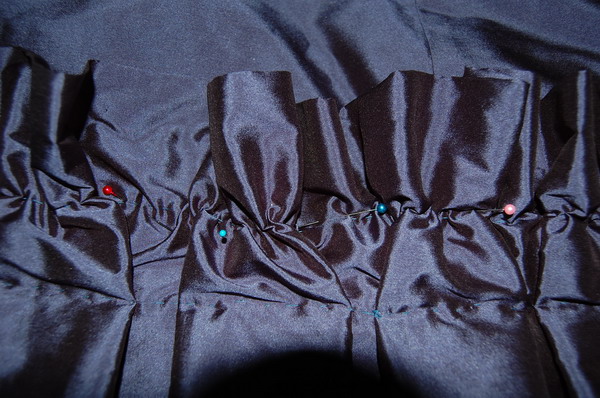
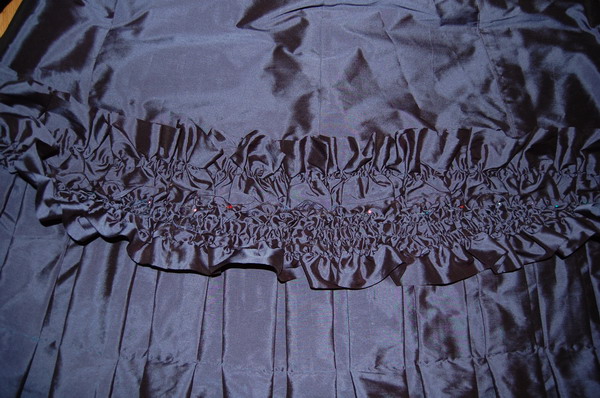
Here we have the top of the ruffle gathered and pinned into place.


A close up of that. It's seriously not attractive, but it gets covered by the little ruffle, so all is good. Gathering pleats out is weird to do.


Pressed pleats!


Now flashless. This fabric doesn't like to be photographed :)


3 March 2011


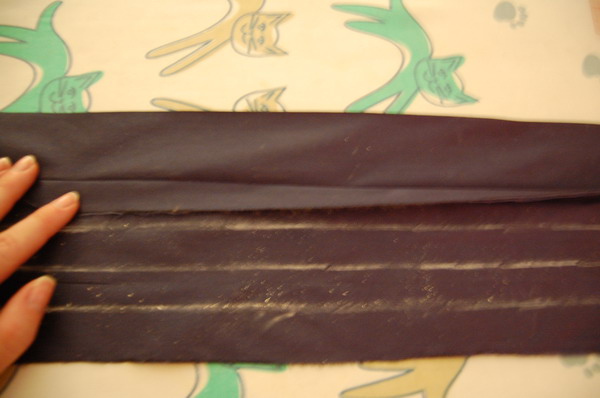
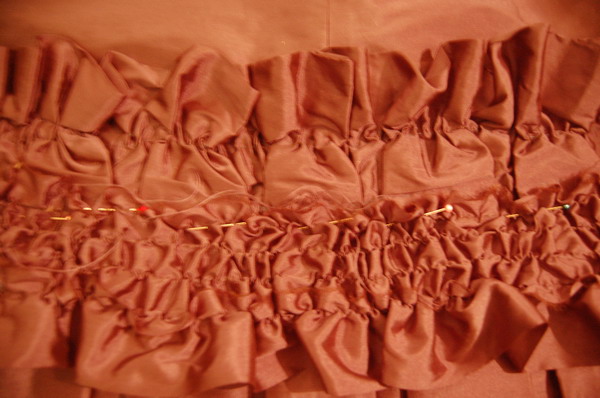
Preparing the ruffle. The fold is 2 1/2 inches long. The ironed fold is 2 inches deep. That's for the first line of gathering. Each line below is 3/4 inch lower.


Pinned into place.


The same, with flash.


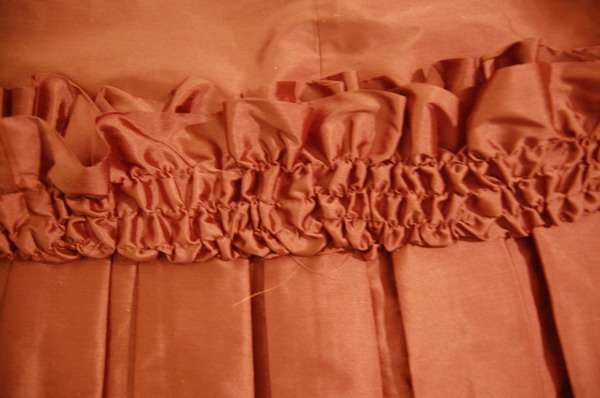
The ruffle folded down.


The same, no flash.


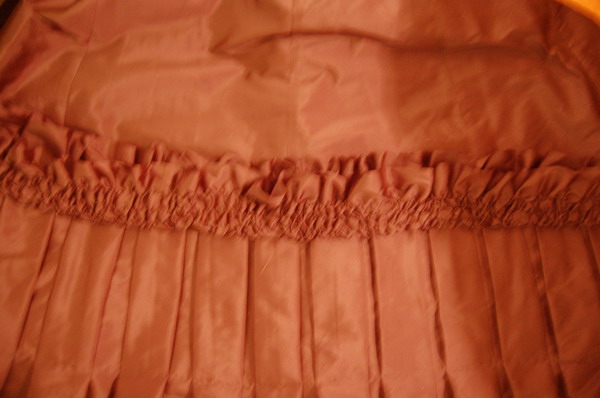
Close up folded up. The gathering lines will be machine sewed down.

Spotty Dress Construction, Part 2--The Skirt

After much staring, it was time to start the skirt. Now, I have pictures of putting the skirt itself together. The construction method I used was mainly from an overskirt I own. For those of you familiar with 18c construction techniques, I used the sew outer fabric and one layer of the lining, then whipstitch the next layer of the lining to it method. However, I haven't written that part up, so I'm going to start with my analysis of the ruffle--mainly an explanation of why I did it the way I did. Then, actual ruffle construction in the next post.

Originally written on 25 February 2011.

As I'm fast approaching base skirt completion--2/3 a hem binding through the hem!--I'm considering skirt decoration. And here are my obsessive ramblings.


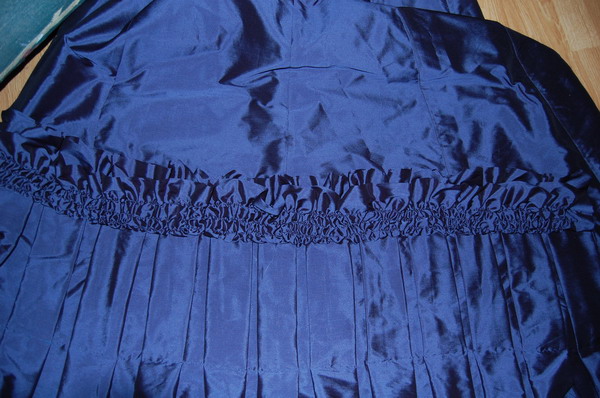
Here we have the pleated, gathered, puffed, up ruffle of doom and questionable tastefulness.

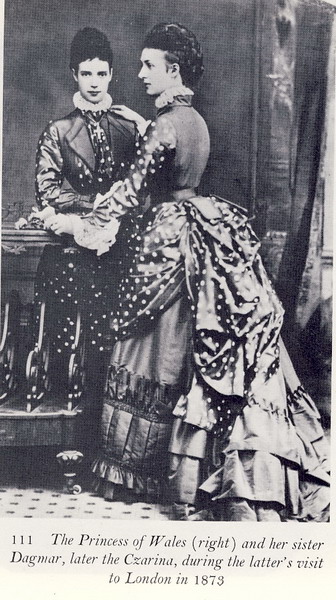
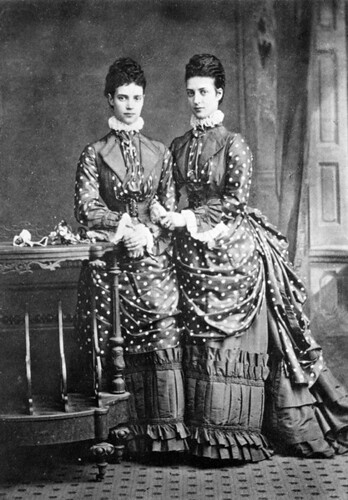
Now, look at the bottom of the ruffle. Especially on Marie's dress (left), you can see that at the bottom of the ruffle, the lines of the folds follow the lines of the folds on the large pleated part. It's not so much that way on top, but I have a theory to explain that away.

So, here's what I'm planning on doing. I'm going to take a piece of blue silk twice or so as wide as I need it to be. Then fold it like bias tape with the ends in towards the center. Then pleat and baste it in place. I'll start it where I want it to stop then just pleat around--no measuring!

This will be fine for the bottom--it just has to hang. But the top will flop. So, run a gathering line through it and baste it there. Sewing the pleats down would be too pleaty, which isn't an issue if they're hanging, so, a gathering line.

Next, the ruche-y bits. This is the same as the Halloween dress. Take strips the same length as the pleats and gather them as needed. Leave the top edge raw and fold the outer edge down so the edge is caught in the last row of gathers--essentially a deep hem.

Then, place it right side to right side on top of the pleats, sew it down. Flip it up, machine sew through the lines of gathering stitches, and voila! Pleats and gathers and prettiness! Oh, and questionable taste :)

The doubled silk will be very good as it is a thinnish taffeta. It's really a super pretty one though. I'm surprised how nice it looks in use.

After that, standard bias ruffles on the back. (ETA: After much staring, we later decided these ruffles were on the straight of grain. Very lucky, as we both nearly ran out of fabric) Why after that? It's easier to play with the height of those than it is to play with the height of the doom-y ruffle :)

Also, I just noticed that Marie's doom-y ruffle is taller than Alexandra's. Neat!

Spotty Dress Construction, Part 1--The Skirt

Well, hasn't it been ages since I've posted? Let's, uh, blame Costume College! Anyway, ages ago, I promised spotty dress construction, so I thought, might as well begin, especially as I have several posts already written. Therefore, I am slightly cheating :)

So here's a repost of a post originally made on 8 February 2011 on my Live Journal and was just for a small number of people who provided that much needed encouragement and advice. As a masquerade costume, it needed to be kept rather secret!

So here we go, patterning the spotty skirt!

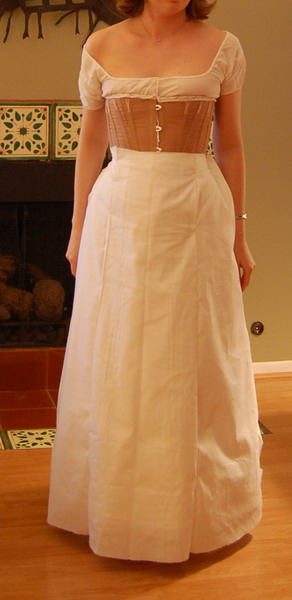
I actually made a skirt muslin! I'm sure this is amusing to no one but me, but it's very much out of character.

Now, my muslins aren't other people's muslins. They require imagination. But I think I like the skirt shape I came up with.

I didn't sew it (let's not get crazy here). It's just pinned.

I used the pattern for the Halloween dress skirt--the 1874-1877 skirt on page 32 of Janet Arnold. I noticed that the Halloween dress had a similar straight shape in front. The back wasn't quite right, but easy enough.


I ended up taking an inch of flare out of the bottom of the center piece and side piece. Repinning a skirt while wearing it isn't fun! I jammed my left middle finger with a pin quite nicely...

It doesn't look as straight as their skirts do, however, once it's in silk lined with cotton and trimmed, I think it will be. The Halloween skirt is much straighter.

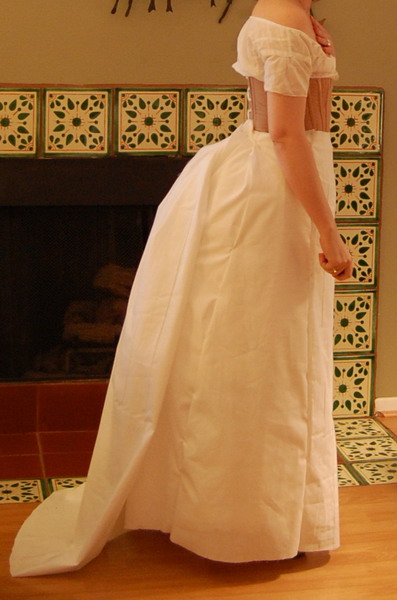
The side picture below also makes the skirt look a little wider than this picture does. It seems a little more natural there, so I think it looks a little narrower here do to intense train fluffing.

Also, ignore the too short thing. It had to clear the floor for the fitting! And again, ignore the badly pinned side pleats. They're enough to get the idea!


To change the back, I used a full width of muslin and didn't pouf it up. I think it'd be helped by using a full width of silk--I think it's still a little narrow--but I'm lazy when it comes to muslins and, well, imagination! Having someone to fluff the skirt out and all the flounces to stiffen it will help too.

Also, I didn't bother with the back yoke--these dresses don't need a flat spot there, so no yoke nonsense.

The skirt is very badly pinned to some other thing that's around my waist. Probably the petticoat. I just hope I don't rip anything taking them out :)

Anyway, to get the train to flop over the front, I concentrated the fullness more towards the side back piece than the center back. That took a bit of futzing to come up with. Also, the skirt does "tie" in back. Why the quotes? I have some badly pinned in pieces of muslin imitating the ties.

The back is also just large pleats. Gathering will give it a softer look, more like the original.

I'm wearing it over my new bustle and corset and my old bustle petticoat. The corset looks way prettier when you can see the whole thing. I have nice waist definition, but I always think just the top part of my looks way off balance in a corset because I have to make them so short since I have zero chest. Trust me, it's a super pretty little corset :)

Wednesday, May 4, 2011

The Spotty Dresses!

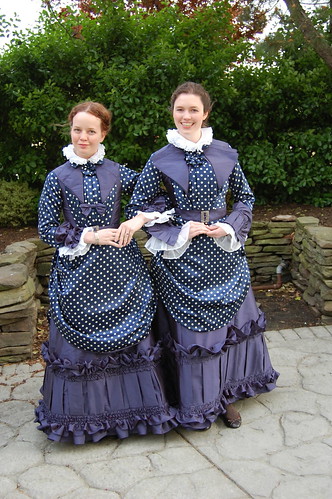
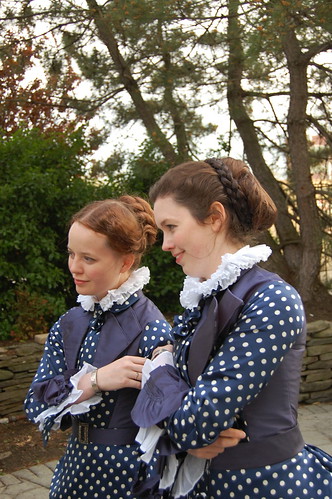
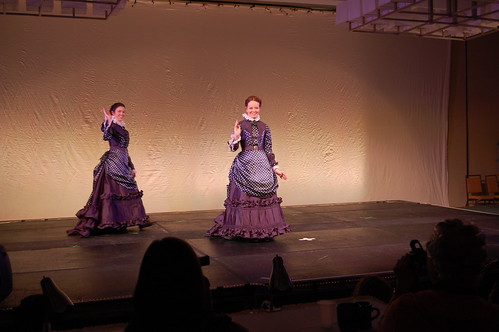
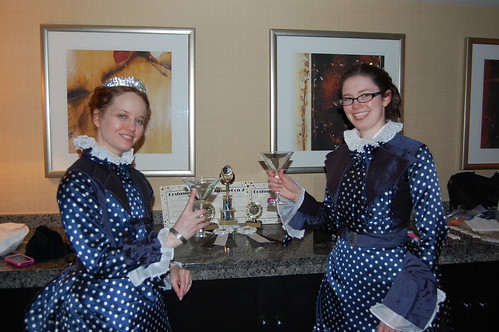
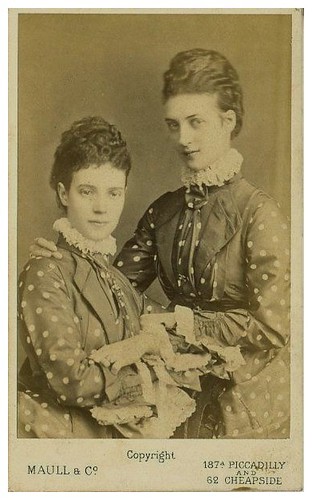
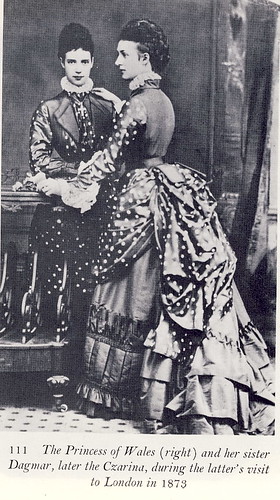
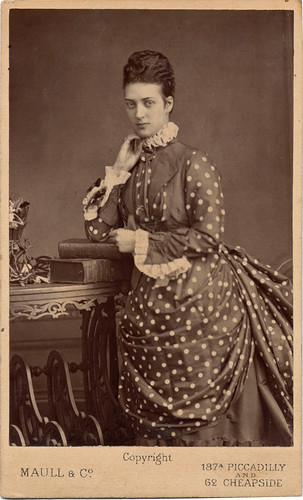
And here we have one of my latest projects--a reproduction of a dress worn by Alexandra, Princess of Wales, and her sister, the Grand Duchess Maria of Russia. My friend Aubry and I made these together for the Costume Con 29 Historic Masquerade. We ended up winning Best in Show Presentation, Best in Class Documentation, and Judges' Choice for Excellence in Design Concept (workmanship). I'll eventually go into this dress in great detail, but for now, our finished dresses!

Spotty Dress--Documentation Spotty Dress--Documentation

Spotty Dress--Documentation spotty_documentation17

Costume Con 29 Costume Con 29

Costume Con 29

Costume Con 29

Why yes, I do want to share an awards picture!

And to see what all this is about, the originals:

The Original Spotty Dress The Original Spotty Dress

The Original Spotty Dress The Original Spotty Dress