
Saturday, August 27, 2011
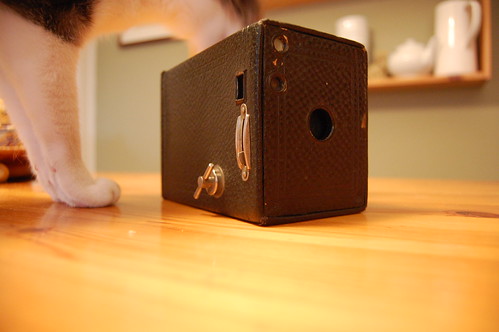
A Brownie No. 2 Model E Camera!
This is a little different than my normal posts, though this is still costume related! I hope to use this for costume photography. How fun to take a picture of costume with a period camera! This is the second one I bought--the first was a model with bellows which were full of light leaks.
Thursday, August 11, 2011
The Spotty Bodice--Construction! Part Five--the Cuffs and Belt :)
First, a note about the overskirt. I took almost no pictures, actually, I don't think I took any until I was done. I'll briefly summarize. The front piece is a rounded trapezoid, and the back a long rectangle. I pleated the edges of the trapezoid and sewed them to the long rectangle, leaving a the seam open on the left side for a placket. The rectangle is faced with spotty silk, since both sides show. The whole thing is lined with Egyptian cotton. The closure is hidden in a side seam pleat. The back is gathered and cotton tapes pull it up into puffs. Not terribly helpful, I'm afraid!
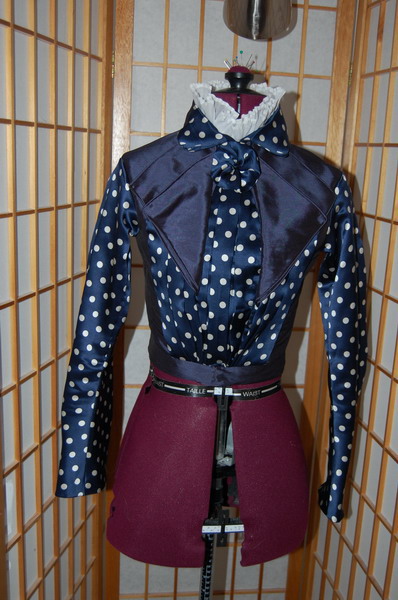
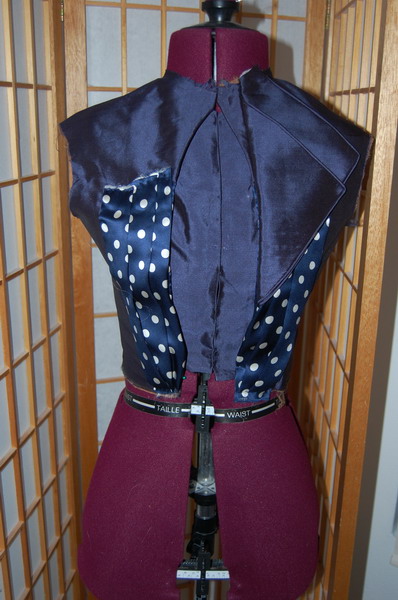
11 April 2011--In which I finish the spotty bodice, and breathe a huge sigh of relief :) My cuffs are a little different than the original. I believe the original was doubled. Mine isn't. Why? One more inch of fabric and I couldn't do the evening bodice the way I wanted to :)
Ok, I still have the belt, but the bodice is DONE!!!
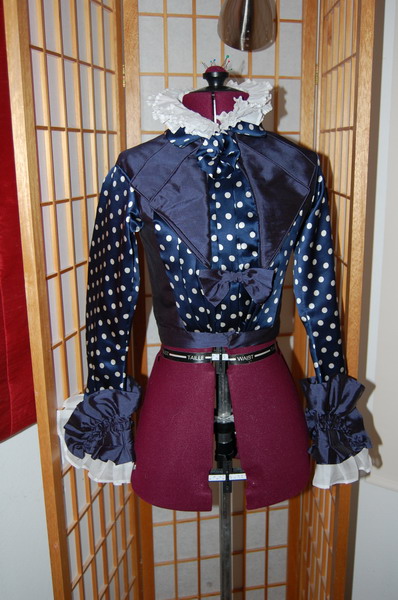
My cuffs are obviously to a different scale. That can be so hard copying. But I like them, and they're very, very, very securely sewn on and I'm out of fabric (if I want to do my evening bodice as planned). So there. Most importantly, I like them :)
11 April 2011--In which I finish the spotty bodice, and breathe a huge sigh of relief :) My cuffs are a little different than the original. I believe the original was doubled. Mine isn't. Why? One more inch of fabric and I couldn't do the evening bodice the way I wanted to :)
Ok, I still have the belt, but the bodice is DONE!!!
My cuffs are obviously to a different scale. That can be so hard copying. But I like them, and they're very, very, very securely sewn on and I'm out of fabric (if I want to do my evening bodice as planned). So there. Most importantly, I like them :)
The Spotty Bodice--Construction! Part Four--the Organdy Collar :)
From 6 April--I used my pleated organdy for this, of course, seen in this post. My first attempt made a pretty collar that looked awful on me. The next post shows how I fixed that. You can see the difference in the dressform pictures! The last line of this post includes the epiphany from staring at it too long :)
The Spotty Bodice--Construction! Part Three--the Plastron :)
The series continued!
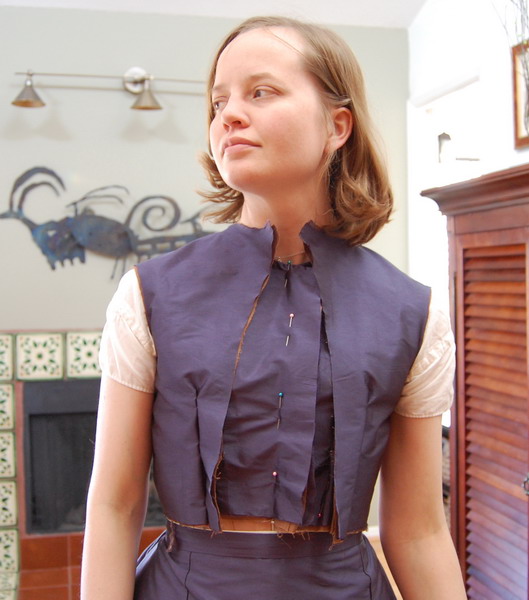
From 3 April--The construction of the plastron here is basically the same way I make 18th century stomachers. I didn't include any comments, as once again, I think the pictures speak for themselves.
The spotty stomacher is done and sewn in one side. Now just hooks and eyes. Unfortunately, I pressed the pleats a little flatter than I wanted to, but it's ok :)
The Spotty Bodice--Construction! Part Two--Lapels and Collar :)
The continued construction. Once again, I'm just copying my original posts with minor edits, the date, and a brief commentary after each date.
From 2 April 2011--For the lapels, we used an antique bodice that I own as a guide. The pictures are commentless--I think they speak for themselves!
From 2 April 2011--For the lapels, we used an antique bodice that I own as a guide. The pictures are commentless--I think they speak for themselves!
The Spotty Bodice--Construction!
And now, at last, bodice construction! I'm just going to give a slightly edited version of what I posted when I was making it. It is a highly odd bodice, as there is no visible front opening. We managed this by having a center front closure in the lining, a layer that closed over that, but didn't close center front, and a plastron to fill in the center.
This dress at the Met was invaluable in figuring out what to do, as was information about a dress Kat had seen and shared with us.
So here are the entries, not really polished. I think it's interesting to revisit what I was thinking at the time, anyway! I put a little summary after each date to hopefully clear things up a bit :)
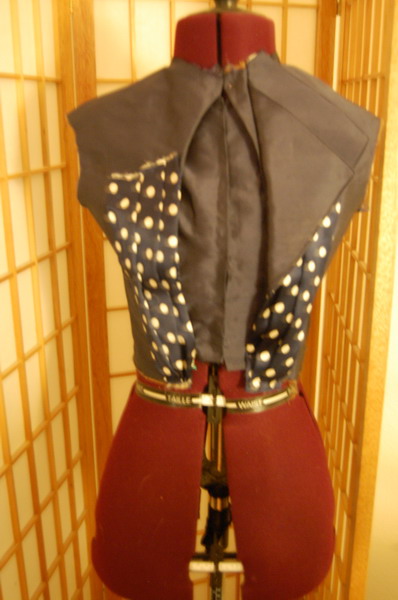
From 15 March--This is the first time I tried the finished bodice on, after adjusting pieces of my existing 1860s muslin to give the right look.
Since I had the corset on, I figured I might as well pin in the darts, right?
Remember that part in the skirt muslin where I said imagination is necessary? Well, it's needed here too. Yes, it's the "finished" piece, but trust me, all my bodices look this terrifying in the darting stage!
This dress at the Met was invaluable in figuring out what to do, as was information about a dress Kat had seen and shared with us.
So here are the entries, not really polished. I think it's interesting to revisit what I was thinking at the time, anyway! I put a little summary after each date to hopefully clear things up a bit :)
From 15 March--This is the first time I tried the finished bodice on, after adjusting pieces of my existing 1860s muslin to give the right look.
Since I had the corset on, I figured I might as well pin in the darts, right?
Remember that part in the skirt muslin where I said imagination is necessary? Well, it's needed here too. Yes, it's the "finished" piece, but trust me, all my bodices look this terrifying in the darting stage!
Tuesday, August 9, 2011
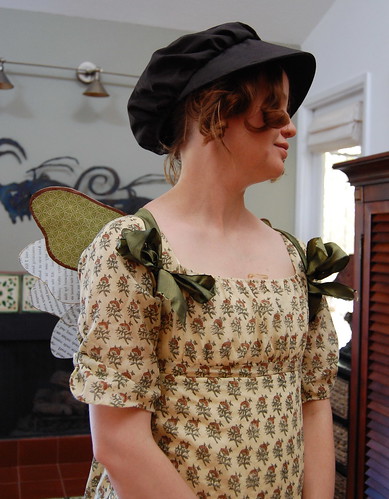
Jane Austen Fairy Wings--A Tutorial :)
A little backstory--last year the Renaissance faire was miserably hot at about 100 degrees. So Twila and I decided on something a little cooler to wear--Regency! With fairy wings. At Costume College I mentioned this plan to Loren, who suggested pages from Jane Austen novels, and an idea was born!
On to making the wings!
You'll need:
Galvanized wire
Cardstock--brown for the "leather" binding and a light color for the title pages
Vellum
Printed paper
A gold pen
Glue (I used Elmer's wood glue, simply because that's what I found lurking in my dye basket)
Needle and thread
Ribbon
On to making the wings!
You'll need:
Galvanized wire
Cardstock--brown for the "leather" binding and a light color for the title pages
Vellum
Printed paper
A gold pen
Glue (I used Elmer's wood glue, simply because that's what I found lurking in my dye basket)
Needle and thread
Ribbon
Saturday, August 6, 2011
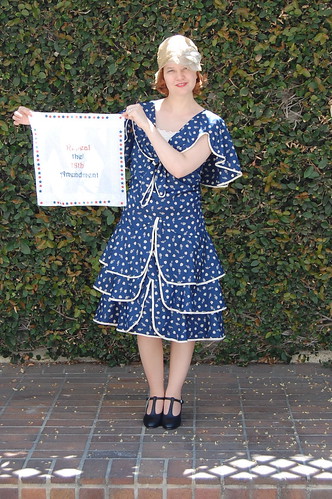
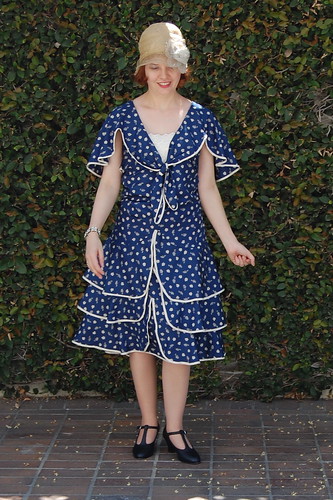
1929 Silk Print Dress
For a group project at Costume College 2011, we decided to make 1920s dresses and campaign to repeal the 18th Amendment. Or be pro temperance, as was the case for one of my friends. I went through many decisions (and even made one dress that really needed a side opening--I got stuck in it and haven't had the heart to add a placket yet) before I found this dress at Vintage Textile and knew I had to have it. And the results!
Subscribe to:
Comments (Atom)