Sunday, April 27, 2014

A Proper 1920s Hem

DSC_7596

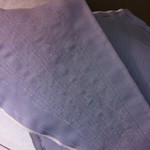
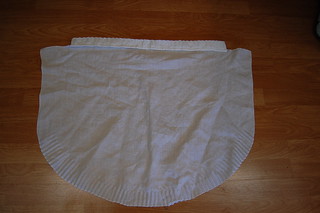
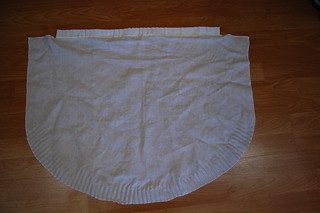
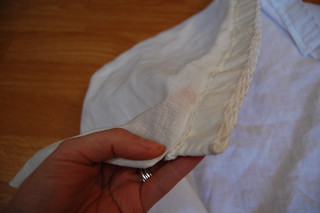
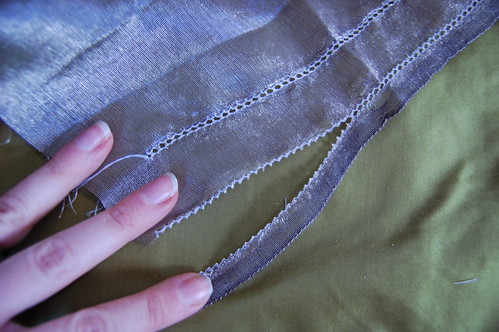
My hemstitched sample, done by Laurie of Cuddle Tyme Hemstitching.


I first encountered picot edging while making my 1921 Vionnet Dress. The original of that was picot edged, and you can see why. The rounded skirt shape would just float so nicely without the weight of a hem. There was a problem though--to do a proper 1920s picot edge, you first hemstitched with a hemstitch machine, and then cut the hemstitching down the middle. So, I hemmed the dress with a tiny hem which took ages, and didn't give the exact look I wanted. But I still wanted a proper hemstitched picot edge someday.


Hemstitching Book 1 Hemstitching Book 2

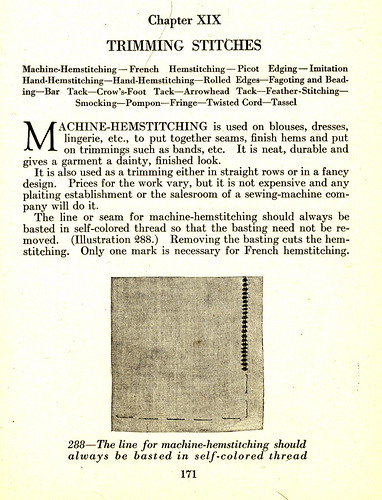
After a little research, I found there was a hemstitching attachment that you could get for a vintage Singer, like I have, or there's the imitation hand hemstitching that I wrote a tutorial about that's described in the Art of Dressmaking by Butterick, but neither of those would work for the picot edge.

So, how did a woman sewing her own dress in the 1920s get this edge? As described in the Art of Dressmaking, she would take it, and have it done.

1922 Evening Dress from Harper's Bazar

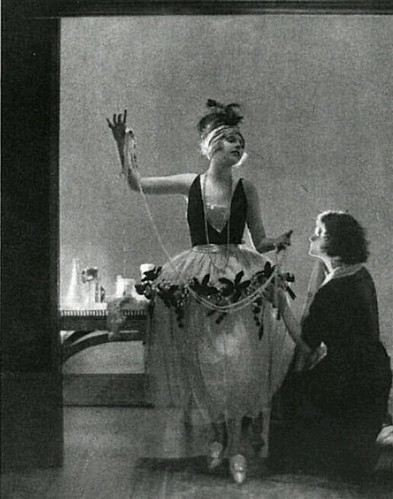
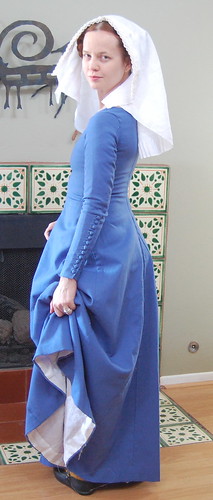
And here we have the dress I'm making for this year's Costume College gala. See those petal shaped skirt panels? Not only was I not looking forward to doing tiny hand rolled hems on them (though I actually like making those, even I have limits!), I was afraid that they wouldn't hang exactly the way I wanted. The original of this dress was done in net, which wouldn't need an edge, but my dress is silver and black metallic and silk organza--the same fabric as my gold gala dress.

I wished that I could do a proper hemstitch/picot edge, and I thought, why not look and see if anyone still does this? And that led me to Cuddle Tyme Hemstitching. I emailed, we discussed my project, I sent a swatch, and it's gorgeous! I'm very much looking forward to having a light, period correct, picot edge on my skirt.

And I'm looking forward to not doing all those rolled hems as well :)


Saturday, April 26, 2014

Velvet Flowers with Thread Covered Beads--A Tutorial!

Flower with more beads

A mostly completed flower--it's going to have another string of black beads.

My gala dress for Costume College this year is a 1922 evening dress pictured in Harper's Bazar. The skirt is "strung with a dramatic garland of black velvet flowers and silver berries." Who can resist that description? I've made a small change to the design. On the original, the beads were between the flowers. In my memory, the beads were part of the flower. I decided to do it this way, both because I liked the look, and it's admittedly easier to sew the beads to the flowers! I think I'm going to need about 12 flowers, so 60 silver beads and 120 black beads. You also don't need as many beads sewing them to the flowers, which is quite a nice benefit!


Tuesday, April 22, 2014

Checking in--A Few Updates!

First Flower Bandeau 11
20s Garter 1 Untitled

I have a lot planned for this blog, and the biggest plan is to update regularly! With that I thought I'd go ahead a post a preview of sorts. Pictured, I have the first velvet flower and thread wrapped bead for the silver and black robe de style I'm making for the Costume College gala, an original 1920s bandeau that I've patterned started writing an article on, an original 1920s garter that I'm planning on reproducing and writing about, and the 1790s stays that I'm working on, mostly because I actually like making stays, and wanted a pretty new pair.

One goal that I have is for every project is to post some sort of tutorial. Most will be small and a matter of looking at what I'm doing and what will hopefully be helpful.

In addition, I've started a Facebook page (also linked in the sidebar) for this blog. I'm just planning to use it for announcements about this blog and my antiques blog, and what I'm working on updates, to sort of celebrate those I'm getting somewhere moments.

Wednesday, April 16, 2014

Hemming Without Help, A Tutorial!

Some people are lucky--they have people to mark their hems. Others of us are not, we have to muddle through on our own. While hemming my blue cotehardie, I realized that this is something I've done often enough (I've never had help with a hem!) that I could do a tutorial on it. There are other methods, of course. You can use a dress form, and there are chalk hem markers, but I find this method works well for me, and is quite reliable!

In this tutorial, I'll demonstrate marking the hem on my pink cotehardie, and demonstrat hemming both a lined skirt, the blue cotehardie, and unlined skirt, the pink cotehardie.

Hemming 1 Hemming 2

When making skirts that will be leveled at the hem, I always make them a little bit too long. You can see that here. The gores in particular are quite long on this one. When I cut them, I didn't take the longer diagonal edge into consideration, knowing that it would be fixed when the dress was hemmed.

If you're sewing by hand, leave the last inch or so unsewn so you don't have to worry about picking out and refinishing seams later.

Saturday, April 12, 2014

An Unusual Embroidery Transfer Method--Or, A Little Creativity!

I recently had way too much fun with a little project I'm working on and decided I might as well share my make do technique for it. One of my upcoming projects is a King's Landing style dress from Game of Thrones. I'm not doing a reproduction, but rather designing my own. This led me to the perfect house for me--House Caron--and its sigil, a nightingale and words, No Song So Sweet. I've ordered a locket with a bird and decided I needed an embroidered bag as well. I'm sure I'm not the only one who occasionally needs a new project right now? In the middle of working on my pink cotehardie, and making sure I wouldn't reach my self-imposed deadline, I decided I had to embroider that day. I had thread (meant for a pinball), yellow silk (leftover from my Eugenie dress), and my self-imposed deadline is weeks (or possibly months, depending on how I want to wear it) before I need the dress. I even had an adorable bird to copy from Fashion in Detail from a 17th century embroidered smock.

One problem? No printer ink. And not enough artistic talent to draw the bird freehand.

I wasn't about to let that stop me though. So, here's what I did.

Birds!

I took a picture of the bird and opened it in Photoshop Elements. I then darkened the outline of the bird using the paint can tool so that it was dark enough to trace directly from the computer. Then I zoomed it to a size I liked, placed paper over the screen, and traced in pencil. Alas, I have no picture of actually tracing the screen :)

Untitled Untitled

Next, I taped the tracing to a window and put another paper over it so I could trace it in ink. I could've traced the pencil copy in ink, but I decided this was easier in case I messed up I'd still have the original.

Untitled Untitled

Then I wrote the motto and taped it back to the window, and taped the silk over it. I then traced the bird, repositioned it over the writing, and traced the writing.

Untitled

And the finished tracing! It's done in mechanical pencil.

House Caron Embroidery

And the finished embroidery! It's just stem stitch in Au Ver au Soie Soie d'Alger. Now, to decide what I want the bag to look like!


Tuesday, April 1, 2014

Frilled Veil, Part Two

Since I've all but finished the frilled veil to wear with my cotehardie, I thought it was time to complete the tutorial started here.

DSC_7170

Here's the completed veil with a sneak peek of the cotehardie. I'm still planning a deep pink overdress with short sleeves and buttons up the front. I do feel sad to cover this dress though! But onto the veil :)

The first frilled veil I came across while actively searching for something to put on my head was at Medieval Silkwork. I thought I had come up with a veil that was a mix of those that inspired me, but looking at my sources again after wearing it, it's obvious that I was most inspired by hers. It's a lovely veil, and I wanted to make sure to give proper credit to my inspiration!

Frilled Veil 1 Frilled Veil 4

Here's the veil, laid out flat. It's sewn with a running stitch to a large half oval. Both right and wrong sides are shown.

Frilled Veil 2 Frilled Veil 3

And here's a closer view of the same thing. You can see that I only sewed the frill to the veil at the edge of the binding.

Frilled Veil 5 Frilled Veil 6

Now, putting the veil on. You need to start with an appropriate hairstyle. Looped braids were very popular, and I decided to imitate those by wrapping my fake braids into sideways buns. I just wrapped the fake braids around my own very tiny braided buns. I had planned on making a St. Birgitta cap since I didn't think a band would stay put on my apparently fussy head (nothing likes to stay on it), but when trying it on, I found a solution--pin the band to the buns. The band is just a bias strip of linen that I really need to hem before I wear. It's pinned in back, and to the buns. I used green pins so they would stand out. In the picture with the cotehardie, I put my hair in three buns--the two shown and one at the base of my neck. In the pictures here, two. I think that I prefer three to better anchor the band in back.

Frilled Veil 7 Frilled Veil 8

Now, pin the veil to the band. Start with the center, and pin perpendicular to the band. You can see the back of the pin sticking out in back a bit. I'd bury it better if I were actually wearing it. Then, use two more pins to pin the veil at your temples. I find it works best about where I pinned the band to my braids. My pins are from The Norse Gypsy Forge on Etsy.

And that's it! It's really quite a comfortable and secure way to wear a veil.

References:

Research and Thoughts about Frilled Veils at By My Measure (and she has a lovely frilled veil on her Fitting Yourself page

Frilled Veil in Action at Medieval Silkwork

Starched Frilled Veil, at Katalfalk coincidentally the same site I learned honeycomb smocking from.

The Fretwork Veil at Family de Huntington.

LInks to many veils at Larsdatter.com