Sunday, October 27, 2013

Postponing Again

While I am going to make the one hour dress, and soon, I'm postponing again. To make this post somewhat more interesting, here's the I just realized I haven't posted about this dress that I'm probably wearing to work on Halloween. It has good elements for that--it's stereotypically pretty, and is quick to put on and has easy hair--important for the morning!

Princess Alexandra Inspired Dress

It's a blue cotton velvet (the fabric photographs horribly!) with an antique lace collar (very lightly basted on, with a little pocket inside the neckline where the excess lace is tucked!) and net sleeves based on a dress of Princess Alexandra's from 1869. It has a huge train. I've only worn it twice for two rather short times, and it needs to be worn some more.

To pass out candy, of course, will be the Angry Birds dress :)

Sunday, October 20, 2013

A Necessary Postponement...

My one hour dress? I need to put it off another week. Sadly, the cold I got last Saturday is in its final throes, and I just don't have the energy to do it.

So, I leave you with this instead--my in progress bicycle stocking!

Untitled

It's from an 1890s pattern, and yes, I'll be knitting a sweater and making a green tweed split skirt to go with it. All topped with a straw boater. Doesn't that sound like the perfect costume for LA in August? Next Costume College, that would be :)

Sunday, October 13, 2013

The One Hour Dress--Next Sunday!

Untitled

My fabric and contrasting bias trim (it is suggested that you buy it--I made it out of Swiss voile, but we'll pretend I bought it!) are ready.

So, Sunday, 20 October, is the planned date. I want to start around 4:30. I'm very excited to make this!

So, watch this link then. It will hopefully be full of dress pictures. I can't wait to see how long or short a time I can do this in :)

Thursday, October 10, 2013

A Knitted Miser's Purse

This is an historically inspired purse. Yes, at first glance it does look like millions of other miser's purses out there; however, I haven't come across one of this style knitted in the round. Crocheted, yes, but knitted? Sadly, no. I wanted to knit a miser's purse of this style though, very much enjoyed doing it, and now I have a pretty thing that I made. Would I love to find a knitted one in the round? Of course! But I won't be broken up if one never appears. There is one fully beaded purse I found that says it's twisted stockinette and appears to be knit in the round, but without seeing it more closely, I don't know if it's what I did for mine. This is also the purse that inspired the leafy design on mine. Knitted miser's purses did exist, but they were knit flat and sewn.

Long story short, I have no documentation. But I do have a pretty purse!

Now that that's out of the way :)

DSC_6796

The completed purse! It's made from Purely Silks size E beading cord with size 15 rocailles by Miyuki of Japan. The pattern is essentially the knitted star bag I made earlier, only with six points instead of eight, and obviously much longer! The lacy section in the middle is k2tog, yo, repeat and p2tog, yo, repeat endlessly row after row. I'm a little sad that I didn't look at more patterns (I extended this one from a two row eyelet design on another bag) because the p2tog was rather brutal. But it's pretty, so oh well! The square end is closed with a three needle bind off as described here on Ravelry--post 46 in the thead-- which is a rather brilliant way of doing it.

I used adjustable toe rings for the rings, and they work perfectly. You need something quite small, which I found out when the size 6 rings I ordered didn't work. You also need something that won't catch on the beads and not go on, which attempt number four, small hematite rings did.

I did keep track of everything and will write it as a pattern, including directions on the fringe.

DSC_6800

Here's how the purse works. There's a slit in the middle section, which is knit flat instead of in the round. To put something in one end, slide the rings to one side, put something in, slide one ring back, and voila! safely stored things!

DSC_6799

And here that is on the other side.

And below are some detail pictures!

Saturday, October 5, 2013

Two 1780s Jackets

DSC_5256

At long last, I thought I should share my last two Williamsburg outfits! They're both 1780s jackets. One is based on a brown striped pierrot jacket in the Kyoto Costume Institute, the other is a 1780s version of my 1790s brocade jacket

I have a tutorial for the brown jacket here and have one planned for the blue jacket. The blue jacket, while somewhat differently shaped, follows the construction of the 1790s jacket quite closely.

DSC_5245 DSC_5249

I'm wearing the jacket over 1780s stays, two plain petticoats, a bumpad, and a sheer striped petticoat. My wig is the Lacy Alonge. Later in the day, right after seeing a satirical engraving of a woman losing her wig in the wind, mine blew off. It was quite amusing and the timing was perfect. I was only using the combs inside the wig to hold it on, and the hat was pinned to the wig--perfect for picking up a strong breeze!

DSC_5276 DSC_5247

The brown silk is from Home Fabrics in the LA garment district. I bought it 6 or 7 years ago. The silk fringe I used to trim it is from eBay, and isn't available as I write this.

DSC_5520 DSC_5525

I'm not wearing this styled the way I had planned. I meant it as a day jacket, and was going to wear it with a fichu and wig, but after the wig blew off making me not want to deal with it (I already have hairline induced wig issues. I promise not to bore you with them, and I think I've bored my friends enough!) and I ended up wearing this at night, I became a little lazy! That's ok--I enjoyed wearing it in a more relaxed manner :)

DSC_5533 DSC_5532

The jacket is made of a gorgeous silk taffeta brocade with the same flower design as my 1790s jacket, which unfortunately did not really want to work for this jacket. It was a little stiffer than it should've been for the peplum and collar. This is why I decided to leave off the planned trim. Oh well--plain shows the fabric off nicely!

And yes, I'm barefoot. Why I didn't slip on shoes...

DSC_5553

A slightly more true to life without the flash picture. And syllabub :)

Friday, October 4, 2013

Coming Soon--A 1924 One Hour Dress!

Although I don't tend to use this blog for upcoming projects or work in progress (see my Live Journal for overkill in that direction), I do want to announce an upcoming project--a one session One Hour dress.

I've thought of doing this for ages--ever since I heard about the 1920s One Hour Dress books--and I'm finally going to do it. I don't think I can do it in an hour (although I admit a secret desire to do just that!), I can certainly do it in one session.

I'm going to blog as I finish each step, as noted in the book. Just a picture and a title at Live Journal (on a tag for the dress), most likely. I don't want to waste time on commentary! Plus, I think posting each step will add to the challenge :)
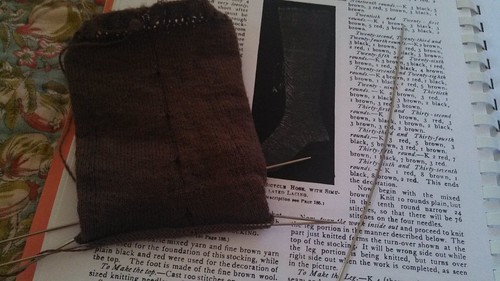
I have the 1924 book, and I'm planning on following the instructions almost exactly, with just a few exceptions.

1. The skirt is a strange sort of wrap. You sew the front and back skirt to the front and back, sew the kimono sleeved bodice side seams, put the dress on, lift the front of the skirt, pull the back skirt around to the front, pin in place, let the front hang down over it, and pin the cascades made by the falling corners into place. It doesn't have you hem the back edges, which I would like to do. I don't mind raw edges inside--it's often period--but I'm not too thrilled about the idea of raw edges down the center front, even if the front skirt hangs over it.

2. I'm going to bind the sleeves after the side/sleeve seam is sewn. It's much more secure than binding the sleeve edge than sewing the sleeve seam.

3. I want to use self bias binding instead of purchased bias binding, for sadly obvious reasons. I'm sure in 1924 I could find a nice coordinating lightweight bias binding that would go perfectly with my lawn. Today, not so much. I might also sew one side down and hand sew the other side instead of sandwiching the bias on and sewing through both sides at once. I'm fairly quick at that, and it's actually more important to me to have a nice dress than to finish as fast as I can. But if it comes out nicely sewing both sides at once, I'm all for it!

Preparing the self bias alone will probably put me over the one hour mark :)

4. I'm most likely going to hem it. The original uses a selvage, which I'm all for, except, once again, it's not 1924 and there's a good chance my fabric will have something printed on it.

5. I might hand sew the belt because I loathe turning tubes above almost all else.

All of these things seem like logical alterations someone in period would have made, so I don't feel like I'm straying too far from the book.
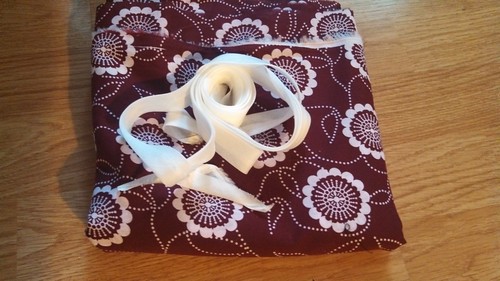
I bought four yards of this lawn for the dress. This is definitely more than I need! I figured a safety yard was good, and I think I can squeeze out another Grumpy Cat style sundress from the leftovers.

Before I make the dress, I am going to make a partial muslin. I'm highly suspicious of things like the neckline being the same 4 1/2 inches for every size. I'll write down my new measurements though and use those to cut the dress, where with a normal dress, I'd use the muslin as a pattern, so I'll still be making the whole dress from the book.

I'm also going to prepare my fabric first. Wash, iron, figure out just the size it needs to be. The book suggests buying the right width and amount of fabric, so I'm going to pretend that I did.

I wish I could sew this on my 1917 machine, but I still haven't had the tensioner replaced. I'm still so annoyed with myself for snapping the screw. In my defense, the metal was very soft! Electric machines were available though and probably figured into how quickly the dress could be made, so I don't feel bad about using the electric machine :)

I'll post again when I get my fabric (I noticed it's listed as sold out and I haven't received a shipping confirmation, wish me luck!) and decide on a date to do this (most likely a Sunday afternoon). I'm really looking forward to doing this!