Sunday, July 27, 2014

A 1920s Hemstitched Tennis Dress

1920s Tennis Dress 6 1920s Tennis Dress 5 1920s Tennis Dress 4

My 1920s tennis dress is loosely based on this dress at the V&A and this dress on Etsy. It's made of dress weight linen from Farmhouse Fabrics. My scarf is some lightweight cotton that I had, and is based on the photograph in this pin. I'm wearing white tap shoes, based on the flat Mary Jane type shoes based on the photograph in this pin.

I used my 1920s base pattern for the bodice. I've had it for several years, and can't remember what it started as. It's a very simple shift shape though. The skirt is straight panels box pleated, based on the pattern in Women's Wear of the 1920s. It's about 110 inches, or two widths of linen. The hemstitching on the bodice is done by hand, and explained in this post. The neckline and armscyes are bound with self bias. The belt is very simple. It's just a tube of linen without a closure that I pull over my head. The belt buckle is a mother-of-pearl buckle I bought on Etsy.

1920s Tennis Dress 11920s Tennis Dress 2 1920s Tennis Dress 3

I'm wearing the dress over my cotton 20s combinations, fully described here. I'm using garters to hold up cotton stockings. They're very simple, just crepe de chine and lace gathered over elastic. I've since bought an antique garter, which is constructed differently and that I'll eventually reproduce.

1920s Tennis Dress 8

A detail of the neckline. You can see the bias binding at the arms. The hemstitching was done by pulling threads and sewing groups of thread together.

1920s Tennis Dress 9

A detail of the waistline. The bottom edge seam allowance was pressed up and the skirt topstitched in. I've seen this done on 20s dresses, and it makes a nice, neat line. The box pleats are sewn together for about half an inch. I tried to sew them a little further down, like the pattern and the Etsy dress, but it was extremely unflattering.

1920s Tennis Dress 10

A detail of the hem. While most of the hemstitching in the dress was decorative, I actually hemmed the dress with hemstitching as well. It's quite easy, just catch the fold of the hem as you sew the little bunches of threads.

Now, if only I really played tennis...

Friday, July 25, 2014

Game of Thrones King's Landing Hair--A Tutorial!

got hair got hair 3

Hair is probably my least favorite part of costuming, yet it's such an important part of costuming. For my King's Landing Dress, I needed to be extra creative with hair. My hair is currently a perfect for my 20s gala dress and 20s tennis dress for Costume College length, which is very much not the right length for my Game of Thrones dress! I also wanted to avoid wearing a full wig, as dealing with a lace front widow's peaked wig just isn't high on the list of what I want to do, plus from Victorian costuming, I'm very used to using hairpieces.

This tutorial will be a little less complete than my average tutorial. Due to the immense amounts of futzing I had to do, some steps aren't photographed. Setting the hairpiece down to take a picture just wasn't an option!

Friday, July 18, 2014

An Easy Lined Bag--A Tiny Tutorial!

DSC_8459 DSC_8458

With Costume College looming, I thought it was time to turn my embroidered bird and motto from my transferring embroidery tutorial into a bag. It was a very quick little project with a very satisfying result!

The bag is very simple--it's lined and sewn with a French seam.

DSC_8451

First, cut four layers of fabric--two yellow silk taffeta (including the embroidered piece) for the outside, and two black China silk for the lining. Then layer them as shown: yellow silk, black silk, black silk, yellow silk.

DSC_8452 DSC_8453

Next, sew the outside seam. Start the seam about half an inch from the top edge, and end about half an inch from the top edge. This is so you can turn the top edge in towards itself for the hem. Then trim the seam. Turn the top edge seam allowances towards each other, and sew shut to hem. I used a running stitch. Press the seams.


DSC_8454 DSC_8455

Turn the bag inside out, pin, and sew the second part of the French seam. Hopefully you didn't miss a part of the lining silk like I did, but if you did, just make sure you catch it in the second part of the seam :)

Now, turn the bag right side out. I then added metal rings to the top edge to run the drawstrings through. You could use eyelets or make a channel for the drawstrings too. To finish, I added a row of black glass beads to to the outside.

Even sewing by hand, this bag only took about two hours. Not including the embroidery, of course! Though that only took about an hour as well. It's nice to have quick projects sometimes, isn't it?

Tuesday, July 15, 2014

Game of Thrones King's Landing Dress--Construction, Part Two

This post picks up from Part One, which covered the main construction seams and the beginning of the lining.

GoT Construction 23

Here's where we left off, with the addition of the beetle wing embroidery and beading. The main seams are sewn, and the lining is attached to the front edge and side panel. One thing--see that running stitch attaching the front lining? It really needs to be a back stitch. Or machine stitch, for that matter. That front stretched a little too much!


GoT Construction 24

Fold the front lining to the inside. Pin it down the center front edge to give it a little stability, smooth it to the side seam, fold the seam allowance under, and pin it down the length of the side seam.

This is an excellent lining technique for full skirts. It gives you the benefits of both flat lining and bag lining with the disadvantages of neither--the seams aren't exposed as in flat lining, and the lining doesn't hang too freely as in bag lining.


Saturday, July 5, 2014

Uh, Oops? Alterations are needed!

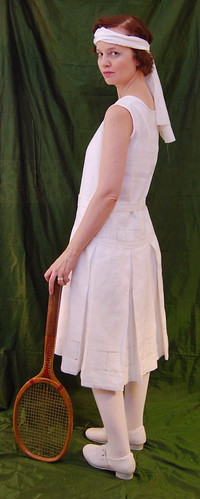
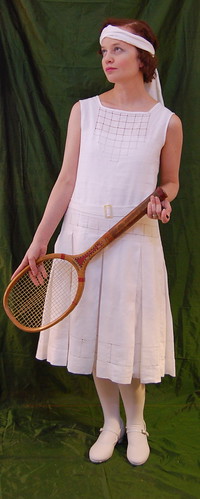
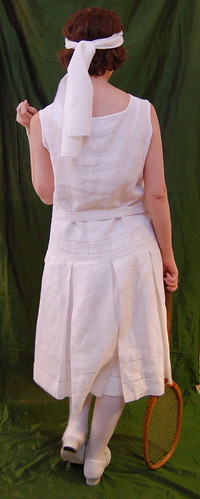
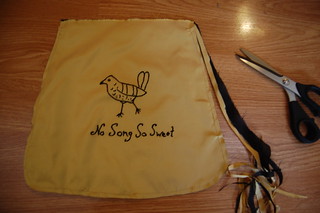
Sometimes when looking at finished costumes, it's easy to overlook the work that went into them and assume that everything went smoothly. And quite often, at least for me, that's not the case. Something, somewhere, went wrong. You can see it in the little detour my 
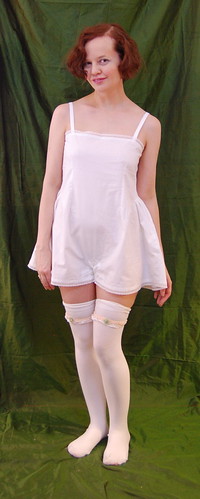
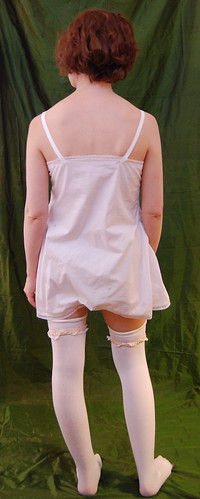
cotehardie post took when I had to reset the front gores. Most often though, when I run into rough spots I just figure something out and move on. However, this afternoon, I was going to work on the sleeves for my Game of Thrones dress, and realized that I really should hem it first. The sleeves will make hemming much more difficult. To do that though, I had to add at least the internal waist tie. I pinned in the ribbon, using the placement from my sundress as a guide. And, it didn't fit. The front sagged, the back was loose. I moved the ties, and it was better, but it still didn't fit. It fit fine holding it shut, but it just didn't fit tying it shut. OK, not good, but I can do this, right?

There were two issues, as far as I can tell. One was somehow, the corner on the underlap side (thankfully not the top!!!) was an inch longer than the top, ok, easy to fix--just move the tie up, and place the second tie further back. The second issue was a little more problematic. The back was too loose, and no amount of tightening the front fixed that. Sigh. I compared my two piece back to the one piece back of the sundress, and they were the same size, only, I guess, not. And of course, I finished sewing the back lining in last night!

I thought this would be an interesting case of showing alterations in a nearly finished dress. I was also very thankful that I used 18th century sewing techniques, which made the alterations quite easy! Had I bag lined the dress, it would've been quite dreadful!

Alterations 1

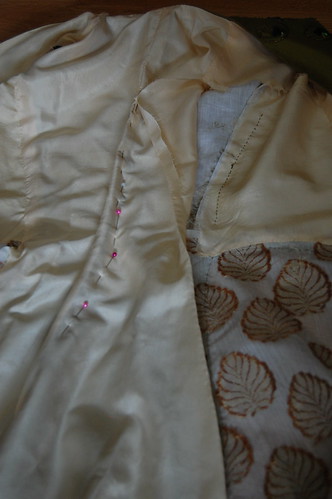
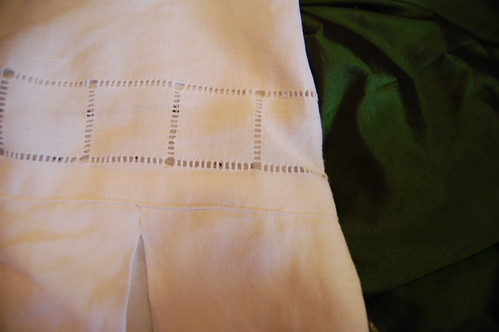
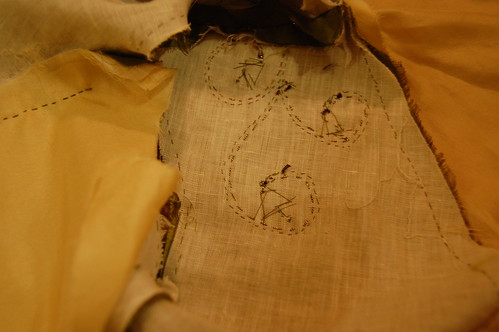
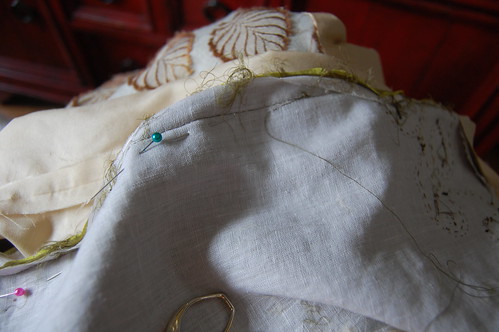
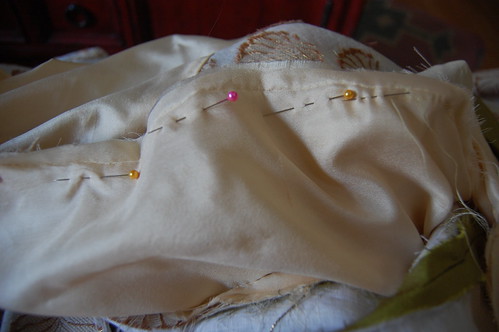
Here's where I started. To make sure the alteration would work, I pinned in the extra fabric at the center back, through all the layers--green silk, linen flatlining, and yellow silk lining. I then unpicked the side lining seam as shown. (This will be further detailed in the yet to be written construction post. I used the same technique as in this Pierrot jacket post. Since it was sewn by hand, I was careful to not break the thread so I could re-secure it.

Alterations 2

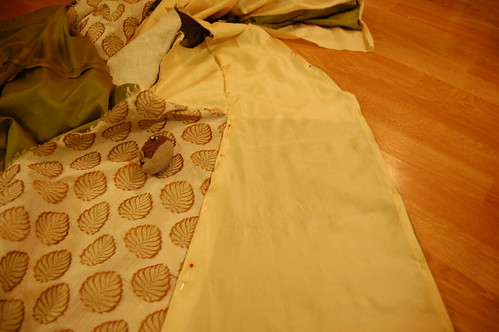
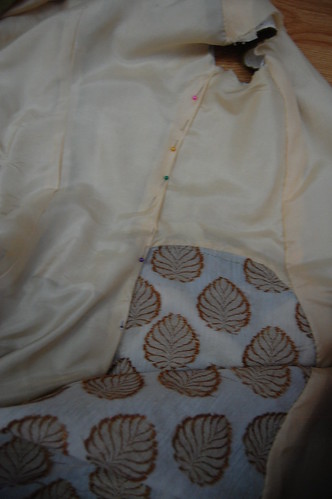
Obviously, I wasn't going to make a seam through all those layers (though, if I were wearing it tomorrow...), so I carefully moved the pins to just the silk and flatlining. I used a lot of pins so I could check the fit. Using a lot almost imitates a seam. I then tried the dress on, and was thankfully happy with it.

Alterations 3

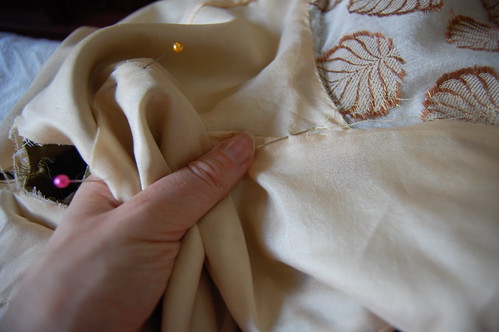
I then re-sewed the seam, being sure to ease out of the old seam gradually. You'll notice I didn't take the original stitching out. There are two reasons for this. One, safety. You want to be sure everything is good before you do too much to the original. Two, it's much easier to trim the seam if it's still sewn together.

Alterations 4

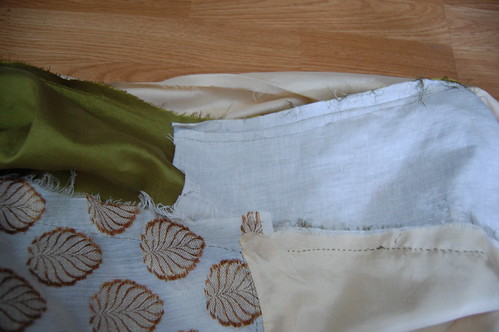
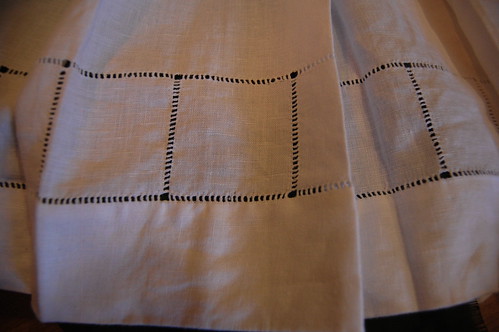
And here's the newly sewn seam! The original seam was backstitched in the bodice portion and running stitched in the skirt portion. I did the same on the new seam. I then tried the dress on again to be sure I was happy with the fit.

Alterations 5

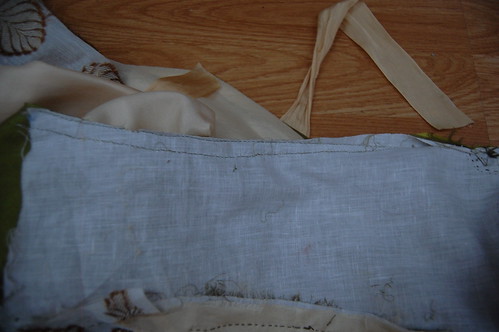
And now, the scary part--trimming. You technically can skip this part if you haven't taken too much in, but I like to keep my seam allowances even. It makes it feel like it hasn't been altered!

Alterations 6

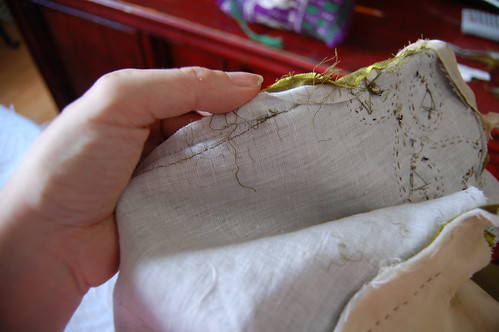
Now, remove the old stitches. The step shown here is for hand sewing. It's quite simple, as before, be careful with taking the stitches out so you can re-secure your thread.

With machine sewing, overlapping the seams for an inch or so is enough, though technically not the best way to do it. It is how I do it though (yes, I make a lot of alterations!), and sometimes, as in this case with the embroidery, it's not even possible to take out the whole seam.

Alterations 7

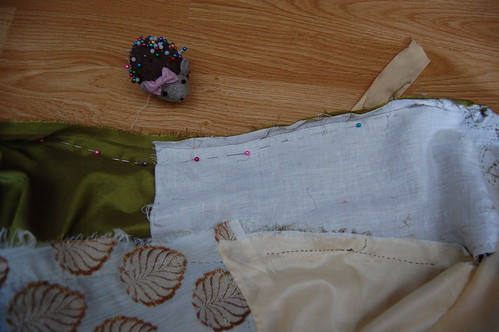
Now, of course, your lining is too big! Sigh. So, repeat the above steps for the lining. Press the lining and dress seams.

Alterations 8

Once the lining is fixed and seams pressed, pin it back into place.

Alterations 9

Sew it, just like you did before!

Alterations 10

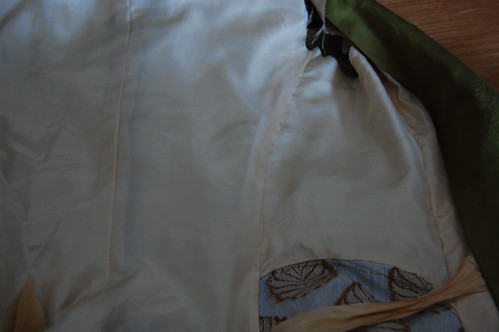
And ta da! It looks just like it used to! Only now it fits better :)


Friday, July 4, 2014

Garters, or What do we say to the god of death? A tiny tutorial!

GoT Garters

In the 18th century and 19th century, garters were sometimes embroidered with phrases. Some, such as these at the MFA, professed love, while others were a little more playful. One pair found on Vintage Textile ages ago (pictured at the bottom of this post), says Stop Here, Do Not Pass, and Godey's Lady's book gave instructions for a pair of Garters that said Stop. Unfortunately, the site where I saw those has gone away and I've been unlucky finding the article elsewhere.

I've wanted a pair of these garters for ages, but it's just one of those projects that's in the back of your mind. However, I was thinking of what garters I wanted to use for my Game of Thrones dress--stockings never stay up on their own for me--and the phrase Not Today popped into my head. A nod to both history and Game of Thrones!

My stockings are the Phoebe Over The Knee from Sock Dreams, which, somewhat amusingly, stay up on their own. I chose these as they're House Caron colors (a minor, very well named house!) and quite pretty as well.

They were very simple to make and took just over an hour. I used fabrics I already had. Yellow silk satin, grey embroidery floss, and purple silk ribbon. You want to use enough ribbon so you can wrap the garter around your leg twice, as seen above. This makes them stay in place much better and much more comfortably than just one wrap.

GoT Garters 1 GoT Garters 2

First, embroider your garters. I just used two strands of floss and a stem stitch. Then, cut your garters to the length you'd like them to be, plus seam allowance, and about three times as wide as your ribbon. Pin the ribbons into place, as shown, and sew. I used a hand back stitch.

GoT Garters 3 GoT Garters 4

Next, fold the edges with the ribbon in, the bottom edge up, fold the top edge down with the seam allowance turned under, and pin. I then sewed it shut with a whipstitch along the side folds and middle fold. Then press.

GoT Garters 5

And that's it! They really are quite simple, and I think they'll be a lot of fun to wear :)

6311

The 18th century garters. Aren't they lovely?

Wednesday, July 2, 2014

Beading and Beetles--Embroidering the Game of Thrones King's Landing Dress!

Wings 18

From the start, I knew I didn't want to make a recreation of a dress, rather I wanted to make a dress that if I turned up in King's Landing, would fit in. We see enough of this style to get a feel for it. One thing I noticed while looking at different dresses was the embroidery had a great deal of texture. With that in mind, I decided on beading highlighted with metallic thread and beetle wings. While certainly not the level of detail on one of Cersei's dresses, it is similar to the amount of detail on Sansa's dresses in this style. I talk a little about the design itself and how I transferred it to the dress in this post.

And now, what I used for the embroidery. Beetle wings that I bought on eBay. This link takes you to the seller I used, although they don't seem to have any in stock right now. Search for beetle wings or elytra to find them. Most of them are in Thailand, where they're a byproduct of the food industry, so a little advance planning is needed! And while there certainly is something of an eww factor, they're really no worse than silk! Or so I told myself. A few minutes into working with them, and I was pretty much over that. I have a friend who's also working on a beetle wing dress at the moment. You can see her blog which includes a little historical information here, Where When Why.

I used the Benton and Johnson #371 wire in antique gold from Hedgehog Handworks for the running stitch along the beads. I've included a picture of it below. Though this is called a wire, it really isn't. It's a thread (cotton, I think) core with a metallic thread wrapped around it.

I used the Delica glass metallic bronze beads from Fire Mountain Gems. These are very nice beads, and do the job of imitating metal quite well. I also used these in silver on my Victorian knitted star bag. They fit over my size 10 sewing needles quite nicely! The cream colored beads between the beetle wings are Mill Hill from my local embroidery shop.

Now, onto the details!