
A piemontaise was a fashionable gown of the 1780s. It was similar to a sacque in that it had pleats from the shoulder to the hem, but unlike a sacque, the pleats were loose over the bodice. Extant robes a la piemontaise include this dress in the Imatex database, this dress, also in the Imatex database, this dress, in the Danish National Museum, and this dress from liveauctioneers.com. All links are to Pinterest.
Thankfully, the Danish National Museum has a pattern draft which helps explain how robes a la piemontaise work. They're made essentially like gowns with separate bodices and skirts, but with extra fabric at the center back of the skirt that attaches at the center back neckline. It would be a very easy dress to alter if styles changed. This dress is best worn over a split bumroll, as seen on Aubry's blog, as a regular bumroll pushes the back out and makes the distinction between the pleats and bodice less noticeable.
This tutorial is for draping the back and skirt. I have a tutorial for making the bodice here, although any method of making a bodice would work, and a very short cuff tutorial can be found here.
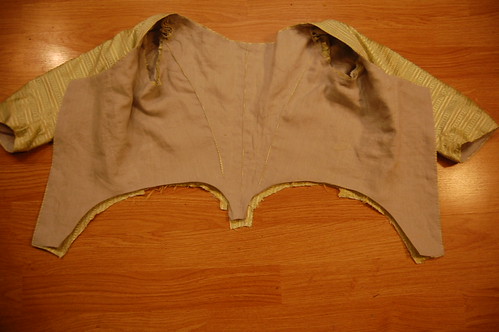
My bodice tutorial ends here, with a finished bodice with an unfinished bottom edge. When I was working it out, it seemed like the method where you insert the skirt between the bodice and lining would work best for the piemontaise.
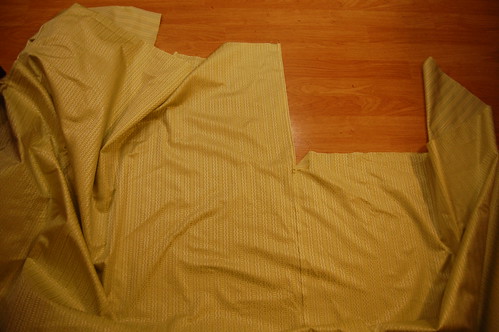
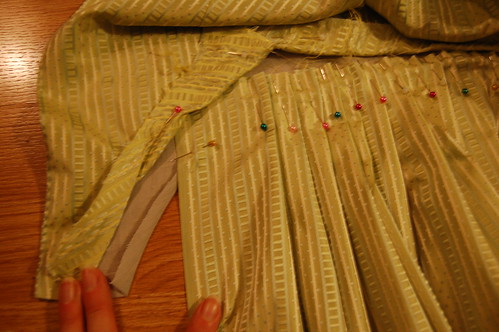
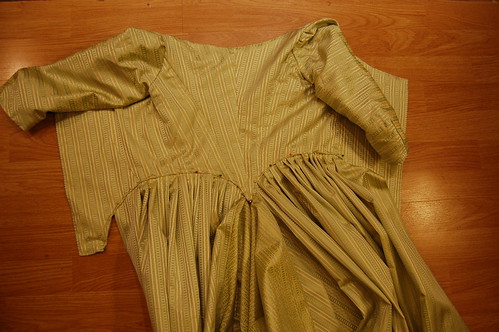
After the bodice is done, the next step is to prepare the skirt. The side panels of the skirt should be your waist to hem measurement, and the center back panel should be a little longer than your neck to hem measurement--including any train you want. I used the diagram linked above for the widths of the panels.
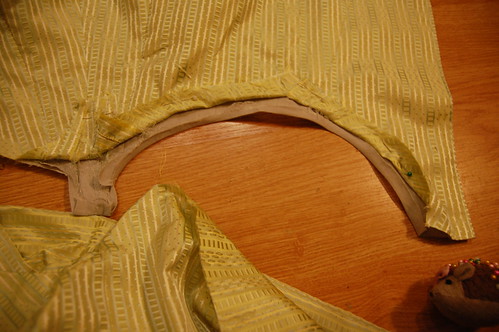
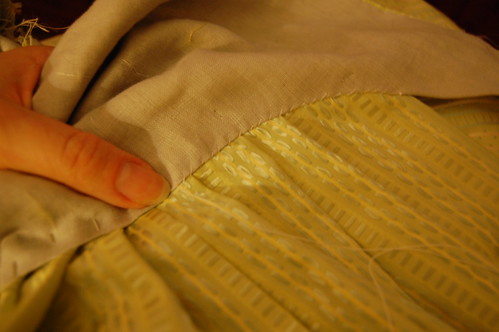
The top inch or so of the seam should be left unsewn, and the skirt edge should be folded into a little triangle. This makes pleating the skirt to the bodice easier. The raw edges of the neck to hem panel should be hemmed since they do show a bit in the finished dress.
To prepare the bodice for the skirt, finger press the lining seam allowance up, and pin the silk seam allowance out of the way.
Start by pinning the little folded triangle to the point of the skirt. Ignore the neck to hem length.
Then pleat!
Continue to ignore the neck to hem length, and repeat the skirt pleats on the other side.
An easy way to level the skirt at the center front point is to just keep pleating straight. Ignore the point, and keep the top of the pleats level. When you sew it, you sew the edge if the lining to the skirt, so the fabric over the point just becomes excess fabric. With a lightweight fabric, you don't even need to trim it which is useful for any remodeling you may wish to do.
Then turn the skirt over, and whipstitch the pleats to the edge of the bodice.
Then turn it back over, and topstitch the silk over the pleats. I used a spaced backstich.
I find draping the back easier on a dressform. My dressform is only somewhat me sized, so you don't need to worry about an exact sized form, as long as your bodice fits. The dressform is mostly so gravity can help you out.
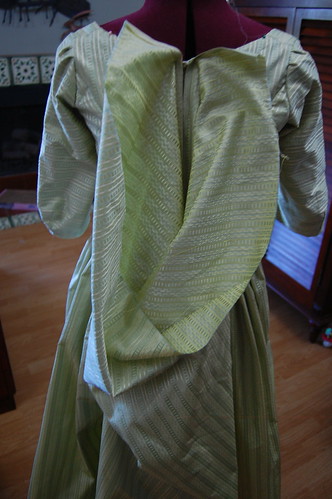
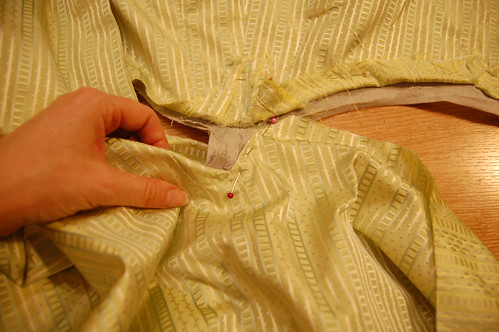
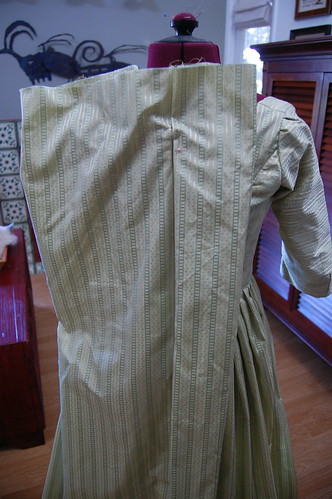
To start the back draping, pin the edges of the neck to hem panel to the center back neckline. You'll notice the extra fabric there--that's for wiggle room. It's much easier to cut away then piece your fabric!
Now, pin the center of the neck to hem panel to the center back.
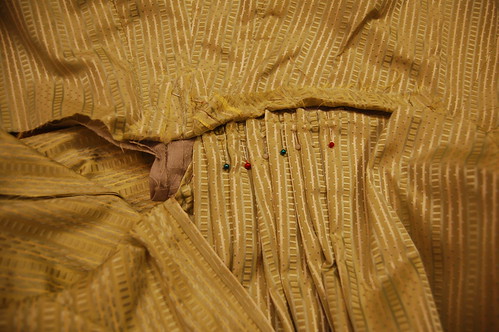
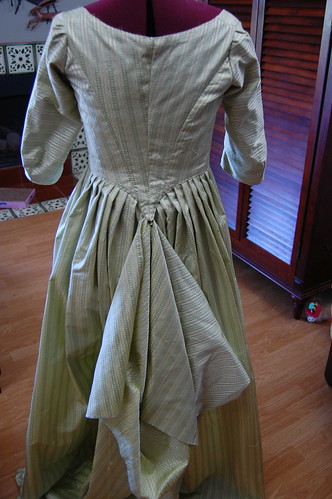
The pleating on this is similar to that on a sacque--you want two layered box pleats. Depending on the width of your fabric--I suspect some of the examples I linked had narrower panels--you might do it differently than I do below.
To start, pleat your fabric just slightly narrower than you want your back panels. Then, make a second pleat just slightly wider than this. (With a narrower panel, you could skip the inner pleat. This pleat is often found on sacques, and lets the fabric drape more elegantly.)

Next, form a box pleat by pleating your fabric towards the center. Then, take the leftover fabric and make a box pleat. The leftover box pleat should stop short of the underpleats, so you can see a little of each edge sticking out.
It's fine to have underlap below the pleats--it's what you can see that matters!
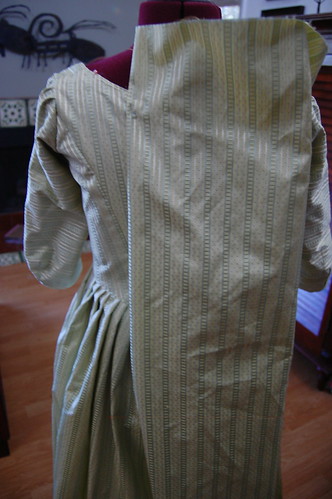
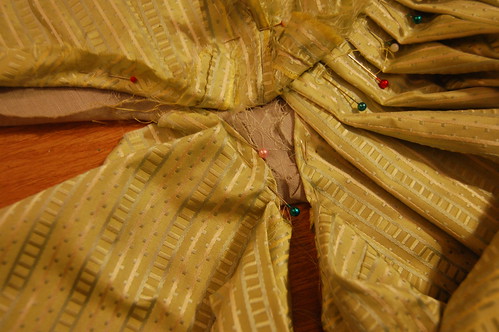
Repeat on the other side! Don't worry about getting the pleats exactly the same as the first side--especially underneath. As long as they look the same, it's fine.
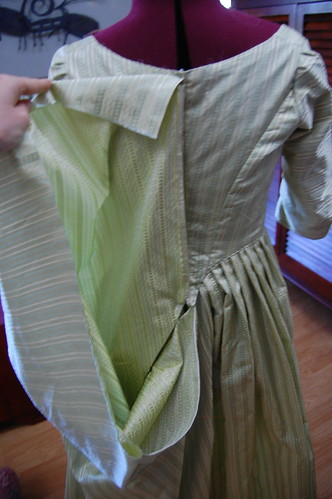
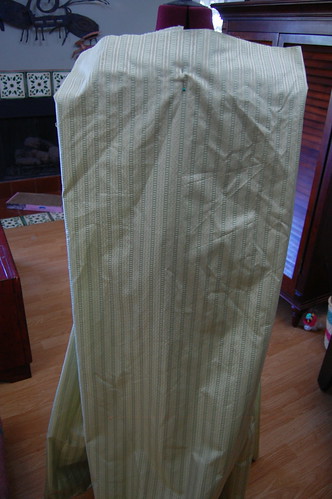
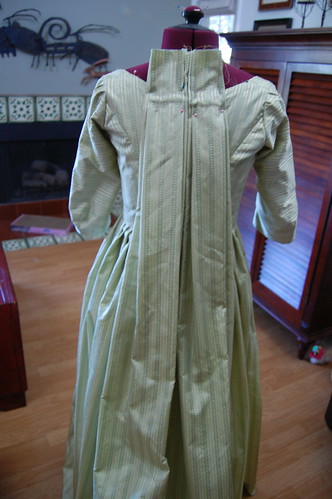
I took it off the dressform to smooth everything out, tried it on, found I needed to pull up the pleats a tiny bit, and put it back on the dressform.
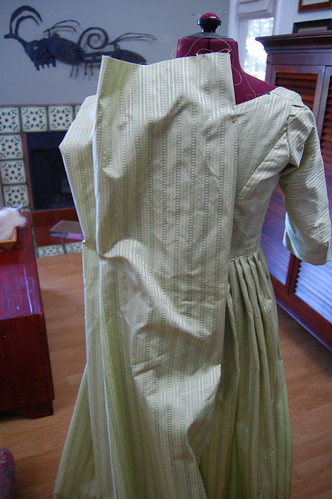
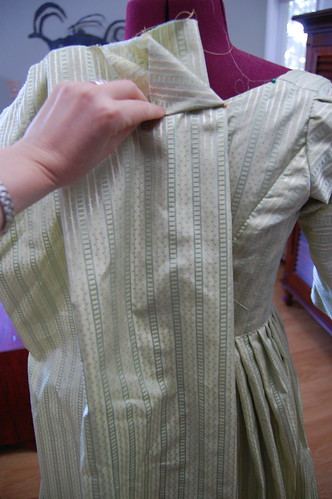
The pins that you see here mark where it needed to be sewn to keep the pleats smooth. The underpleat was left loose, but the visible pleats looked better sewn together. I used a spaced backstitch along the pinned lines.

After sewing down the pinned parts, I trimmed the excess fabric and bound the neckline using a straight of grain strip of the silk. My apologies for not having pictures of this step. I then trimmed the neckline and sides of the skirt with box pleated silk organza.
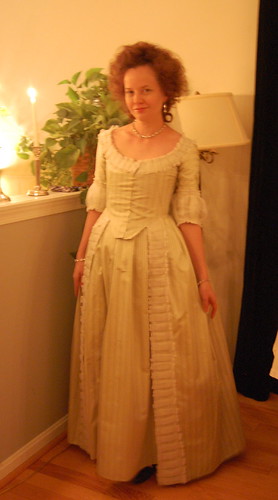
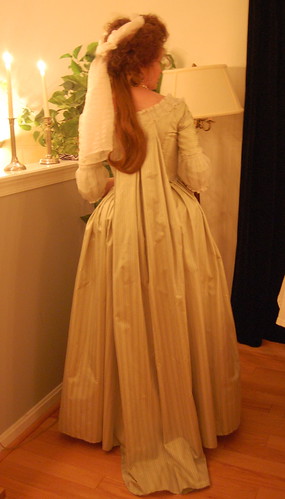
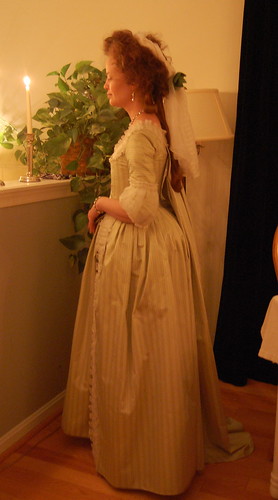
And the completed dress! At this time, my only pictures are by candlelight (or very bad first try on pictures! I hope to take better pictures in the not too distant future!
You look so beautiful in that! A question; how does one get into the dress? Is the opening down the center back? (I've not done any authentic period sewing, and I look at pictures and always wonder how one gains entry)
ReplyDeleteThank you!
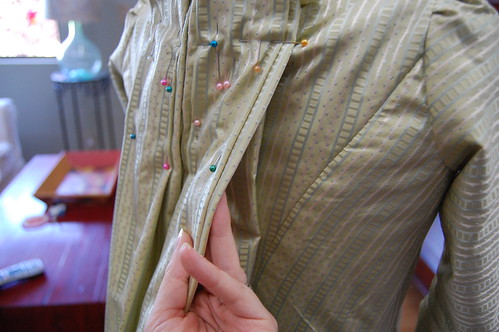
DeleteIt has a center front opening. It pins down the center front of the bodice. The skirt is open in front, and it's worn over a petticoat.
Wonderful, as usual! Thanks for sharing!
ReplyDeleteThank you! And you're welcome :)
DeleteThank you so much for sharing pictures and details about the construction of your Robe a la Piemontaise, it is so lovely to see how it is made and especially how adorable it turned out! It's such a modern dress in a way, isn't it?
ReplyDeleteThank you for sharing the construction step by step. The fabric looks amazing and seems to be different in every light, though it looks as you've struggled fraying while sewig.
ReplyDeleteI especially love the light decoration you've chosen. Beautiful!
Sabine
PLEASE HELP!!! Can you advise me on how to make a split back sacque back where the jiggle is open and the waist/belting is fully exposed? -Mike. mcgoodson@comcast.net
ReplyDelete