Saturday, August 8, 2015

A Dress from Lost Hope--Jonathan Strange and Mr. Norrell

IMG_20150804_215020

This year for Costume College, a group was making dresses based on Lost Hope in Jonathan Strange and Mr. Norrell. I resisted, as I hadn't read the book though I had wanted to for a while. Then the series came on. I had hoped to have the book finished first, but that didn't happen. When the first Lost Hope ball scene came on, I instantly needed a silver and white Regency dress. I started reading the book shortly afterward, and the descriptions of dresses are quite different, but I still wanted silver and white.

IMG_20150804_214438 IMG_20150804_214642

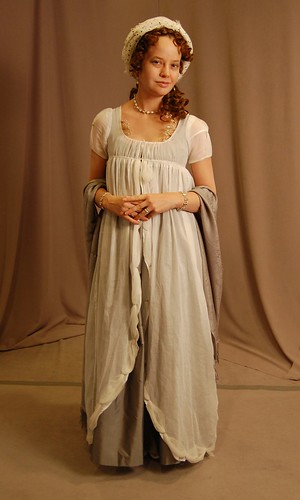
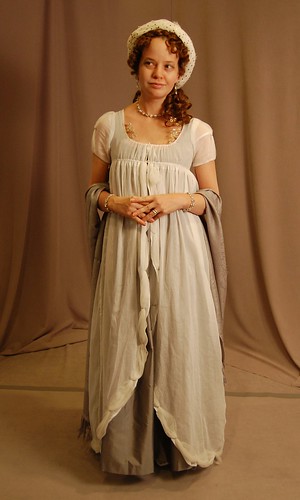
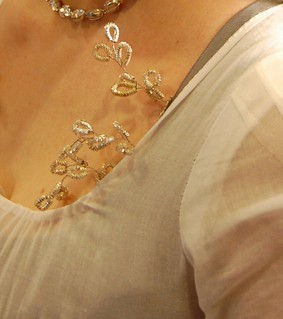
The overdress is made from cotton voile from Dharma Trading. It's trimmed with soft silk net that a friend picked up for me in England years ago and Benton and Johnson silver wire from Hedgehog Handworks that I twisted into cord. The sleeveless underdress is silver silk taffeta from Renaissance Fabrics. The neckline is trimmed with vintage boullion trim that I bought on Etsy.

The main inspiration for my overdress is this this dress, which shows traces of having sleeves.

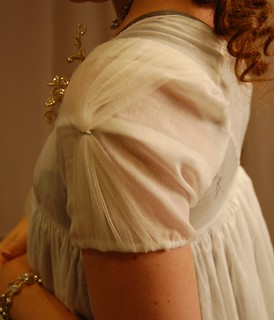
I'm wearing it over a 1910s chemise with ribbon straps, one of which has fallen (I wanted the sleeves sheer), my 1790s/early 1800s corset, and a strapped petticoat.

IMG_20150804_214605 IMG_20150804_214928

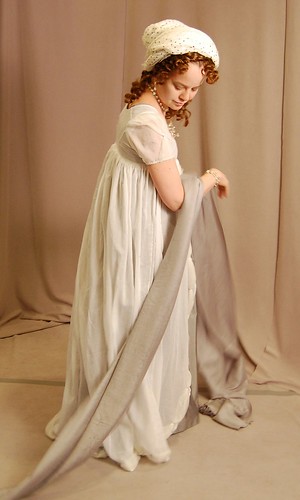
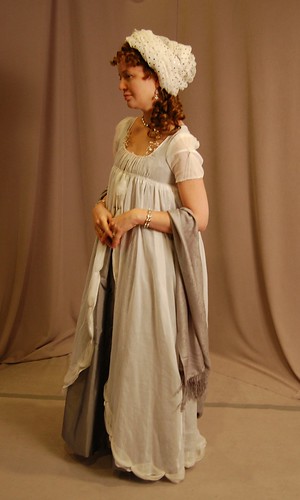
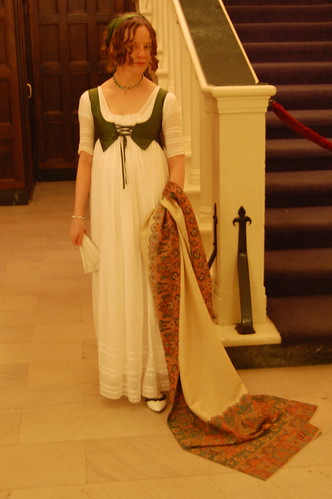
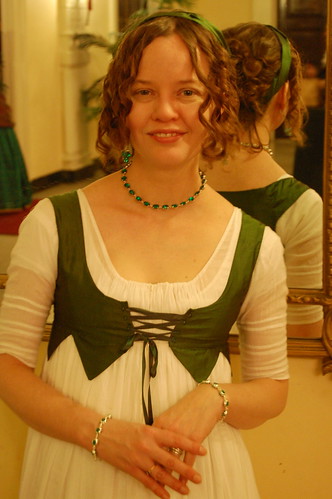
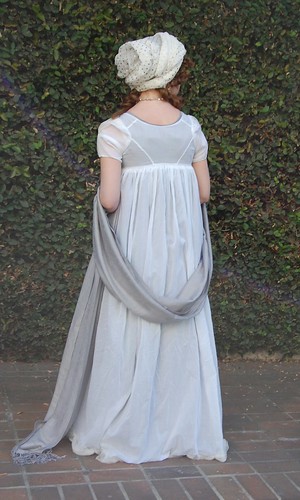
I loved the accessories for this. My collet necklace, bracelets, and earrings are from Dames a la Mode. I sewed two shawls from Amazon together--a brilliant idea of Jen Thompson's. I redecorated my shoes from my recent green and white dress.

Here's some information on how I did my hair. It was amazingly simple. I sewed curls to a long braid which I wrapped around my head and around a bun in back. I also pinned curls in back, then wrapped a scarf--a lucky find at Target a few years ago--as a turban. It took about five minutes. I'm a huge fan of fake curls now!

IMG_20150804_215522 IMG_20150808_232532

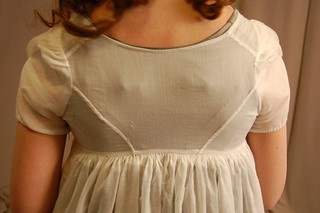
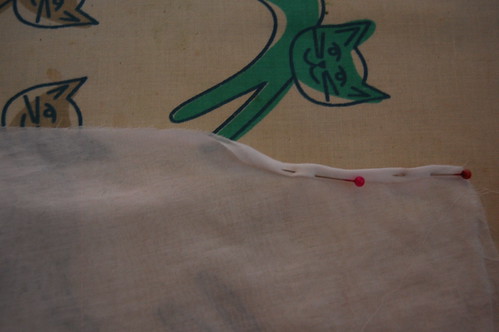
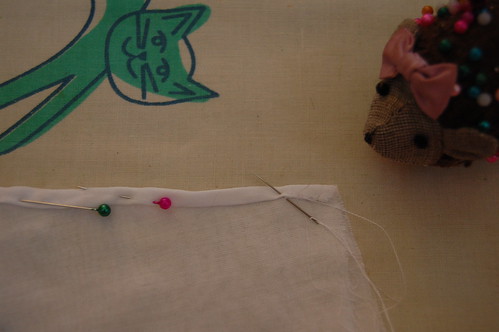
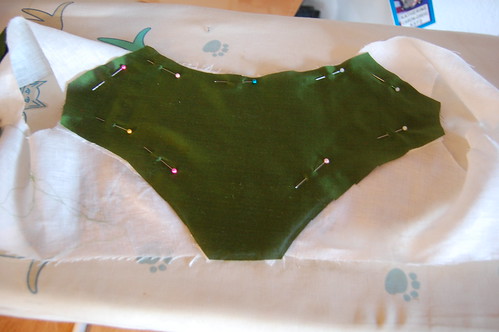
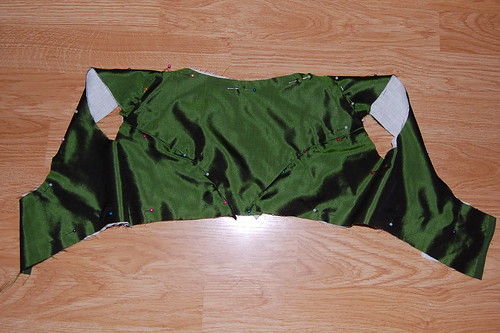
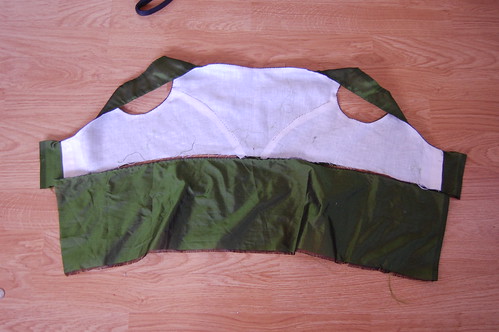
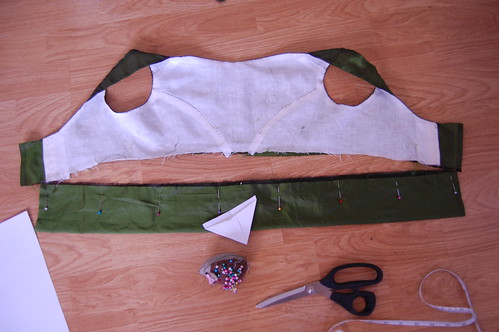
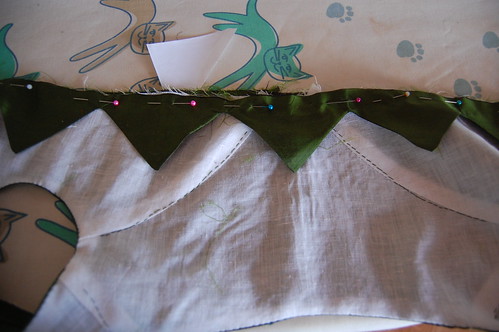
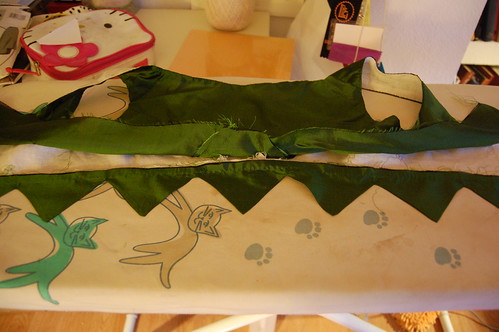
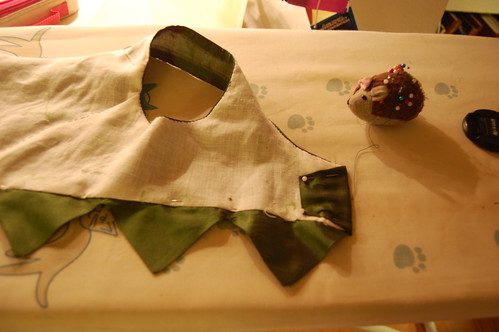
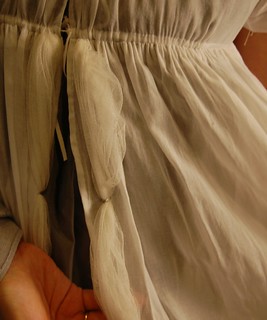
Construction was quite simple. The overdress is unlined, and sewn with flat felled seams in the bodice and mantua maker's seams in the skirt. The skirt is cartridge pleated and sewn to the bodice. The bodice closes with drawstrings, and there are tiny drawstrings in the hem of each sleeve. I didn't even use eyelets in the sleeves--I just poked a hole with a bodkin. The underdress has a front drawstring and flaps that pin in front. It follows the construction of my recent shortgown and striped dress that I did take many pictures of and will have a tutorial for.

IMG_20150804_215445 IMG_20150804_215143

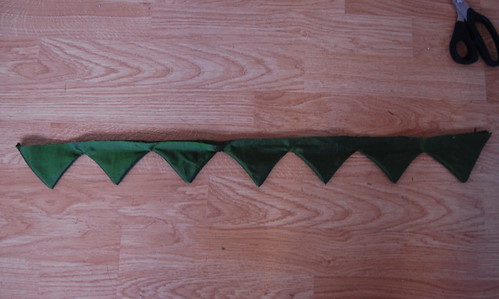
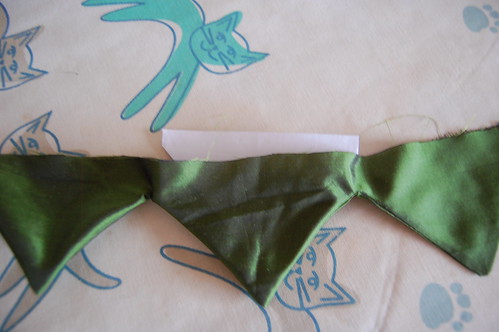
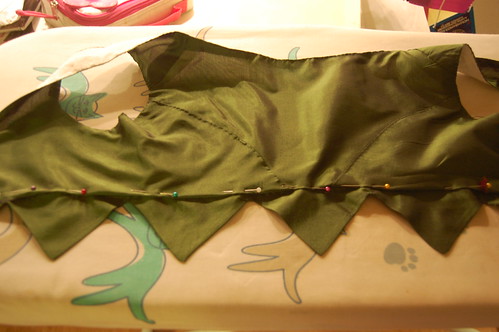
The trim is puffs of silk net tied down with twisted silver cord. I sewed the puffs in place, then took a short piece of cord, poked two holes in the fabric, and tied it below. I tacked one edge of the puff down in strategic places to keep them from drooping. The trim was inspired by this portrait.

IMG_20150804_214246 IMG_20150804_214329

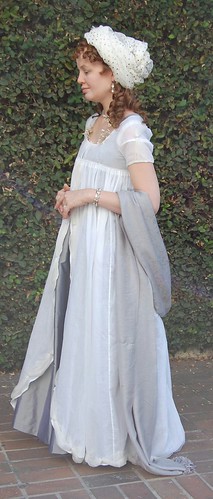
The dress in daylight. Unfortunately, it was hard to get a picture of how the trim and jewelry sparkled!


lj_IMG_20150725_195951332

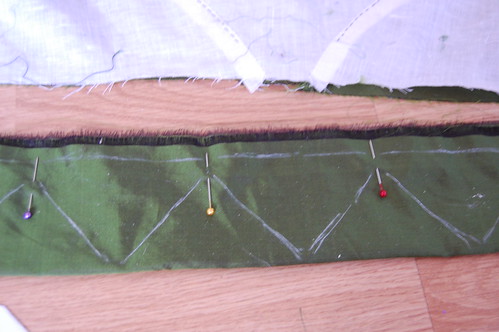
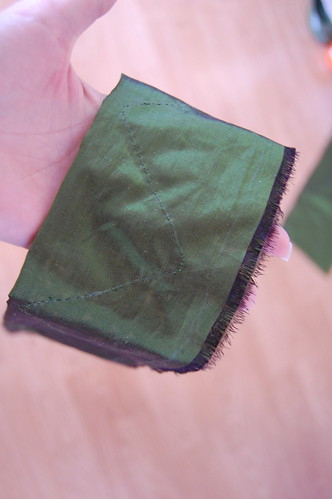
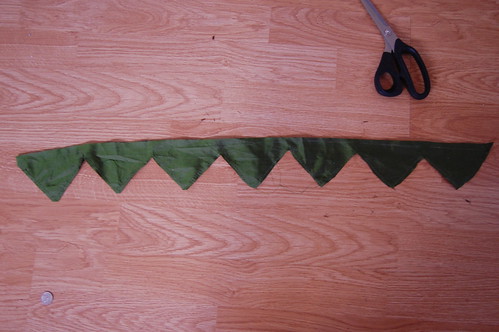
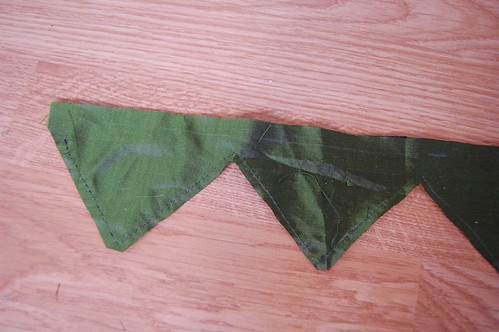
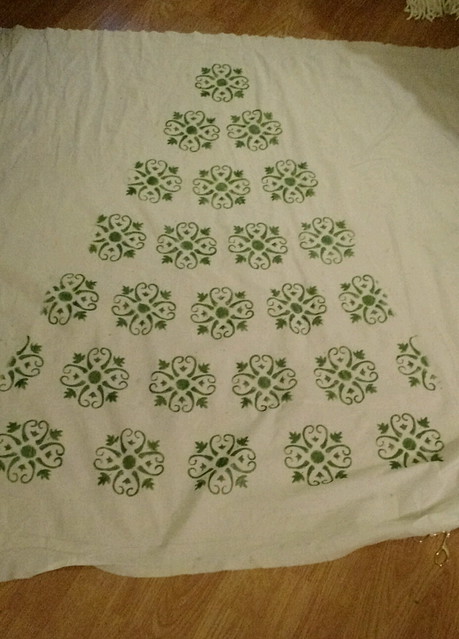
The retrimmed shoe. Since I sewed the pleats in the green before sewing them to the shoes, it'll be easy to switch back.

lj_IMG_20150803_011259

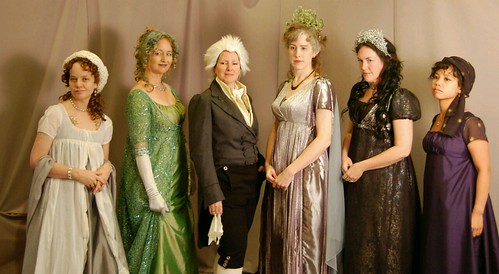
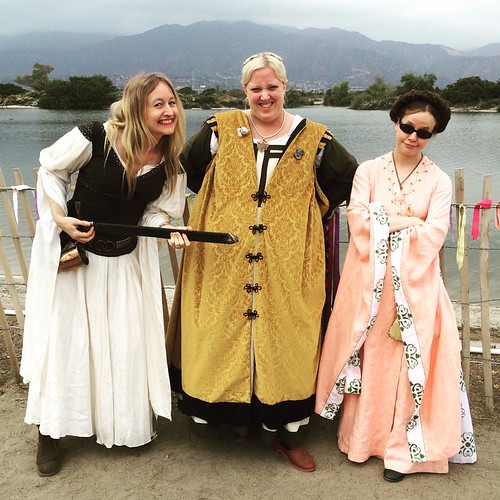
And some members of our group!

IMG_20150805_001419

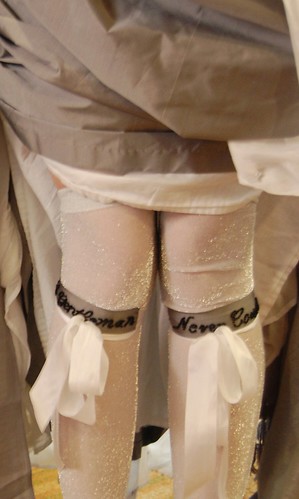
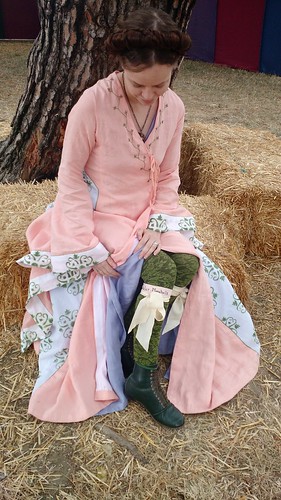
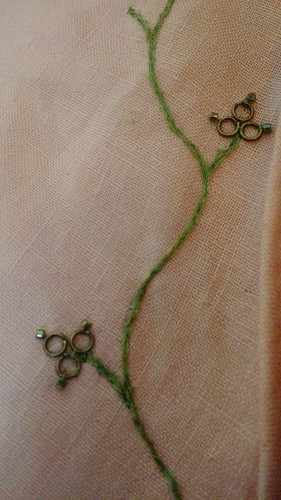
And possibly my favorite accessory--beaded garters. They say "A Gentleman Never Could" which was Jonathan Strange's response when Wellington asked if a magician could kill by magic. It seemed appropriate for garters! My sparkly stockings are from Amazon.

A Mantua Maker's Seam--A Tiny Tutorial

Have you ever looked at a sheer early 19th century dress and wondered how they could possibly make skirt seams so small? A mantua makers seam recreates that look with much less effort than a French or flat felled seam.

The mantua maker's seam is described in The Lady's Guide to Plain Sewing, Book II from Kannik's Korner, which is a wonderful book--along with Book I--for anyone interested in period stitches.

DSC_0451

Cut your skirt as normal. Put your pieces right sides together, as usual. Offset the under edge slightly, especially if you're using a thicker fabric. (I actually didn't do this since my cotton voile was so light.) Then, treating the two as one roll them as if you were going to hem it. Pin the whole seam like this.

DSC_0452

Then, just as if you were hemming, whipstitch the seam. Your stitches should be small and fairly close together. And that's it!

The sample here is the skirt on my Lost Hope dress.

Tuesday, August 4, 2015

A Sleeveless Spencer

DSC_9991

For the Jane Austen Evening last January, I wore a sleeveless spencer over a white dress. Due to several things not working out (fabrics, flu, knitting more than any one person should), I needed something relatively quick, which a sleeveless spencer is! I was mostly influenced by this painting and this fashion plate.

Construction information for this spencer can be found here. My shawl was a gift from a wonderful friend, and my fan is a lovely silver and white fan by Dengra Designs on Etsy. My necklace, earrings, and bracelets are by the incomparable Dames a la Mode, also on Etsy.

DSC_0015 DSC_0006

The spencer is lightweight silk taffetta from the Michael Levine's Home Store in the LA garment district lined with linen. It laces shut with ribbon from Farmhouse Fabrics. The dress is voile from Dharma Trading and just the bodice is lined in linen.

DSC_0014

I'm wearing the dress over a shift from the Kanniks Korner pattern, stays based on the late 1790s/early 1800s stays in Corsets by Jill Salen made with cups instead of gussets, and a strapped petticoat.

A Sleeveless Spencer--A Tutorial

If you've made a plain Regency dress with the intention of dressing it up and pairing it with accesories, a sleeveless spencer is one of the easier things to make. It uses the same pattern as your dress, and doesn't have sleeves--a rather excellent combination!

I made my white dress about 10 years ago, using the pattern for the drop front dress in Patterns of Fashion as a base. I used the same pattern for this spencer.

My spencer has a pointed trim along the bottom edge. Bottom trim is of course optional, but if you decide not to use it, be sure to cut the back of the spencer a little longer (or make a mock up) since spencers often sit slightly differently than dresses do, and even with the same pattern, the waistline may not match.

Sleeveless Spencer Construction 1

To start, sew your lining. This was the same lining as the dress. The only difference was I shortened the flaps that cross over in front, and adjusted the neckline shape a little bit.

Sleeveless Spencer Construction 2

Next, fold the center front flaps in and interline them. Unlike in my picture, the interlining should be a little shorter than your lining so you can hem the neckline. I used linen buckram from William Booth, Draper.

Sleeveless Spencer Construction 3

Then pin the center back fabric to the lining.

Sleeveless Spencer Construction 4

And pin the front pieces to the lining. Fold the seam allowances for both the straps and the back seams under.

Decide how you want to finish your edges. I turned the lining and fabric towards each other and sewed them together. You can also finish the edges with bias tape, as seen in this example I found after I made my bodice.

Topstitch the fabric to the lining.

If you're turning the edges in, don't sew the fabric to the lining for the first and last inch or so of each seam.

If you're using bias, topstitch the whole shoulder strap seam to the lining, and just leave the bottom inch or so of the center back seam free of the lining (if you're adding decoration of some sort, that is, otherwise, just topstitch the whole seam to the lining.)

For both methods, don't sew the center front yet. You'll turn this under later, so you don't get a white (or whatever color your lining is) at the edge of your bodice. You can see this in the next picture.

Sleeveless Spencer Construction 5

Once the edges are finished, add any waistline decoration--points, ruffles, and pleats are all options. They can be at the back or all around the bodice.

To measure my points, I took a piece of fabric and laid it against the bottom of my bodice. It extended slightly past the lining to account for a seam allowance.

Sleeveless Spencer Construction 6

I then divided the strip of fabric into seven points--I just futzed it until I found a size that worked and I liked. I folded a piece of paper to use as a template for the points.

Sleeveless Spencer Construction 7

I then drew the points on the strip of fabric.

Sleeveless Spencer Construction 8

I sewed along those lines using a running stitch.

Sleeveless Spencer Construction 9

I then very carefully (nervously!) cut the points out. It's much easier to sew and then cut!

Sleeveless Spencer Construction 10

I cut as close to the sewing as possible since I was turning it right side out.

Sleeveless Spencer Construction 11

Then I turned the strip right side out.

Sleeveless Spencer Construction 13

To iron the points, I inserted the paper template into each one so the seams would press flat.

Sleeveless Spencer Construction 14

I then pinned the points to the lining...

Sleeveless Spencer Construction 15

...and sewed them with a running stitch and pressed them down.

Sleeveless Spencer Construction 16

I then pinned the fabric seam allowance over the points and topstiched them into place. While you could sew the points to the fabric and whipstitch the lining, I find doing it this way leaves a cleaner line.

Sleeveless Spencer Construction 17

I then folded back the center fronts, whipstitched them into place, and added eyelets. And that's it!

DSC_0015

The completed spencer!

Sunday, May 10, 2015

A Summery Game of Thrones King's Landing Dress

Game of Thrones Linen Dress 4

I have a history of not wearing faire period costumes to faire--see the cotehardie, 1950s, and Regency fairy, so, not surprisingly, I wanted to wear my Game of Thrones dress. However, I thought of last year's faire and its 90 degree weather, and didn't really want to wear my silk dress. Expecting similar weather, I decided to make a dress in lightweight linen and line it with cotton voile. Predictably, the weather was gorgeous--in the 60s and overcast--and my silk dress would've been fine! Oh well, I'm quite happy to have a new dress!

I wanted a dress that was summery and light, and I think I achieved that. Working on it though, I could only imagine Cersei smirking at its sweetness, and that it was probably a dress best suited to Lollys Stokeworth.

Game of Thrones Linen Dress 1

The construction is mostly the same as my first Game of Thrones dress, with the only differences being the neckline is piped, the sleeves are unlined, I didn't cover the armscye seam allowances with the lining, and the center back seam is done with this 18th century stitch. Like my first dress, I made this one entirely by hand.

I'm wearing the same hairpieces I wore with my first dress.

Game of Thrones Linen Dress 3 Game of Thrones Linen Dress 2

The dress is made of linen from Farmhouse Fabrics, lined with cotton voile from Dharma Trading, and cotton lawn side panels stenciled with Shiva Paintstiks, also from Dharma Trading. The stencil I used is from Amazon. It ties shut with 1/2 inch loosely woven cotton ribbon (I folded it in half to make 1/4 inch tubes) from Angela Ligouri.

Game of Thrones Linen Dress 14 Game of Thrones Linen Dress 15

I'm wearing it over a sleeveless linen dress from the same pattern that ties in the opposite direction, the Elizabethan lace stockings from Sock Dreams, my Valar Morghulis/Valar Dohaeris garters, and Robert Land Regency boots.

Game of Thrones Linen Dress 13 Game of Thrones Linen Dress 10

The dress is embroidered with 1 mm Italian wire mesh ribbon from Mimi's Gems, jump rings from Fire Mountain Gems and Mill Hill beads from my local embroidery shop. I sewed the jump rings into place with very fine silk filament thread.

I decided to wear a fox pendant from WC Goods on Etsy after a friend pointed out that the dress was Sweet Briar colors, and as a women's college graduate (Agnes Scott), I decided to take it a step further as a gesture towards Saving Sweet Briar.

Game of Thrones Linen Dress 17

Though the fox is the sigil of House Florent, I still went with my own House Caron of Nightsong bag, of course!

Game of Thrones Linen Dress 5 Game of Thrones Linen Dress 8

I decided to make the underdress from the same pattern as a dress without a waist seam is more comfortable in the heat. It's unlined linen from Burnley and Trowbridge and ties with their silk ribbon.

Game of Thrones Linen Dress 7 Game of Thrones Linen Dress 6

The underdress is mostly the same pattern as the dress. The back is cut as one piece instead of with a center back seam, and the bodice and skirt portions of the side panels are cut as one. The neckline is about an inch lower, and both it and the armscyes are bound with self bias.

Game of Thrones Linen Dress 11 Game of Thrones Linen Dress 12

The side panel and sleeve trim are both edged with Italian wire mesh. The sleeves have the 1mm, and the skirt panels the 3mm. To trim the sleeves, I stenciled a straight strip of the cotton lawn, folded it down the center, and bound the sleeve edge with it.

Game of Thrones Linen Dress 16 Game of Thrones Linen Dress 9

To stencil the fabric, I first traced the pattern shape. I then measured where the center bottom, and stenciled from there. I rubbed the paint stick onto it, then rubbed it into the fabric like finger paint. Messy, but successful!

For the embroidery, first I sewed the long vine, then the stems. I used a bodkin to bury the ends of the wire mesh in back. The jump rings are just sewn down in a few places and the bead is sewn with a backstitch.

DSC_0217

And with my friends, Loren of the Costumer's Closet and Llyra of Creative Chaos. You can't take us anywhere, apparently!