Showing posts with label tutorials. Show all posts

Wednesday, August 7, 2019

Melisandre's Glowing Necklace--For Those Who Know Nothing, A Tutorial

DSC_3956 (1)

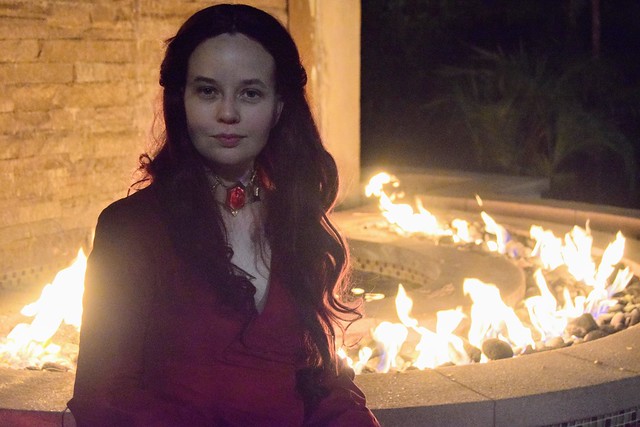
I think half the reason I wanted to make a Melisandre cosplay was to make her necklace. Once my friend Loren of the Costumer's Closet--who's done a lot of interesting work with props--suggested that the necklace light up, I knew I had to make it work. I found a few other necklaces online that lit up, but none of the ideas quite worked for my necklace, so I had to come up with my own way of doing it. This is an entirely new area for me! I know nothing about electronics--especially making them so small!

And about the post title--clearly, my subconscious was at work. I didn't really mean to make the reference, but since I do know nothing about this, it was a logical title, which obviously needed to be kept. More details about my trials and false starts at the bottom of this post.


Monday, August 5, 2019

A Late 1790s Dress with a Diamond Back--A Tutorial

DSC_2833 DSC_2838

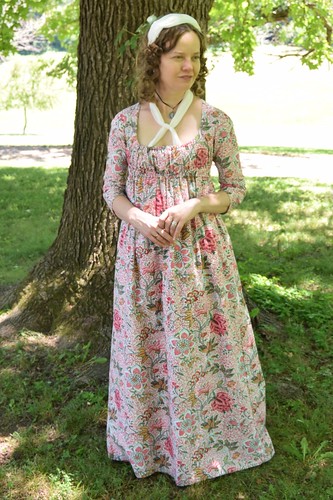
My late 1790s print dress worn at the Jane Austen Festival. It's made of bird print cotton from Colonial Williamsburg, lined with linen from Burnley and Trowbridge, and worn over short stays made with springs (here--other pictures I was wearing my cupped short stays), a linen shift, and petticoat on straps. The dress closes with drawstrings in the front over a pinned linen lining. More pictures of the dress, including how it closes, can be seen here.

IMG_20170410_134616871

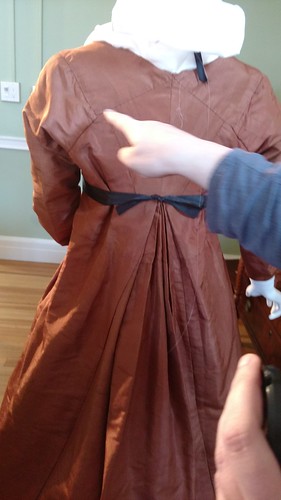
In 2017, I was lucky to be able to see An Agreeable Tyrant at the DAR Museum. I already owned the catalog, which has scaled patterns for many of the dresses. I had been thinking of making a print dress when we saw a remodeled silk taffeta dress with just the sort of back I had been meaning to make for years, but never did. Seeing one in person made things click, and I knew that my new dress would finally have that back.


Saturday, April 27, 2019

1830s Day and Evening Hair

DSC_3843 - Edited DSC_3901 - Edited

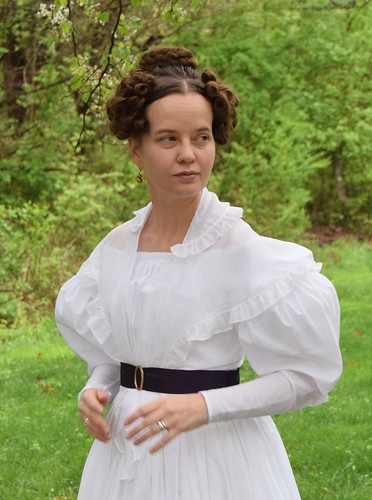
For my friend Robin's Young Victoria Dinner, I knew I needed to give as much attention to my hair as my dress--the 1830s had some of the most distinctive hair in history. Hair is not my strong point as a costumer, but the architectural qualities of 1830s hair gave me some reassurance that I could do it. It looked extremely strange as it was coming together, but when all the pieces are in place--the side curls, bun, and sleeve, it's remarkably balanced.


Thursday, August 2, 2018

Making A Game of Thrones King's Landing/Handmaiden Dress

GoT Handmaiden 1 GoT Handmaiden 2 GoT Handmaiden 3

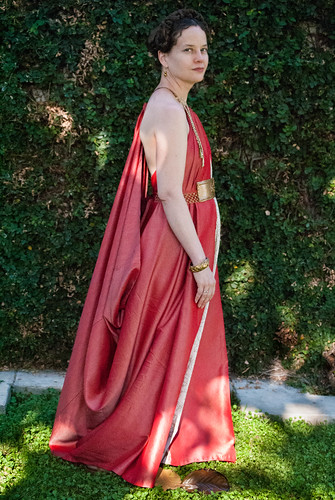
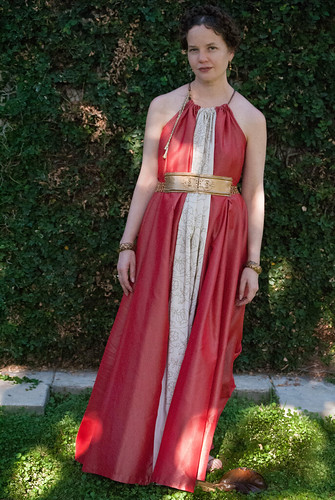
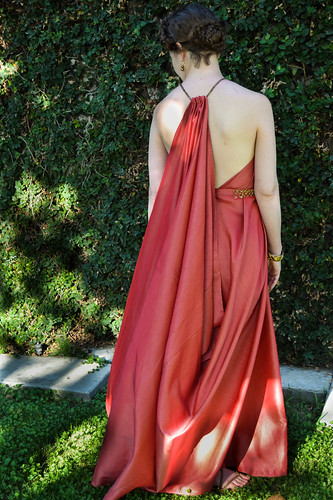
Since first seeing them, I loved the gowns that Cersei's handmaidens, women in King's Landing, and later Shae wore. Looking at them, I realized that they were really quite simple--a giant tube with drawstrings at center front and back and belted at the waist. Mine is made from about five yards of silk taffeta from Renaissance Fabrics which I washed to change the drape of. My belt is made of Worbla based on this tutorial by Jak Cosplay. I learned the hard way that you should read the description carefully on your chainmail rings and make sure they're not for jewelry.

After figuring out my dress, I did a search to see how others had done them. I found a sketch that someone who had come to the same conclusion had done, but haven't been able to find it again. I also found a post on the Game of Thrones Costuming Facebook group with a similar technique.

More pictures of the dress can be found here

Being me, I hand embroidered the front panel, used fingerloop braiding for the ties (using the videos seen here. I used 5 loop flat for the drawstring and 5 loop square for the tie. I finished the ends with gold rings from Fire Mountain Gems by sewing them to the ends and wrapping the join with thread), and hand sewed the seams. However, this can be a very quick project! You can see some progress pictures using the hashtag got_handmaiden_k on Instagram.

But onto the dress! First, a video of putting it on. I also have pictures at the bottom of the post, but the video shows it more clearly. And obviously I don't wear a camisole or underskirt when I'm wearing it, but it was necessary to do something for pictures!


Sunday, December 31, 2017

Regency Leia Bodice and Pleated Open Robe--Some Construction

My Regency Leia dress was the first dress I made after I was lucky enough to study some late 1790s/early 1800s dresses in person at the Fashion Museum in Bath. I used a few of those techniques on this dress. A little ironic considering the fantasy origin of the dress, but, being me, I did want to make it as accurate as possible--even if the embroidery pattern may have been a bit strange to early 19th century eyes!

The completed dress can be seen here.
DSC_1794 DSC_1796

The dress is made of silk taffeta with a linen lining.

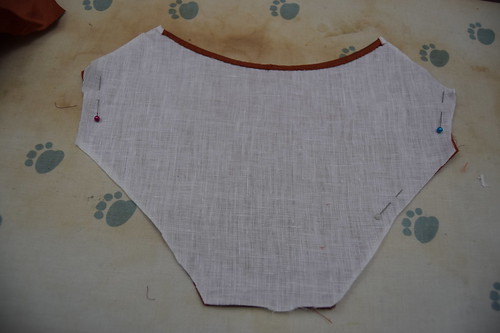
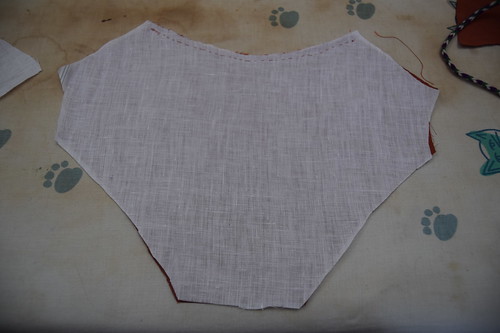
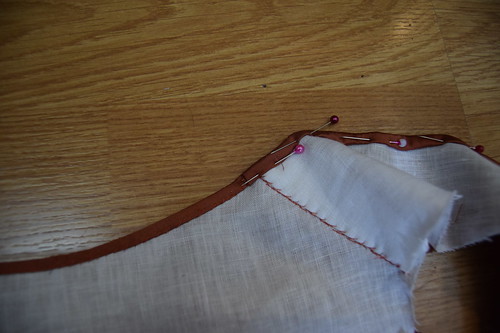
The first step was to baste the center back neckline lining to the silk. Then, the two layers were turned under and hemmed.

Many of the extant dresses we looked at had a row of large stitches on the back neckline. We wondered about the purpose. When I made this dress, it became obvious--it was much easier to neatly hem the curve of the neckline without the fabrics shifting when it was basted. And since it doesn't show, there's no reason to take the basting out.
DSC_1797 DSC_1798

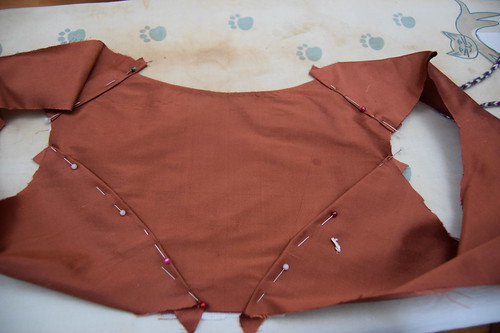
After the center back is done, the seam allowances on the silk fronts are folded under, and sewn to the back. The seams are sewn where the pins are. Although in the past I've sewn lapped seams very close to the fold, many of the dresses we studied had seams sewn a little ways in from the fold, which gave the seams a defined look.

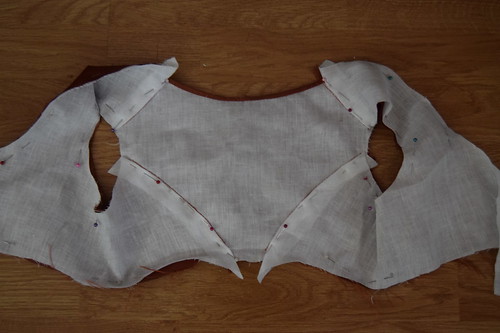
After the silk is sewn, the lining is inserted. The seam allowances were folded under and whipstitched in.
DSC_1799 DSC_1800

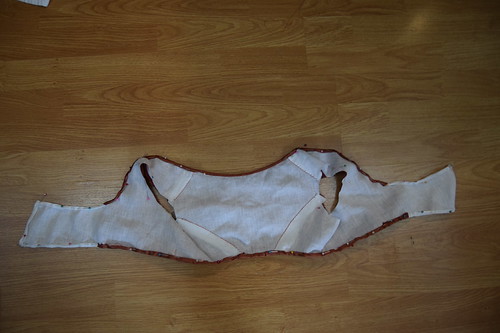
Once the lining is done, the edges of the bodice are hemmed. The hem starts at the side back, around the strap, down the neckline, the center front flap, the bottom edge of the bodice, and continues until the other shoulder strap.

The silk doesn't extend all the way over the center front flaps--only to where it's going to be covered by the center front gathered panels.

Although a bodice of this shape could easily be hemmed without hemming the center back first, doing it this way would work very well for a more square shaped back, where there's no slope between the center back and the back straps.
DSC_1801 DSC_1802

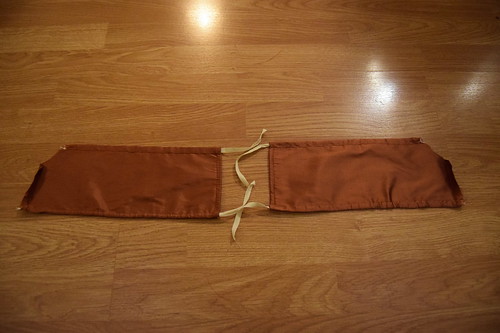
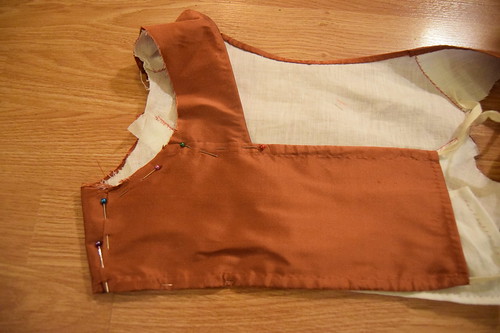
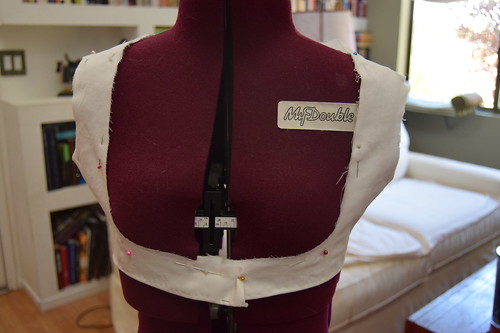
The center front gathered panels are just rectangular strips that are hemmed at the top and bottom for drawstrings with a curve cut out for the armscye. The seam allowance at the side seam is turned over and topstitched to the bodice. The top of the panel is sewn to the shoulder strap where it's pinned.

The sleeves are then set normally. The skirt is a slightly gored tube that opens at center front. I cartridge pleated it and sewed it to the bottom edge of the bodice, being careful to not catch the drawstring. The front panel is slightly gathered with most of the gathers being concentrated in back.

Most dresses I've seen from this time have the center back of the skirt mounted about an inch or so above the back waist and sewn right side to right side, which makes it stand out a bit, but I chose not to do this on this dress because I wanted a flatter line under my overdress.
DSC_1804 DSC_1805

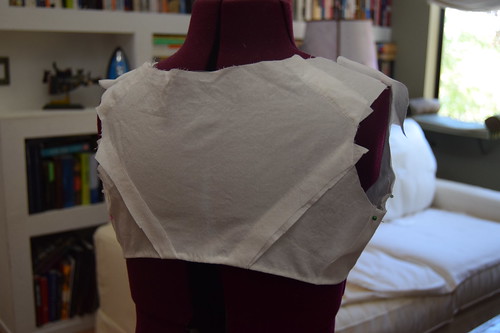
The overdress is cotton voile lined with linen. I completed the bodice except for the top hem and securing the voile layer on the shoulder straps.
DSC_1806

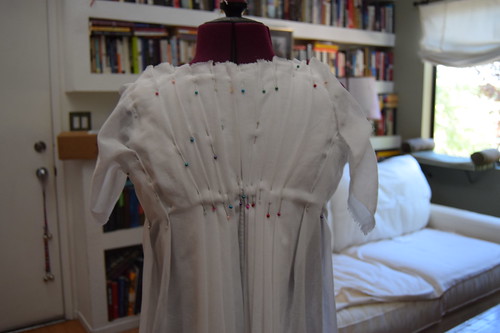
The back is one rectangular panel from neck to hem. It's really quite simple--the panel is pinned at the center front and sides, and then pleated until everything is pleated and it looks nice. I have an inverted box pleat at the center back with all the other pleats facing it.

All the pleats are sewn down and trimmed. The center back neckline was finished with a strip of fabric that was turned to the inside and hemmed. The front neckline was turned under and hemmed. The sleeves were finished with strips of voile on the bias and hemmed.

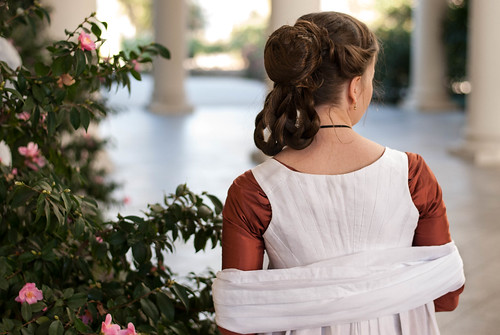
The center front is pinned shut--and worn with a Rebel Alliance pin, of course :)
Jae-18

Friday, May 19, 2017

An 1860s Dress--An Incomplete Tutorial

I started making my dresses for Remembrance Day 2015 with very good intentions--to photograph every step of the way and write a tutorial. I did fall down on that partway though--the plaid dress changed to the blue dress and then there are a few skirt pictures. I seem to have forgotten about sleeves and attaching the skirt. Still though, I thought I'd present what information I have, and since I'm planning on going to Gettysburg again this year, do a more thorough job on my new dresses. But for now, some 1860s construction information!

DSC_0966 DSC_0965

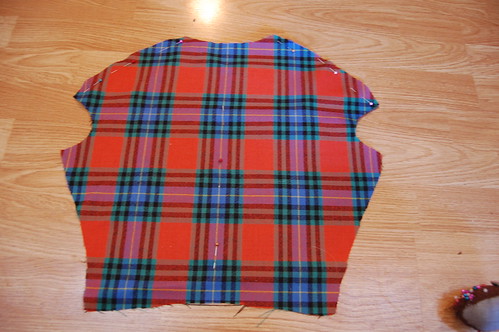
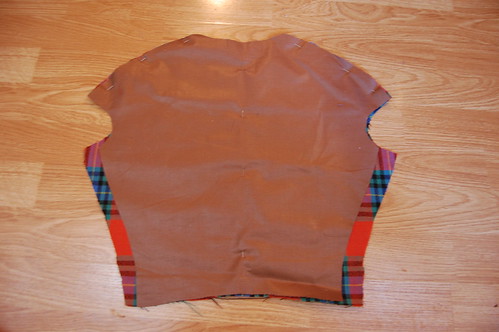
In the 1860s, bodices were commonly made of three pieces--two fronts, and a back with false seams. To create the false seams, cut your fashion fabric slightly larger than your lining. It's easy to adapt a three piece back into a one piece back, just lay your pattern pieces together as if they were one. I did that for years before finally cutting a new one piece back pattern.

Pin the fashion fabric to the lining at the shoulders and down the center back.

And since this is going to be quite long, even as an incomplete tutorial, please click to continue reading!


Monday, August 8, 2016

Transferring a Design and Beading a Bow--A Tiny Tutorial

Green Robe de Style

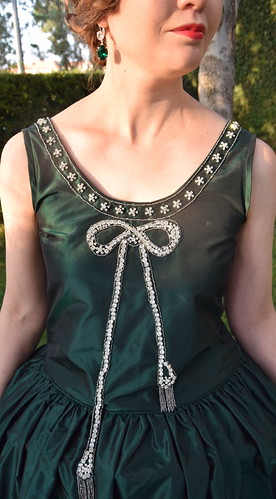
The most striking feature of the dress I copied for the 2016 Costume College Gala is a rhinestone bow on the front neckline. It's what drew me to the dress when I first saw it, and it was one of those dresses always in the back of my mind.

My green silk taffeta is from Renaissance Fabrics, my steel cut beads are from Hanson Stone Vintage, and my rhinestones are from Pretty Things Supplies

IMG_20160723_160140394a

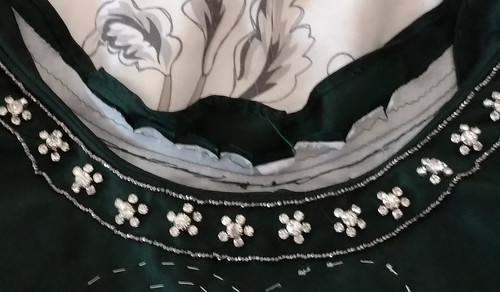
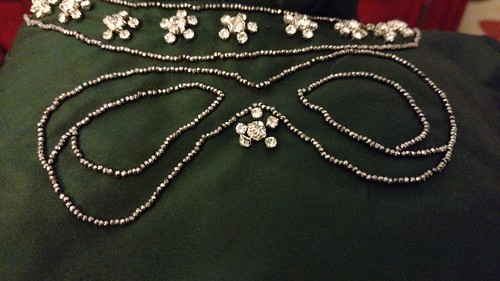
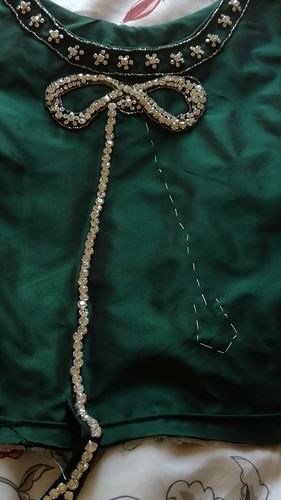
I knew when I was making this dress that I wanted to add the beading to the mostly finished dress. I finished the bodice, except for sewing the neckline facing down. This way I was able to sew the neckline beads on and then whip the facing into place. I left off the skirt as well, because I didn't want it in the way. You can see the half finished facing in the above picture. The rhinestones are 5mm surrounded by 2mm.

Because my fabric is so dark--green shot with black--my previous technique of a cell phone flashlight and bowl, wasn't going to work. My fabric was also too dark for the pencil markings to show up. I have a chalk pencil somewhere, but I didn't really want to rub that off with the beading anyway.

Beaded Bow

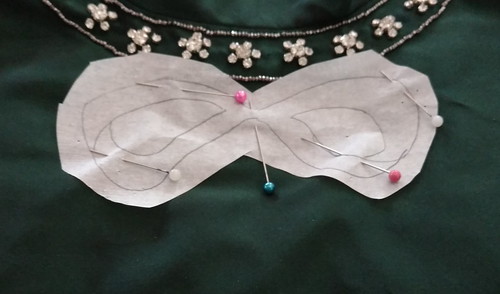
To start, I traced my design onto tracing paper. It looks opaque in the picture, but is actually sheer. Tissue paper would work as well. I then pinned the design into place.

To get the design itself, I enlarged the picture of the dress and traced it--very easy!

Beaded Bow

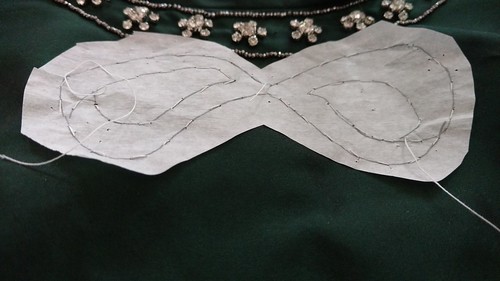
I then sewed along the lines using white thread and big basting stitches.

Beaded Bow
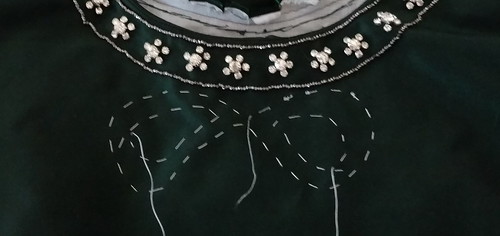
When I tore the paper off, very carefully and with the help of a seam ripper, I had a perfect guide for the beads!

Beaded Bow

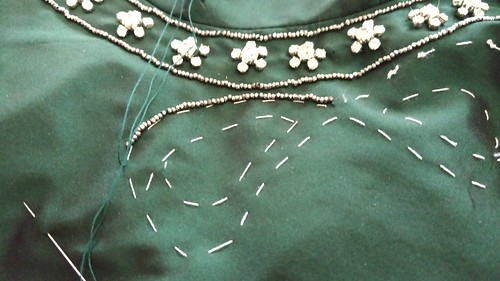
I sewed the beads right next to the guiding stitches--this made them easier to pull out once the beading was done.

Beaded Bow

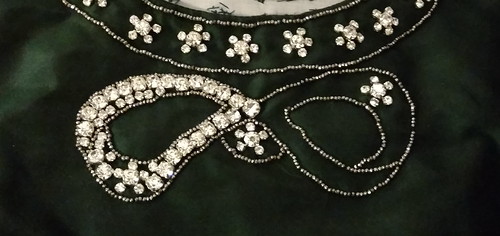
The completed outline!

Beaded Bow

I then filled the bow with rhinestones. I used a 6mm in the center and 5mm and 2mm in the rest.

Beaded Bow

For the tails of the bow, I basted a line, sewed 6mm rhinestones along it, and then sewed the steel beads along the edge.

Beaded Bow

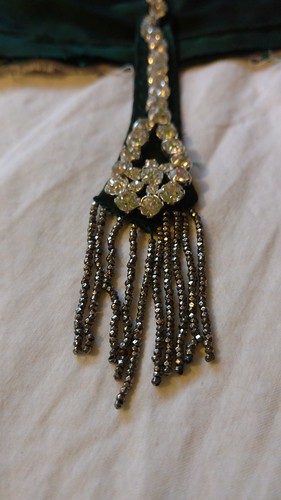
One of the tails ends past the skirt. I hemmed a piece of fabric in the shape I wanted, added the rhinestones, and sewed it to the dress. I sewed the steel beads after this so they'd cover the join between the extension and the dress.

And that's it! For the beading, at least :)
Wednesday, August 19, 2015

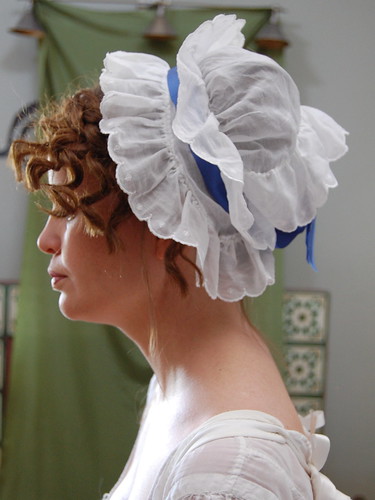
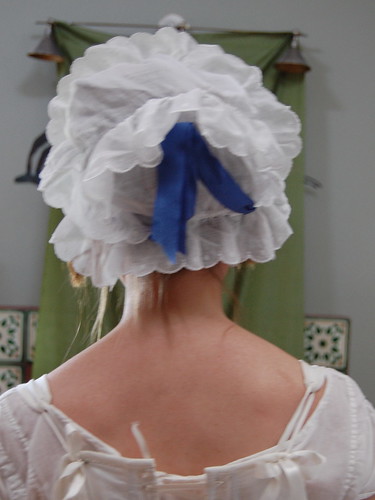
Faking a Regency Cap--A Tiny Tutorial

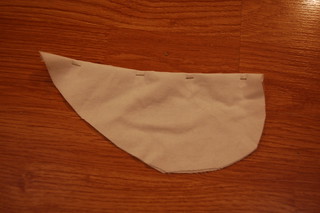
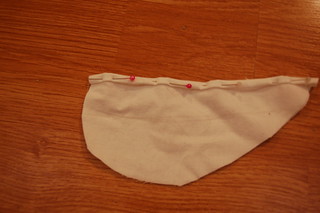
DSC_0904 DSC_0905

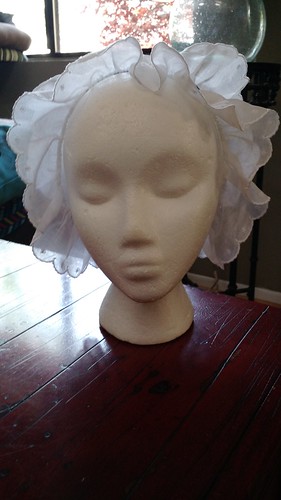
I will happily admit this is not a completely accurate Regency cap. As I was sitting and looking at the strips of fabric that I was thinking about turning into a cap pattern, I realized I could go about it an easier way--I could use my Kannik's Korner cap pattern and add a few Regency elements. Some had ruffles across the crown, others had ruffles facing back, early fashion plates had colorful ribbon, (I'm obviously using the extended stylistic definition of Regency here), and a feature many of them had was the front ruffle extended around the back of the neck.

My cap is made of Swiss muslin and trimmed with Swiss embroidered edging, both from Farmhouse Fabrics. The ribbon is from Silky Way on eBay.

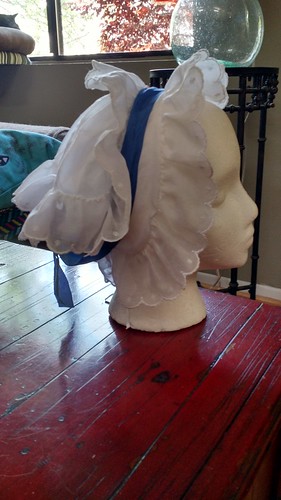
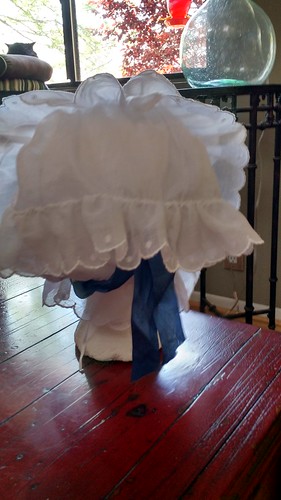
IMG_20150607_160138228_HDR IMG_20150607_160148655_HDR

To make my cap, I used the girl's band and woman's caul, like I have in my previous Kannik's Korner caps. I followed the directions with the pattern. After attaching the band and caul, I whip gathered a piece of the embroidered edging, and sewed it across the back crown of the cap. Then I sewed another whip gathered piece of edging to the back of the band, facing backwards. I then tried the cap on and pulled the drawstring to about where I wanted to wear it. I then took another piece of whip gathered edging and sewed it around the entire edge of the cap, including the gathered portion. Then I added ribbon, which I just played with until I liked the look of it.

IMG_20150607_160154987

And there it is, a very silly, frilly cap!

Binding 18th Century Stays--An Abbreivated Tutorial

After writing my 1780s stays tutorial, I realized that there was one part that was probably more helpful than anything else--binding the stays. I don't take credit for this binding method, rather Nicole, of Diary of a Mantua Maker told me about it, and I was later lucky enough to see it done on extant 18th century stays in Lara Corset's collection.

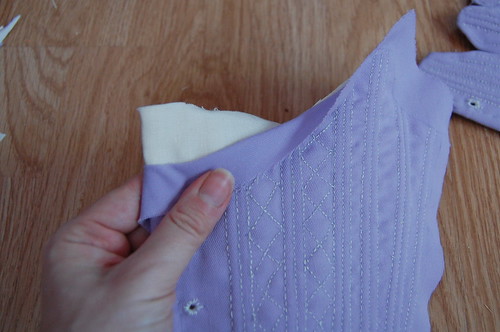
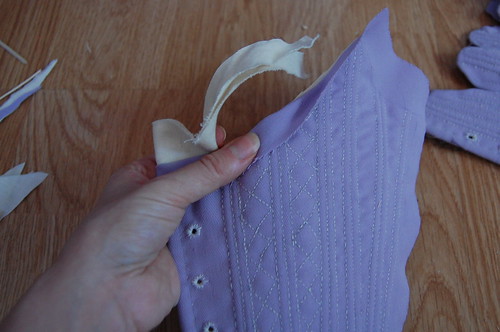
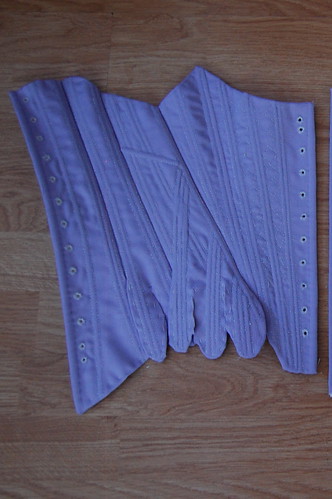
If you've ever wondered how 18th century stays had such a narrow binding, this is how. Instead of cutting all layers to the edge and binding, a seam allowance was left on the top layer of the stays, which was then wrapped to the wrong side and hemmed, essentially binding the stays before adding the binding.

Purple Stays 3

Here's the seam allowance on the top of the stays. Right now, it's all layers of the fabric. Inserting the boning is much easier this way.

Purple Stays 4

Only the inner layers of the stays are cut. The top layer seam allowance is left in place.

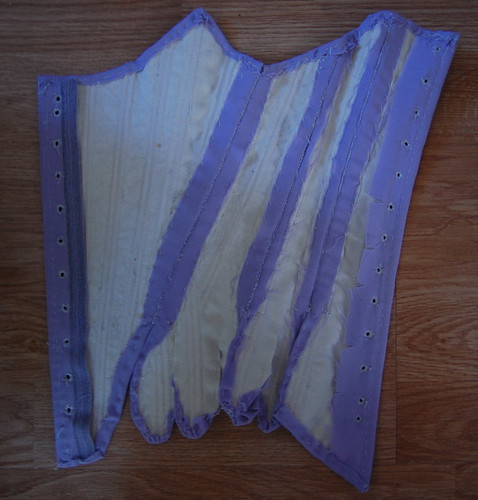
Sew the panels of the stays together. No need to do it by hand like I did, unless you're like me and actually think it's fun to hand sew stays!

Purple Stays 11

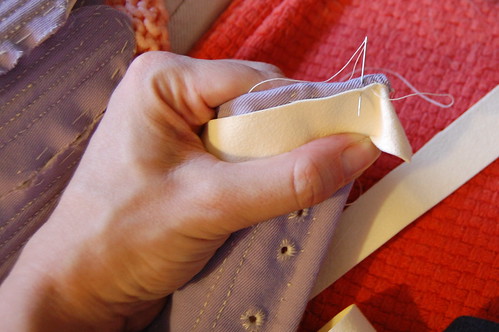
Once the panels are sewn together, fold the excess seam allowance to the wrong side and hem it to the lining.

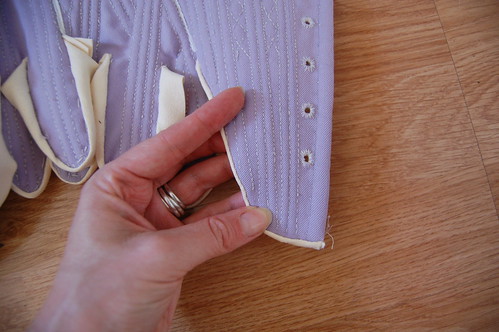
Purple Stays 10

Here it is from the right side. Now, when you bind the stays, you're not doing it to finish the edge because it's already finished, but rather binding to finish the edge more nicely and provide a little extra strength at the seams.

Purple Stays 15

Bind the stays however you like. I used ultrasuede (also on Nicole's recommendation!). I'm afraid to get the truly narrow binding though, it does have to be done by hand. You want to catch the top of the hem more than anything else.

DSC_9323

And nice, tiny binding, just like real 18th century stays!

Tuesday, August 18, 2015

1790s Transitional Stays--A Tutorial

transitional_stays7

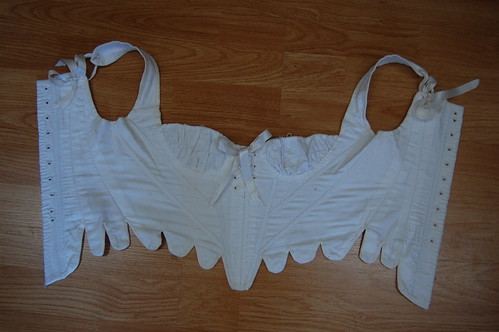
My main inspiration for these stays was this pair of stays in the Victoria and Albert Museum. Mine are slightly simpler, but keep the elements I wanted. Separate cups, higher waist, and general 18th century cut. I used the 1790 linen stays pattern from Corsets by Jill Salen as a starting point since they had the general shape I wanted. I changed them to back lacing with false front lacing and gathered cups. They're made of two layers of fabric, cotton broadcloth for the outer layer and cotton twill for the inner layer. Both fabrics are from Fabric.com. They're boned with metal and plastic artificial whalebone. I used the plastic in the diagonal channels so I could easily shape the end of the bone to fit. They're bound in tight weave cotton ribbon that I bleached white. They're laced with silk ribbon from Farmhouse Fabrics. The cups are drawn in with twisted cotton crochet cord.

DSC_9867

Basic construction is straightforward. All seam allowances are turned in towards each other--so they're on the inside--and the pieces are whipstitched together. This is based on early 18th century stays construction, but since the seam allowances are inside, there's no need for a separate lining to cover seam allowances.

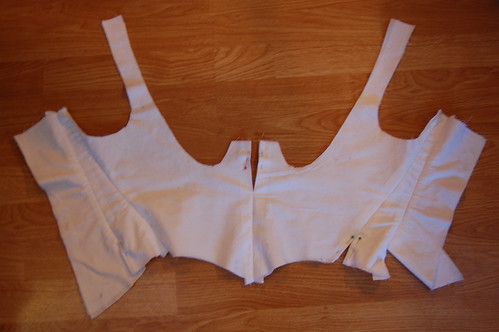
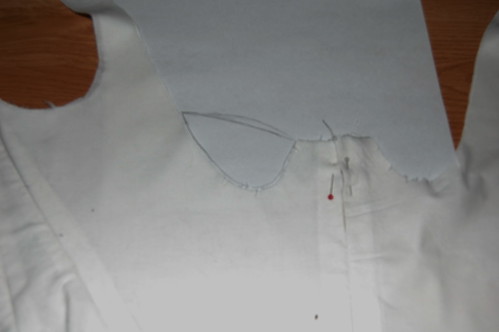
To pattern the shaping for the cups, I fit the stays normally, adjusted my bust into the position I wanted it held, and drew a line underneath that. I smoothed out the line when I took the mockup off.

DSC_9868a

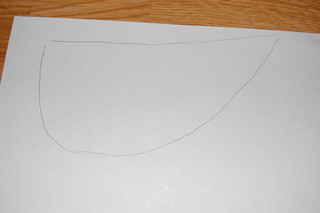
To pattern the cups, I traced the shape of the cup onto paper.

DSC_9869a

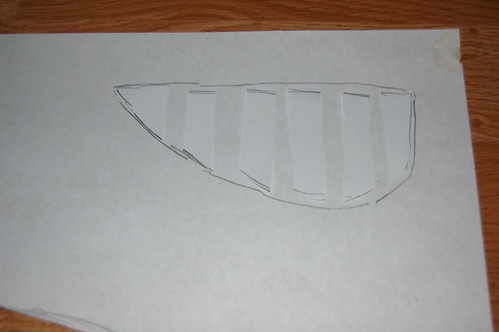
I then cut that shape into strips, spread it out, and traced around that.

DSC_9870 DSC_9871

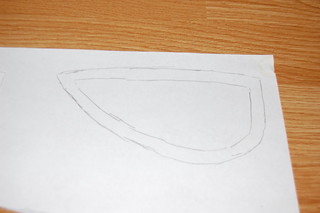
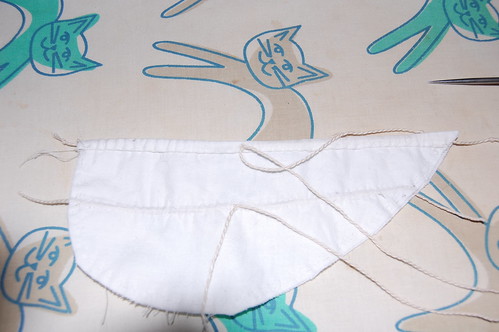
I added a seam allowance on all sides--to sew to the stays and to put a drawstring channel in the top--and adjusted the top line so it would make a smooth line with the straps.

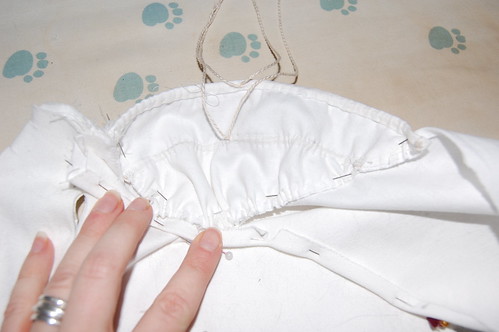
DSC_9913 DSC_9914

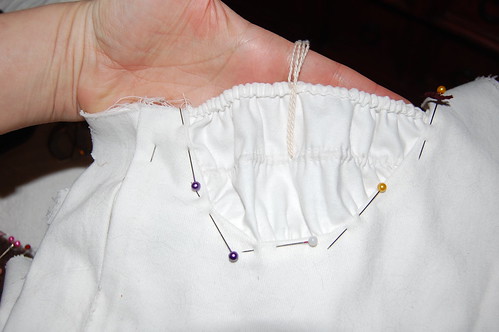
The cups are two layers of broadcloth. The top is hemmed to make a drawstring channel. The line drawn in the center of the cup is to create a drawstring channel for the center of the cup.

DSC_9915

Here it is sewn--there are no eyelets for the twisted crochet cord drawstrings; they're just poked through the fabric.

DSC_9916

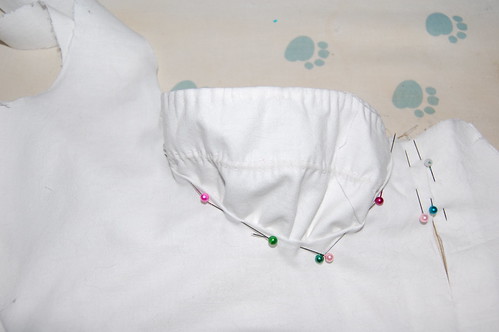
The seam allowance under the cup is folded down, and the cup is topstitched in. I used a spaced backstitch.

DSC_9917

The lining is left loose. The curve is clipped a little to make the seam allowance fold more easily.

DSC_9918

The seam allowance folded down, and is whipstitched to the wrong side of the cup.

I did a second row of spaced backstitching after the lining was whipstitched down. This wasn't completely necessary, but it made it feel more finished.

DSC_0871

The tabs are cut, boning is added, eyelets are sewn, they're bound, and they're done!

DSC_0872

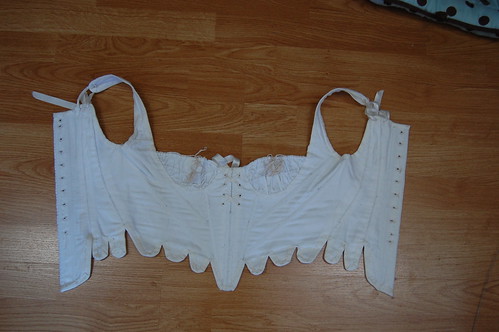
Here they are from the back, which because of the techniques used, looks an awful lot like the front...