Showing posts with label beading. Show all posts

Monday, August 8, 2016

Transferring a Design and Beading a Bow--A Tiny Tutorial

Green Robe de Style

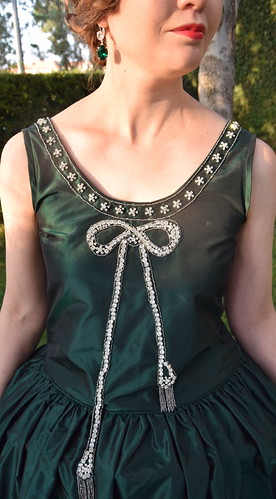
The most striking feature of the dress I copied for the 2016 Costume College Gala is a rhinestone bow on the front neckline. It's what drew me to the dress when I first saw it, and it was one of those dresses always in the back of my mind.

My green silk taffeta is from Renaissance Fabrics, my steel cut beads are from Hanson Stone Vintage, and my rhinestones are from Pretty Things Supplies
IMG_20160723_160140394a

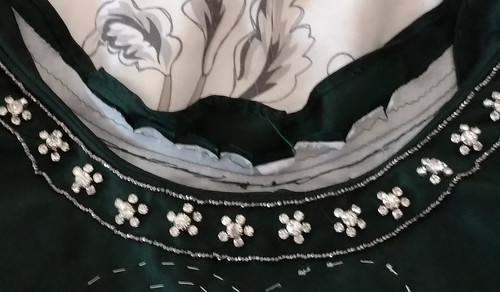
I knew when I was making this dress that I wanted to add the beading to the mostly finished dress. I finished the bodice, except for sewing the neckline facing down. This way I was able to sew the neckline beads on and then whip the facing into place. I left off the skirt as well, because I didn't want it in the way. You can see the half finished facing in the above picture. The rhinestones are 5mm surrounded by 2mm.

Because my fabric is so dark--green shot with black--my previous technique of a cell phone flashlight and bowl, wasn't going to work. My fabric was also too dark for the pencil markings to show up. I have a chalk pencil somewhere, but I didn't really want to rub that off with the beading anyway.
Beaded Bow

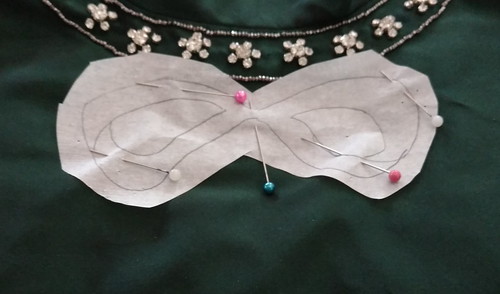
To start, I traced my design onto tracing paper. It looks opaque in the picture, but is actually sheer. Tissue paper would work as well. I then pinned the design into place.

To get the design itself, I enlarged the picture of the dress and traced it--very easy!
Beaded Bow

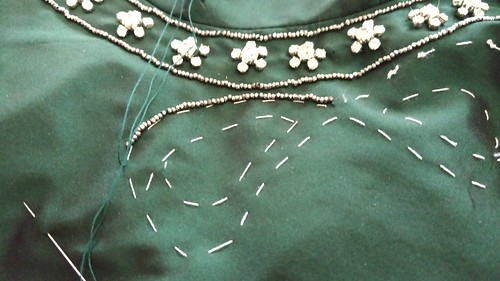
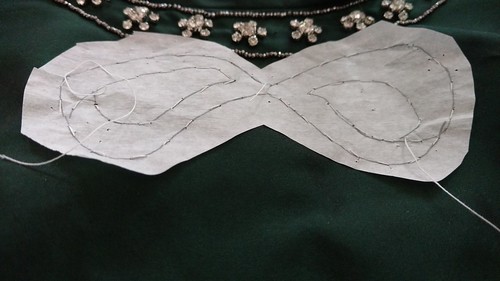
I then sewed along the lines using white thread and big basting stitches.
Beaded Bow
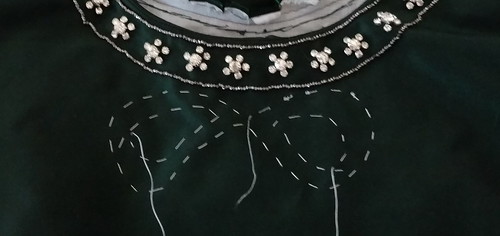
When I tore the paper off, very carefully and with the help of a seam ripper, I had a perfect guide for the beads!

Beaded Bow

I sewed the beads right next to the guiding stitches--this made them easier to pull out once the beading was done.
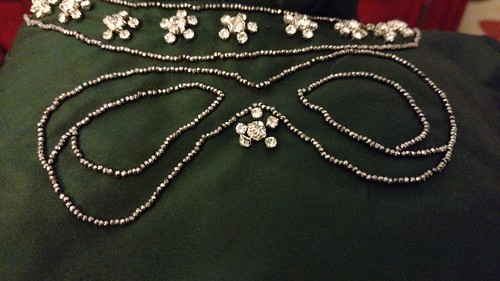
Beaded Bow

The completed outline!

Beaded Bow

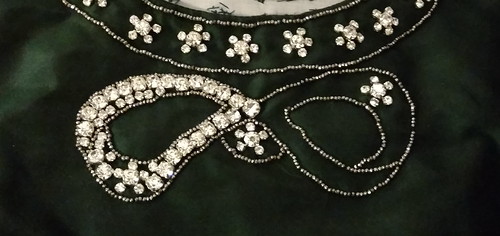
I then filled the bow with rhinestones. I used a 6mm in the center and 5mm and 2mm in the rest.
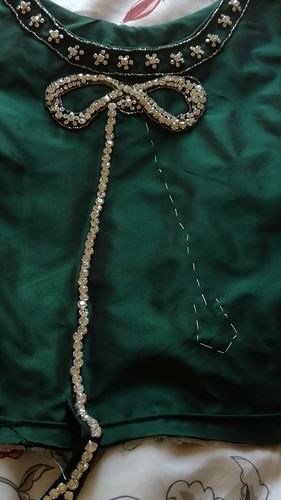
Beaded Bow

For the tails of the bow, I basted a line, sewed 6mm rhinestones along it, and then sewed the steel beads along the edge.
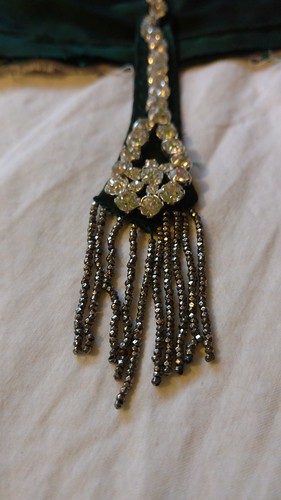
Beaded Bow

One of the tails ends past the skirt. I hemmed a piece of fabric in the shape I wanted, added the rhinestones, and sewed it to the dress. I sewed the steel beads after this so they'd cover the join between the extension and the dress.

And that's it! For the beading, at least :)

Wednesday, July 2, 2014

Beading and Beetles--Embroidering the Game of Thrones King's Landing Dress!

Wings 18

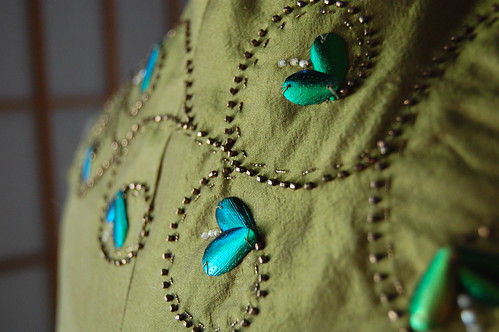
From the start, I knew I didn't want to make a recreation of a dress, rather I wanted to make a dress that if I turned up in King's Landing, would fit in. We see enough of this style to get a feel for it. One thing I noticed while looking at different dresses was the embroidery had a great deal of texture. With that in mind, I decided on beading highlighted with metallic thread and beetle wings. While certainly not the level of detail on one of Cersei's dresses, it is similar to the amount of detail on Sansa's dresses in this style. I talk a little about the design itself and how I transferred it to the dress in this post.

And now, what I used for the embroidery. Beetle wings that I bought on eBay. This link takes you to the seller I used, although they don't seem to have any in stock right now. Search for beetle wings or elytra to find them. Most of them are in Thailand, where they're a byproduct of the food industry, so a little advance planning is needed! And while there certainly is something of an eww factor, they're really no worse than silk! Or so I told myself. A few minutes into working with them, and I was pretty much over that. I have a friend who's also working on a beetle wing dress at the moment. You can see her blog which includes a little historical information here, Where When Why.

I used the Benton and Johnson #371 wire in antique gold from Hedgehog Handworks for the running stitch along the beads. I've included a picture of it below. Though this is called a wire, it really isn't. It's a thread (cotton, I think) core with a metallic thread wrapped around it.

I used the Delica glass metallic bronze beads from Fire Mountain Gems. These are very nice beads, and do the job of imitating metal quite well. I also used these in silver on my Victorian knitted star bag. They fit over my size 10 sewing needles quite nicely! The cream colored beads between the beetle wings are Mill Hill from my local embroidery shop.

Now, onto the details!