
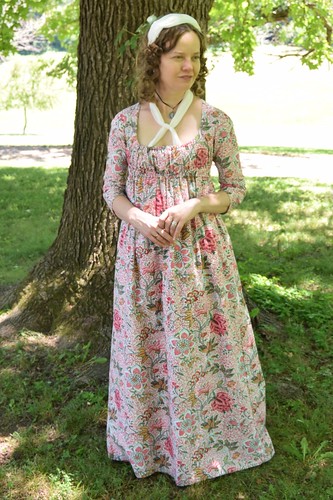

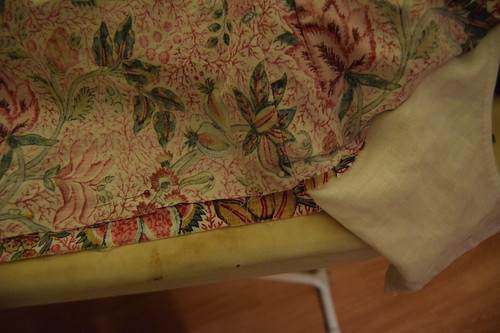
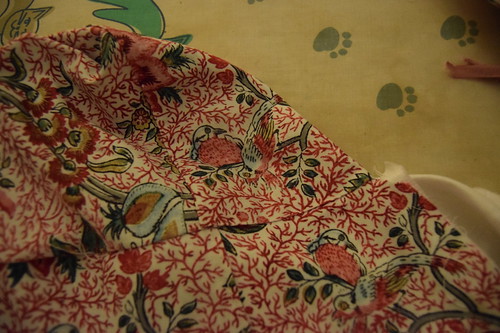
My late 1790s print dress worn at the Jane Austen Festival. It's made of bird print cotton from Colonial Williamsburg, lined with linen from Burnley and Trowbridge, and worn over short stays made with springs (here--other pictures I was wearing my cupped short stays), a linen shift, and petticoat on straps. The dress closes with drawstrings in the front over a pinned linen lining. More pictures of the dress, including how it closes, can be seen here.
In 2017, I was lucky to be able to see An Agreeable Tyrant at the DAR Museum. I already owned the catalog, which has scaled patterns for many of the dresses. I had been thinking of making a print dress when we saw a remodeled silk taffeta dress with just the sort of back I had been meaning to make for years, but never did. Seeing one in person made things click, and I knew that my new dress would finally have that back.
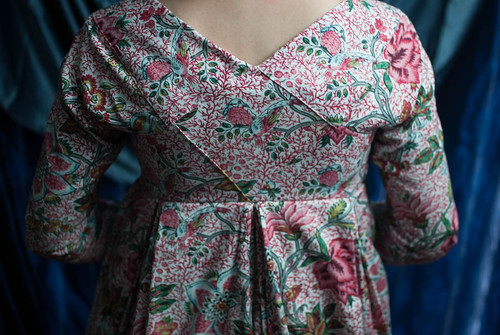


There's a pattern scaled by the Modern Mantua Maker in the book, and I used it for reference and the skirt shape, but I mainly went off what the dress looked like, and used my 18th century bodice block as a base. The pattern for this dress is laid on top of my 18th century pattern. I changed the angle of the back shoulders, cut off the point, straightened the underarm shape and make it a little shorter, and made longer straps. The strap is wider in front than the bodice strap. This is to make hemming it easier later on. I used the same sleeve pattern as in my setting sleeve tutorial--the 18th century style that has a corner. Since the armscye was bigger than the original dress, I set it without the pleats so common in the 18th century. You can see that the dress in the DAR originally had pleats in the sleeves as well--fold lines remain. The marks on the center back piece show wher the shoulder strap belongs.
The first picture shows the pattern over my 18th century block. The second shows the pattern on its own.
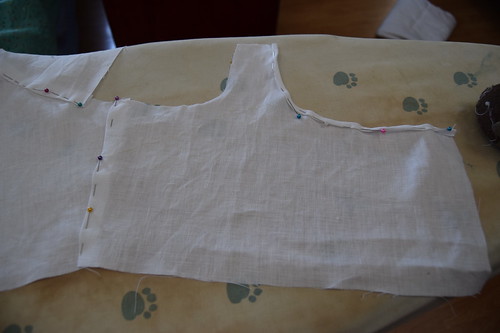
You'll notice that the shape of the lining doesn't match the diamond back. That's because the print fabric seamlines don't match the seamlines of the lining. This was commonly done in dresses. It's much easier to get a good fit, and then adjust the outer fabric as you want. I also shortened the waist for this dress. I kept the pattern long to make it more versatile.

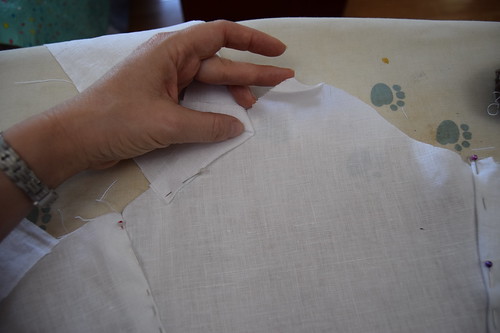
First, fold the point of the center back down a little. Then pin the side pieces to the side back seams, and the shoulder pieces to the shoulder seams. The straps should extend past the center back and touch at the center of the fold.


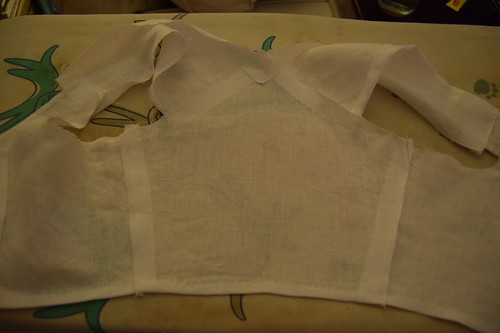
The shoulder straps in more detail. They extend past the center back so they can be hemmed later. They overlap a little here, but that's because they meet at the center back to give the top point of the diamond shape.

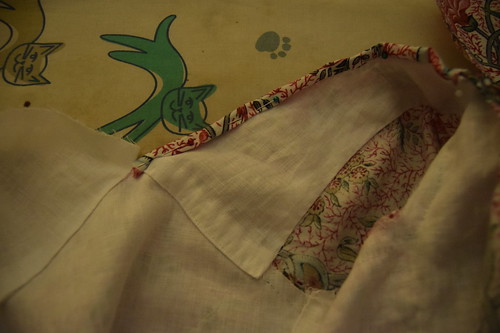
The neckline edge is hemmed with a narrow hem. Here's what it looks like at this point--this is the side the fabric is mounted to.


Fold the shoulder strap seam allowance up, towards the other seams. I should've done this from the start! This finishes the edge of the armscye when you set the top of the sleeve. Pin the shoulder strap the the front strap--the fold should be even with the underarm, and the neck edge should extend past the neck edge of the front strap.


I made the center back piece the same shape as the lining, but you don't really have to do that. Fold the top of the center back to match the lining and if you want, you can fold the bottom edge too. It wasn't always done because it's covered by the skirt, but I like to do it. The side pieces will be a different shape than the lining. I just extended them to make them a shape I liked. Fold the seam allowances under, and pin. This step isn't best shown with such a busy print, but the shakily drawn green line shows the folded under edge. The side pieces meet where the line ends. The place where the side pieces form a V is also where I mounted the skirt. These seams are sewn with a spaced back stitch.
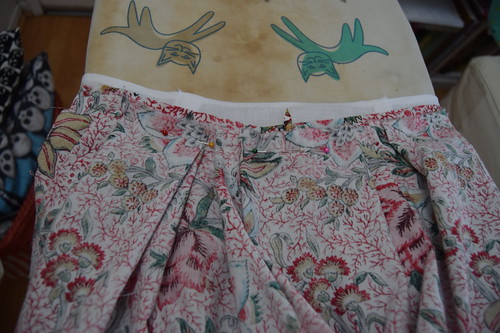
Now for the back skirt. I pleated the skirt based on the draft in An Agreeable Tyrant. It's sewn to the back, right sides to right sides, at a curved angle above the waistline. The sides of the back of the skirt roughly hit at the underarms. The skirt is sewn to the bodice with a back stitch.
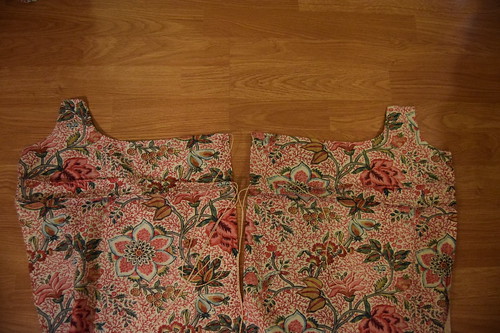
The front of the dress is one piece, shoulder to hem. It closes at the neckline and waist with drawstrings. The double drawstring is based on an original. I used the front lining piece as a guide, and made it wider so it would be full enough to gather in. The center front is a hemmed slit.

The seam allowance is then folded under and top stitched to the bodice with a spaced back stitch at the shoulder strap and underarm seam. Then it's turned inside out, and the front skirt seam sewn to the back, right sides together, with a running stitch.
I don't have pictures of setting the sleeve. Except for leaving out the pleats, I followed my 18th century sleeve tutorial. A brief summary--sew the underarm of the sleeve in, from the corner in back to where the front strap meets the strap lining. Then ease the top of the sleeve over the top strap lining. Sew the top of the sleeve to the shoulder strap, near the folded edge. Then place the outer fabric strap over the lining and top of the sleeve with the seam allowances folded under, and top stitch it down over the back shoulder seam and the shoulder edge, and the front shoulder strap. This is all shown in the tutorial!
The shoulder strap still extends past the center back and the front strap. Hem both the lining and outer fabric together, as shown in the picture above.
And that's basically it! Except, of course, for hems and all the little finishing details that always take longer than you expect...