
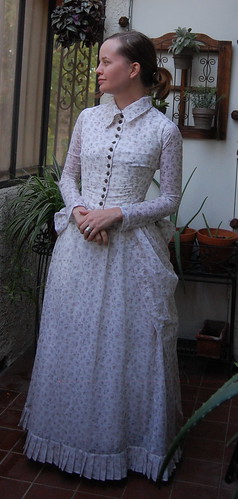
The original dress that this is based on can be seen on my antiques blog, here.

I'm breaking this tutorial up into three parts, the skirt, overskirt, and bodice. The scaled pattern for each part will be at the bottom of the post. There's also another post with the dress actually being worn.

The techniques here will work for any bustle bodice pattern. The construction is fairly standard for the period.
A confession--I used an existing pattern to make this bodice. I’m a huge believer in using base patterns to make different styles. That said, the pattern I used is on my website and is from a similar date and remarkably similar to this dress. I laid the pattern pieces over this dress and all had the same general shape, only the size was a little different.
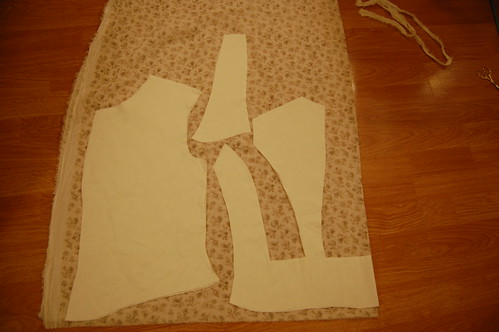
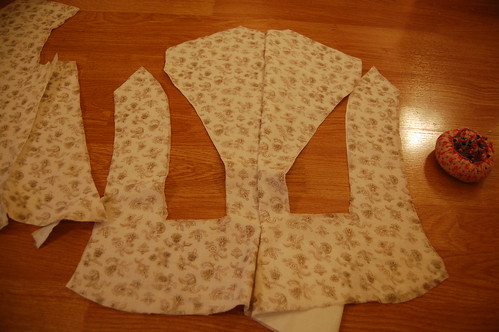
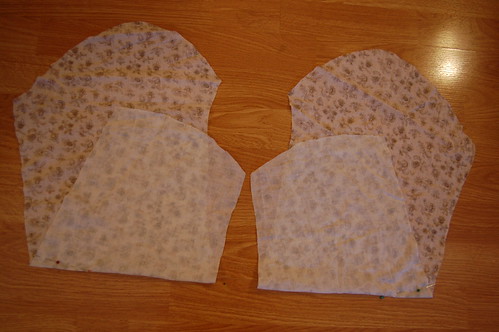
First, cut everything out! My preferred way of cutting is to cut the more stable first--that’s the lining that you see laid out on the voile--and use to cut out the less stable fabric. The lining was more stable here. For something like a silk dress lined with linen, I’ll cut the silk first. Then I use the stable fabric to measure my seam allowances, and ignore any wiggling the other fabric has done.
The bodice is flat lined. The pieces were not basted together before sewing. Though basting pieces together is a common modern technique, it’s not one I’ve noticed in any of my antique bodices. If you smooth the pieces as you pin them, it works very well and you don’t have to worry about any wrinkles or bubbles caused by basting the pieces together.
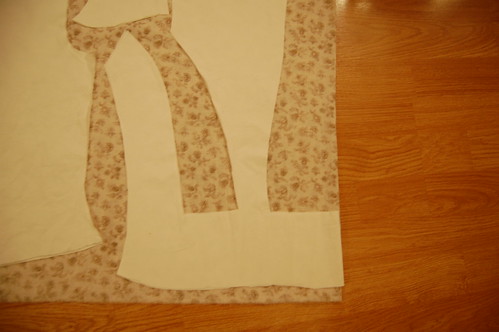
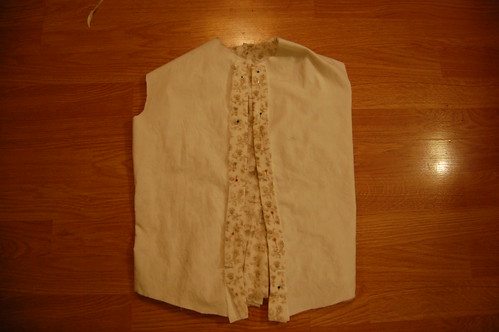
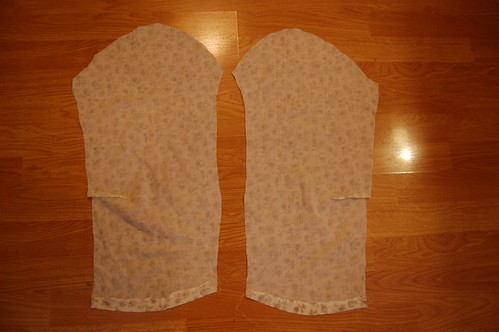
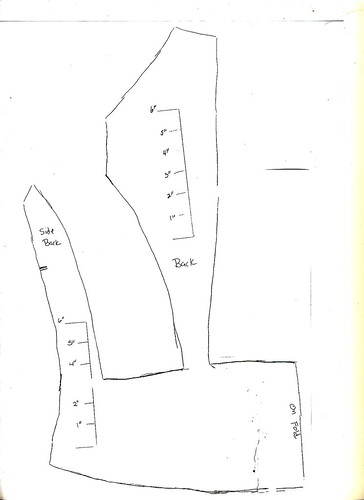
There are no seams in the pleats. The pieces are simply placed a few inches apart and connected.

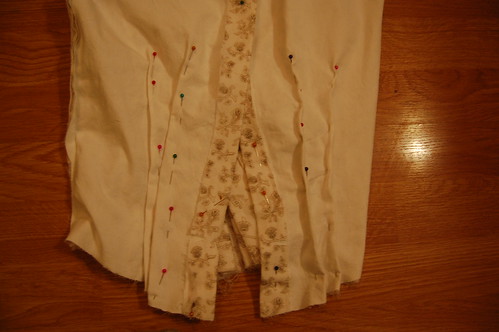
Pin the center back seam. The seam should extend slightly past the edge of the pleats.
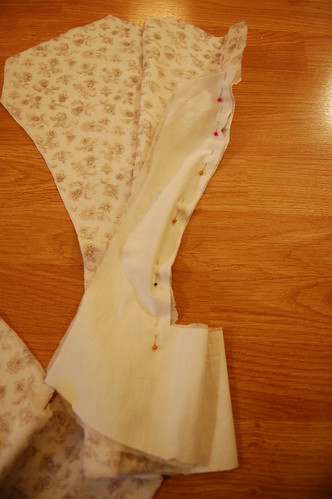
Repeat for the side back pieces. Start at the bottom so the pleats are lined up, and pin to the top. Again, the seam should extend slightly past the pleats.
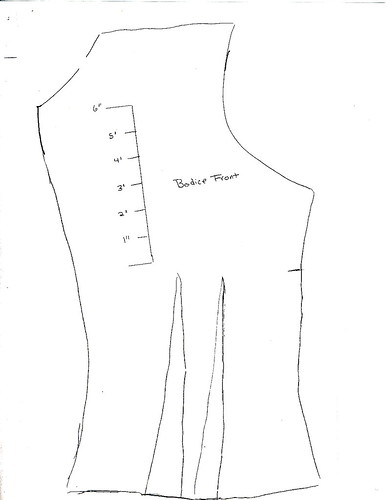
Repeat for the side front and front pieces. I find it easier to wait until the body seams are done to pin the shoulder seams.
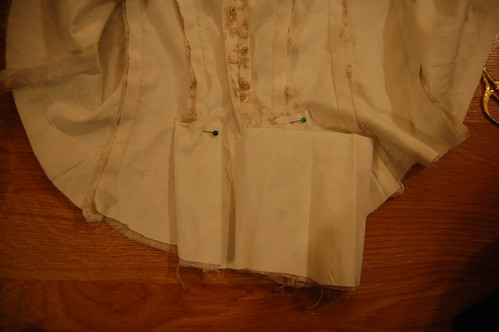
Sew the seams with a ½ inch seam allowance. Press the seams towards the front, and press the placket in. Clip the placket where the waist curves out.
Clip the seam between the front and side front pieces. There are two cuts at waist level, about ½ inch apart. Though the seam is relatively straight, both on the original and mine, which makes it not an obvious place to clip, it helps it fit over the hip. (Please note--this picture was taken later in the construction process.)

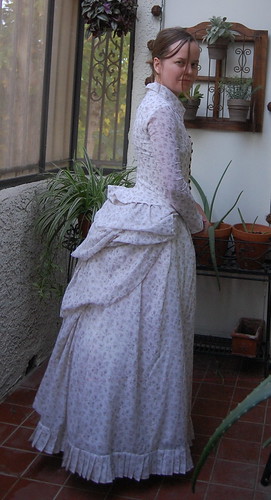
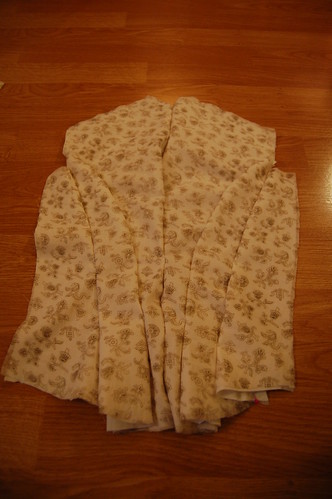
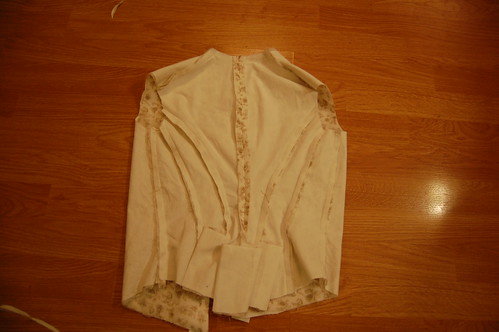
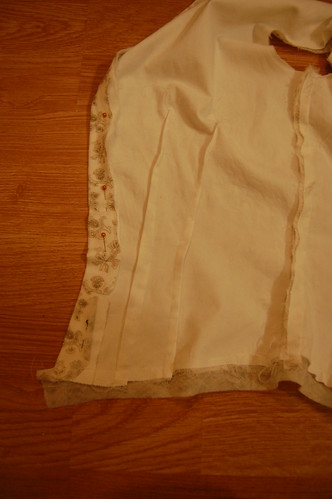
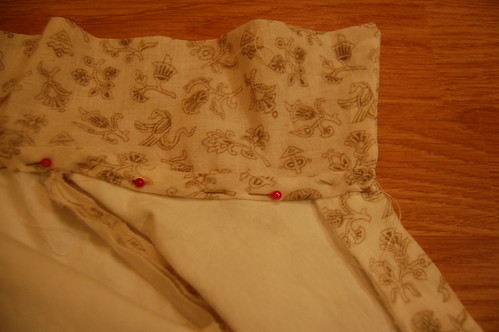
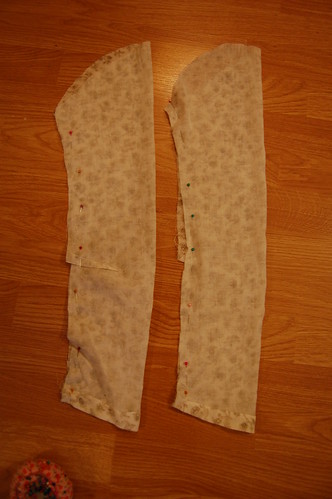
Fold the excess fabric between the side back pieces and the back pieces into box pleats. The edge should extend slightly past the seam allowance as shown.
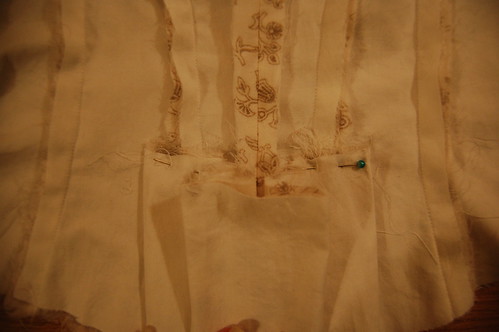
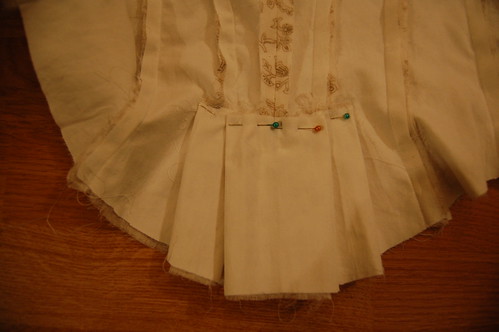
Fold the excess fabric between the center back pieces into a double box pleat.
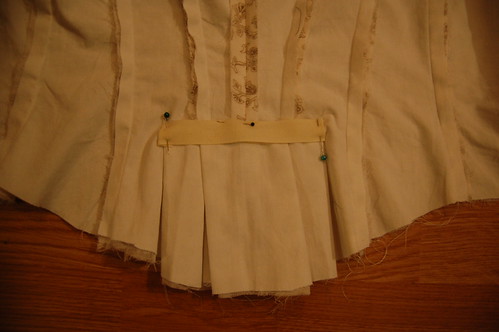
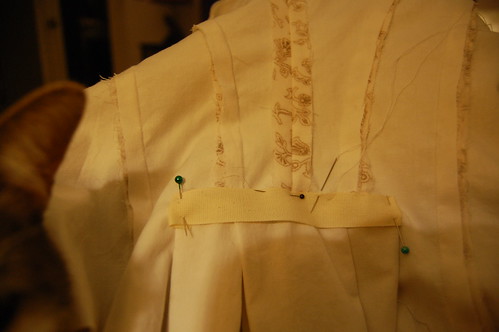
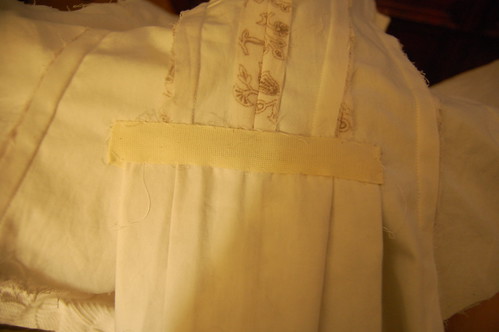
Baste the pleats into place, and cover with a piece of cotton tape. Whipstitch the tape into place.
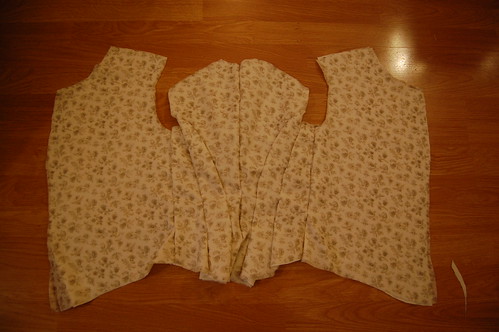
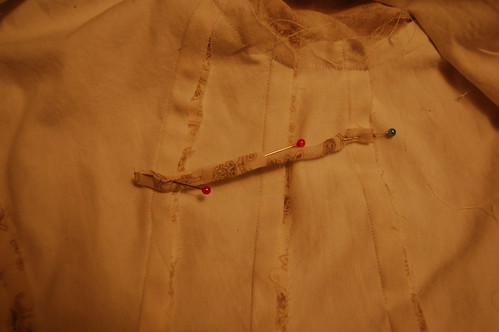
Make the darts. My preferred method is to try the bodice on inside out, pin it shut, and pin the darts into place. The darts are then sewn, cut open, and the raw edge overcast. This may or may not be the order the original was done, but it gives the same result.
I chose to not cut my darts open. My darts are always quite narrow, and cutting them didn’t seem logical.
Press the darts. On the original, the first dart is pressed to the front, and the second is pressed to the back. On the left side of the original, while both are pressed this way, the first dart is sewn towards the back. I decided to press both sets of darts in the same direction, as that was apparently the intent of the original.
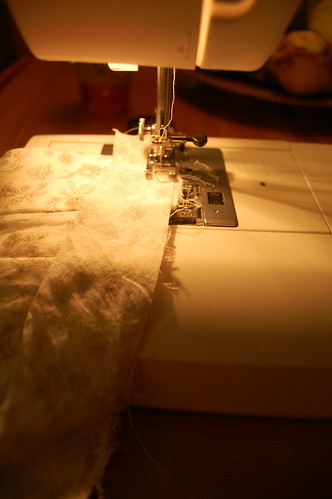
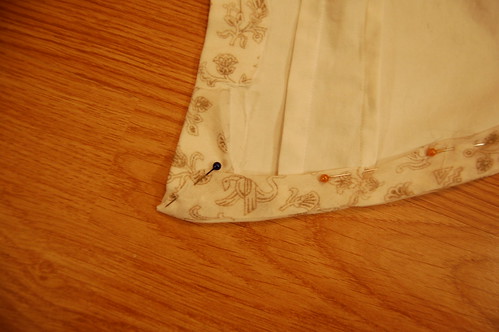
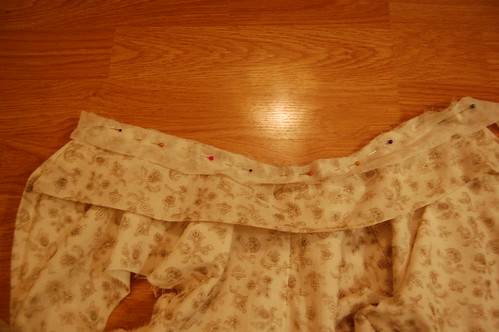
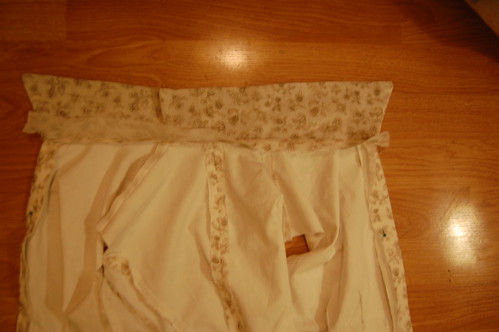
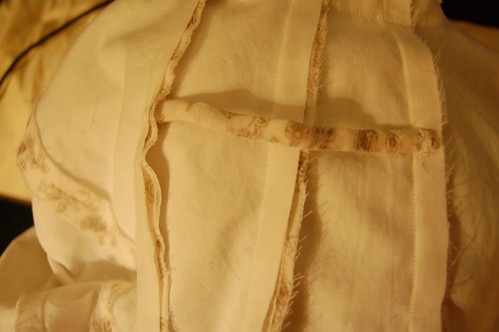
Next, finish the bottom edge. Cut a strip of self bias, and sew it right sides together to the bottom of the bodice. You don’t need to pin this into place, just set the strip on your bodice and machine sew through all of the layers.
Turn this up and whipstitch into place. At the front edges, the bias is folded at a diagonal.
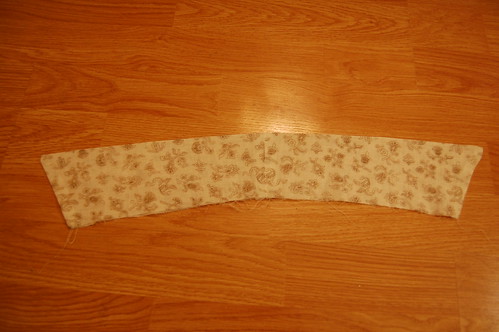
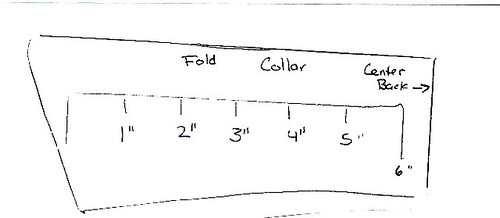
Sew the center seam on the collar pieces. Fold in half, right sides together.
Sew the two collar pieces right side together down the diagonal outer edges. Turn right side out, and press.
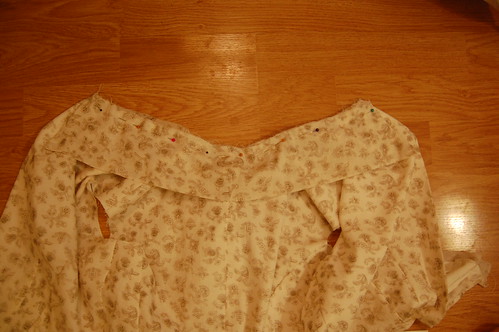

Pin the collar to the right side of bodice. Pin a strip of bias to the edge. Sew through all these layers.
Press the seam allowances towards the bodice, fold the bias under the seam allowance, and whipstitch into place.
There is a loop in the left underarm, presumably for hanging. To make this loop, fold the edges of a small strip of fabric in, and then in half. Whipstitch shut. It should be just a little longer than the undearm. Sew to the seam allowances. I noticed when doing this step that the left front seam allowance was, unlike the others, pressed to the back. Presumably, this was so the strip could be sewn to the underside of the seam allowance.
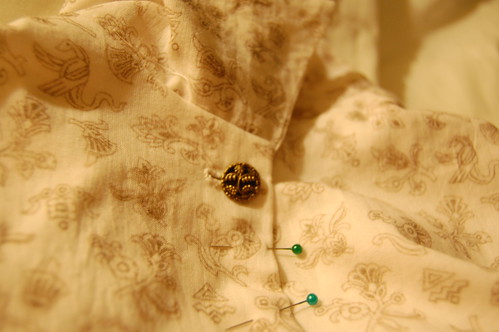
Make 17 buttonholes and sew the corresponding buttons on. It sounds like so little when you say it like that! I made 16, as I had a set of 16 antique buttons.
The interior seams are then finished with an overcast stitch.
Sleeves
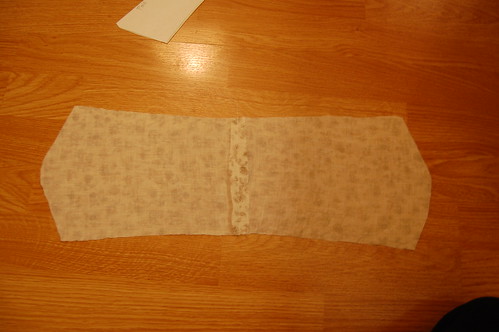
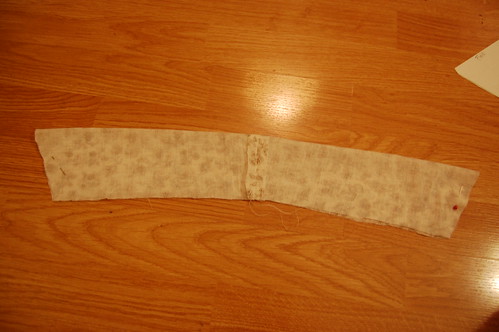
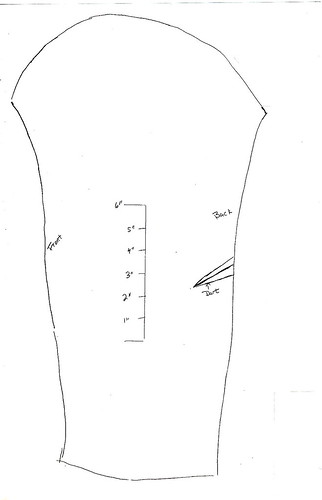
First, sew the darts in the elbow area. On the original, the dart was clipped open and overcast. I chose not to do this as my fabric is a looser weave.
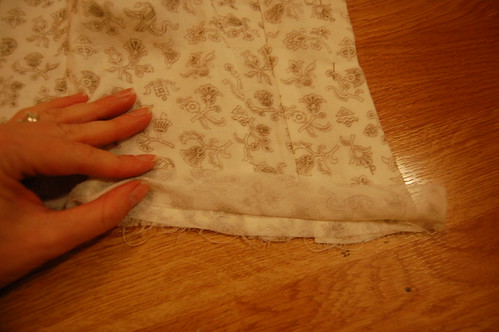
Hem the bottoms of the sleeves with a 1 1/8 inch machine hem. My hem is smaller as I forgot that I needed to add a little for the hem allowance while cutting.
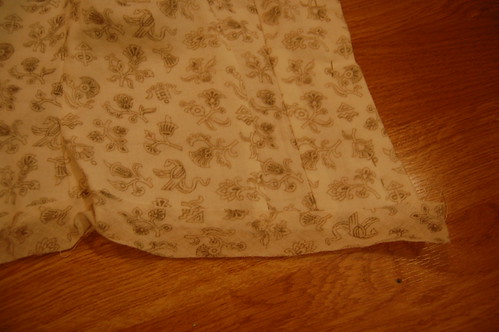
Sew the sleeve seam, starting at the bottom so you can be sure the already hemmed cuff matches up perfectly. Just skim over the part where the dart is since the edge has changed a bit, and trim it after it’s sewn.
Hem the seam allowance in the cuff by hand. Be sure to sew across the bottom to secure the seam.
Sew the sleeve into the armscye. It’s sewn normally--pinned right sides together and machine dwn.
And with that, we have a dress!
This comment has been removed by the author.
ReplyDeleteThis comment has been removed by the author.
ReplyDeleteOh my, thanks so much, I kept wondering how a back with the pleats is done! Your gown is beautiful, btw, looks so comfy.
ReplyDeleteThis comment has been removed by the author.
ReplyDeleteI've been running around like a chicken with my head cut off trying to figure out how to make a bodice like this :) Something about this post has made it all click, thanks!
ReplyDelete