
Looking at pleating diagrams from the previously mentioned books is very helpful as you're doing this next step!

Pin the center back of the pleats to the center back of the bodice. I found this easier to do off the form than on it.

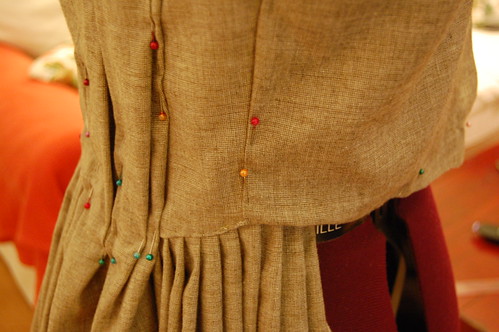
Make a narrow inverted box pleat in the center. Mine is about three-quarters of an inch deep. If you notice, the fabric is already setting itself up for the next pleat!
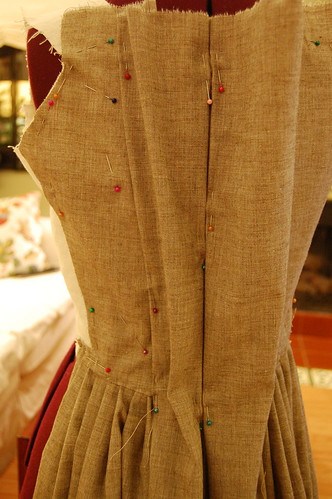
Make the outer pleat. This should be wider at the top than the bottom. Just futz with it--there's no science to it. The size and shape of this pleat did change over the century, so it's best to look at extant dresses to see how you should shape yours. Just be sure to not make this smooth, as the next pleat sits on top of it!
Make the next pleat. This should sit on top of the first, and allow a little of the first to peek through.
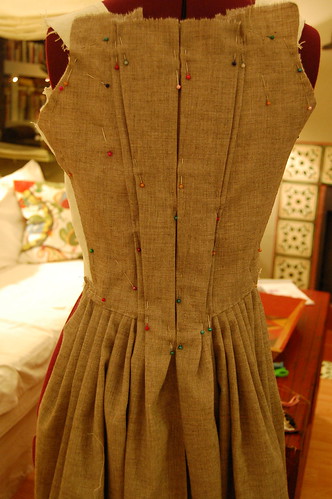
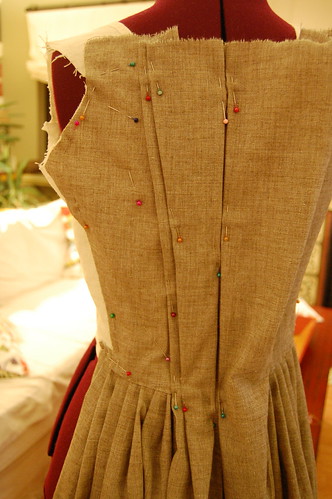
Repeat on the other side! They don't need to be perfect. As long as they're visually similar, you're fine.
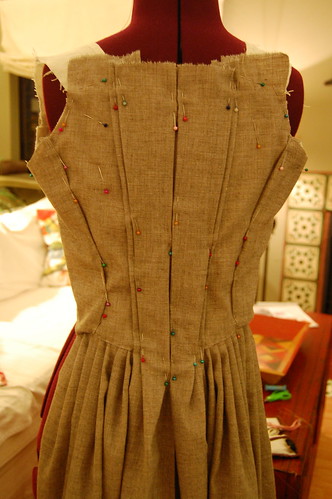
Now, pin the front pieces on. You don't need to match the seamlines. I wanted a slightly smaller look to the back, so I cut my front pieces a little longer. Match the front around the bottom of the armscye, fold the seam allowance under, and pin into place.
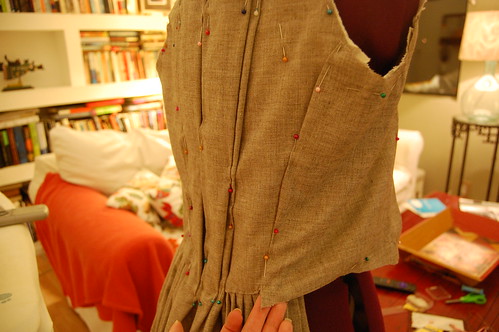
You'll notice there's a little leftover at the bottom. Tuck this underneath the back bodice as shown. This will allow you to turn up the bodice edge all the way around the front of the skirt.
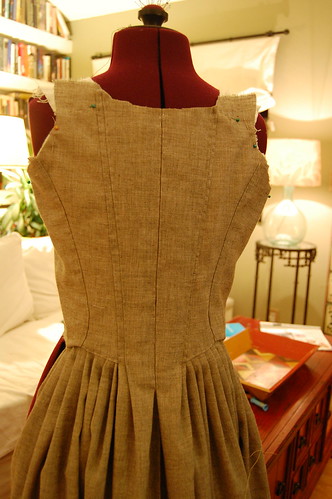
Repeat on the other side. Then, using a spaced backstich, sew! I started at the sides and then sewed the center back. Be sure to smooth things out each time you sew--sewing does shift things a little. Trim the neckline edge.
And with that, the back of the dress--well, except for binding the neckline--is done!
As I write this, I've also sewn the sleeves, stomacher, and front skirt pieces to the back. The tutorial continues here with the front of the dress!
Great tutorial, thanks for the Christmas present! ;)
ReplyDeleteYou are most welcome!
DeleteWow, I'm going to have to try this out...I've made several and the dang pleats are tough to fix right. Cool idea!
ReplyDeleteI've never been happy with my pleats, so I'm very happy to have come up with this! Thanks!
DeleteI was wishing one day you'd write an anglaise tutorial after your epic francaise tutorial. My Christmas wish came true! Your tutorials make this so easy. Thanks.
ReplyDeleteAfter my last miserable failure of an anglaise, I thought I'd never do a tutorial. But then I decided to brave another one, and once I stumbled on this idea knew I had to do it. I'm so glad you like it!!!
DeleteThis tutorial is making so much sense! Thank you for making the construction process clear.
ReplyDeleteVery best,
Natalie
Thank you! Directions can be so hard, so it's good to know they're clear!
DeleteThank you! I have learned so much.
ReplyDeleteParts 1 and 2 have been awesome. Did you post a tutorial on the front?
ReplyDelete