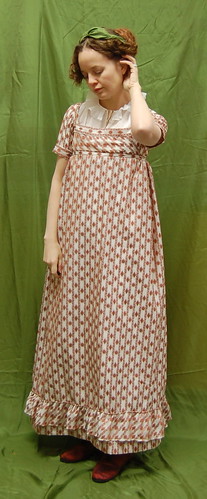

The Sunday night before Halloween, I decided I needed a new dress to wear at work on our Halloween, which was Thursday. Nothing in my admittedly extensive wardrobe felt quite right, plus, I was up for a challenge (hand sewn dress in four days!) and had some rather fabulous new red silk Robert Land boots that needed to be worn. The result--a Regency drop front dress from one of my first LA garment district purchases at my first Costume College in 2003.
Construction details can be seen in this post.
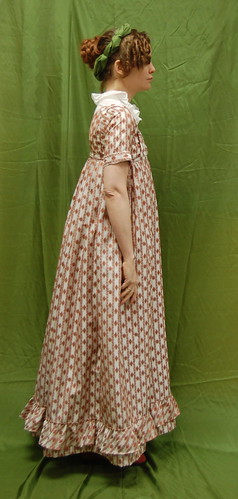
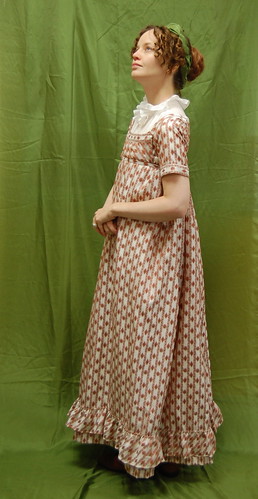
It is a rather straightforward dress, the interest coming from the stripe and the bias touches--I love bias stripes! The ruffle around the hem--of which there will be two--is gathered over a cord. My turban is just two pieces of my backdrop silk twisted together and tacked into place. Of course, I decided to use some of that silk that I bought just for backgrounds before I even used it as a background :)
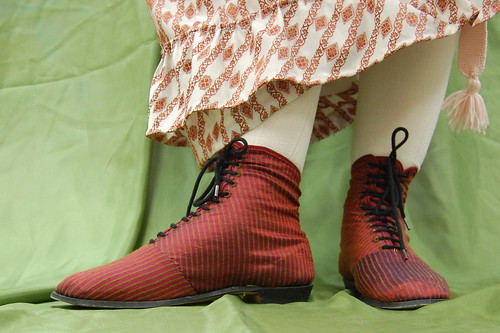
The silk boots that are largely responsible for this dress being finally made!
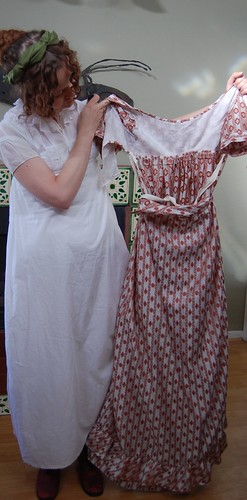
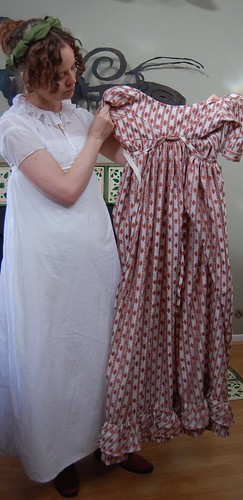
Here's the dress, ready to be put on. The waistband/ties are threaded through the loops in back, and the front hangs loose.
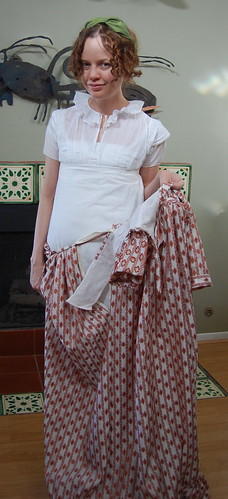
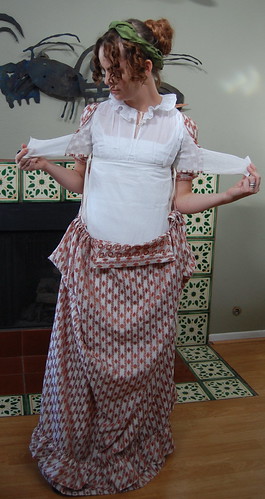
The first step is to pin the flaps. I find it very helpful to pin the flaps to my stays. If I don't do this, then the flap rides up. I haven't come up with a fitting solution for this, and I've tried everything I can think of. I just don't have the figure to keep the flaps in place.
You'll notice ties on the inside of the bodice--I decided against using these when I put it on, although they are seen in original dresses.
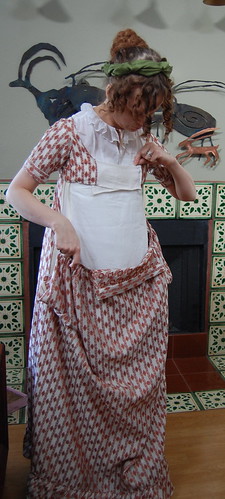
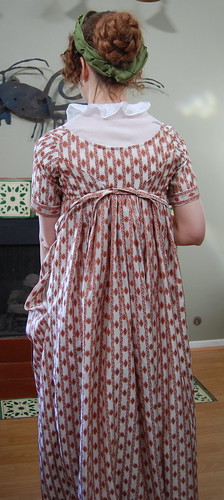
Once the flaps are pinned, this is what it looks like from behind. The ties are through the loops at back, and the front is hanging down.
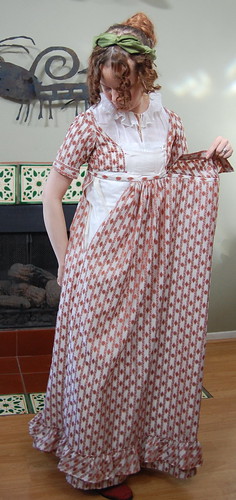
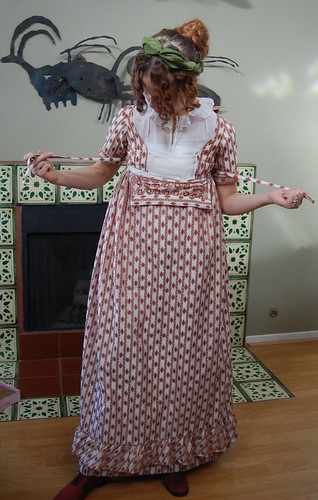
Now, here's the front. The ties are pulled so that everything is tight. The loops guide them into place--it's quite simple to do!
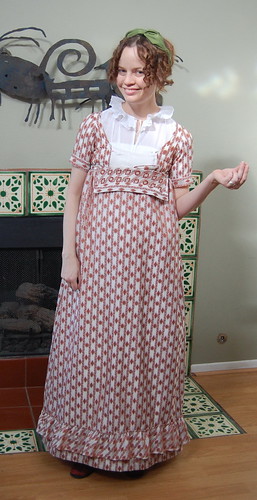
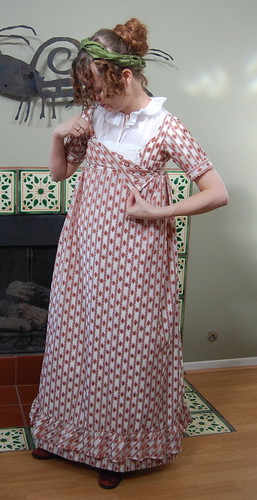
The loops are then tied. I chose to tie them under the bib. Then pin the bib into place. As complicated as this style looks, it's really quite easy to put on by yourself, which is rather nice in this era with many dresses closing in back.
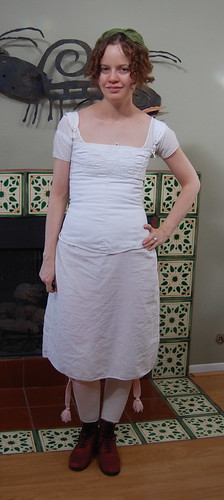
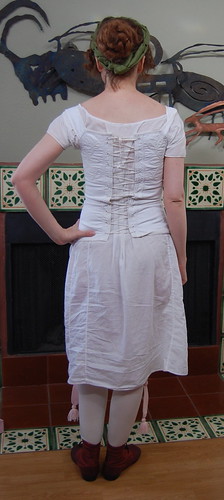
Underneath my dress, I'm wearing a shift made from Dharma Trading's batiste (I think, it's over ten years old!) and stays based on an 1820s pair at the Met. Initially, I had planned to wait to make this dress when I had new 1810s stays, but it should fit over those easily when I get around to making them.
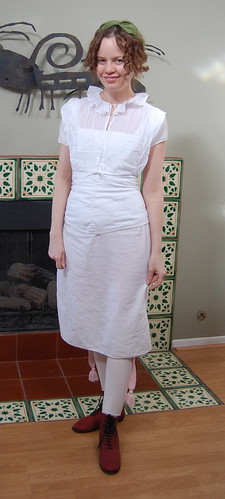
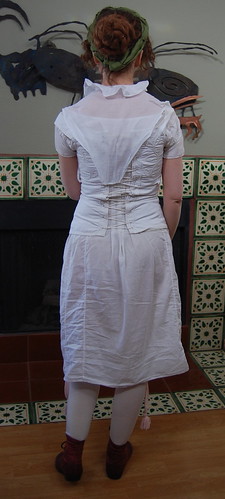
My chemisette is made from Swiss Finella muslin from Farmhouse Fabrics. It's based on the pattern in Patterns of Fashion. It ties at the neck with a cord twisted out of crochet cotton, and ties at the waist with 1/4 inch cotton tape.
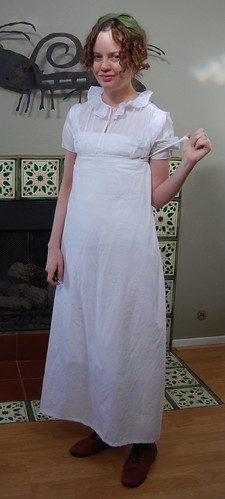
My petticoat is just two panels of fabric, open at one side seam, and held up with straps. The straps also did a brilliant job of holding the chemisette in place.
And that's the dress! Though I do try to limit myself to larger projects now, I do find working on dresses in such a limited time frame to be a rather satisfying challenge :)

Lovely garment and inspiring to get it made in so short a time. Congratulations
ReplyDeleteYay bias stripes! Thanks for showing us all these detailed images of how you put on the dress (: You look beautiful, as always!
ReplyDeleteI LOVE how this turned out! It is a perfect partner for your fabulous boots!!!
ReplyDeleteBlessings!
Gina
This turned out beautifully! I love the fabric, a perfect match for those shoes!! :)
ReplyDelete-Emily
LOVE IT!
ReplyDeleteThe step by step of how you put it on is so helpful. Makes it a lot less intimidating. Thank you!
This is so Lovely!!!!! Thank you for the tutorial. And where did you get those boots?!?!?
ReplyDelete