Showing posts with label knitting. Show all posts

Sunday, February 7, 2021

A 1920s "Two Day" Sweater...

20s Sweater 1


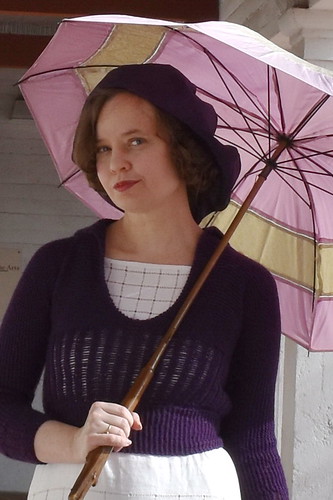
I made this sweater almost by accident. I bought the c. 1921 Bear Brand Blue Book on Etsy and found a few patterns in it I wanted to make. They called for Shetland Floss, so naturally I wanted to find out more about it.  I do have a sample of it from Peace Dale Yarns, which I wrote about here, but was interested to see if I could find any from Bear Brand, details about the weight, or how much yardage was on a skein.  Instead, I came across The Diane Sweater in an ad for Fleisher's Yarn in the April 1921 Ladies' Home Journal that claimed it only took a day and a half to make.  While I knew that it would take longer--it took about a month--it gave me an actual reason to make something and consistently work on it--something I haven't been able to do since all events were cancelled--as they should've been--this year. 

I took these pictures by myself with a tripod, and so look forward to when we can get together again. 

My version of the pattern can be found here. I've rewritten it and fixed a few of the errors in the original pattern. 

Making the 1920s "Two Day" Sweater

20s Sweater 2 20s Sweater 3 20s Sweater 4


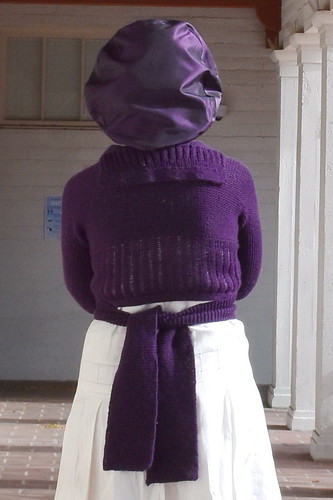
An ad for a sweater using Fleisher Yarns, The Diane Sweater was published in The Ladies’ Home Journal in April 1921. The sweater calls for Shetland Floss, which is about a modern fingering weight. Based on similar patterns, the gauge is five stitches an inch--this isn’t what you expect from fingering weight, but I achieved it with size 8 needles when I was figuring out another pattern. I made my sweater with sport weight yarn on size 6 needles, which also gives 5 stitches an inch. The fit of the sweater counts on the stretchiness of the finished sweater--no size is given.

The sweater is knit in one T shaped piece, starting at the back with added cuffs, collar, and belt. It’s folded at the shoulder, the side seams are sewn, and the belt is sewn to the bottom front edge and tied in back. My notes and changes to the pattern are in brackets. [ ]

This post is just about construction--more pictures and details can be found on this post. I've included a copy of the pattern without pictures at the end of this post, and a PDF is available here.

Wednesday, November 22, 2017

Tintype Photography, Or A Photographic Trip to the Past

2017g4 IMG_20171118_214516

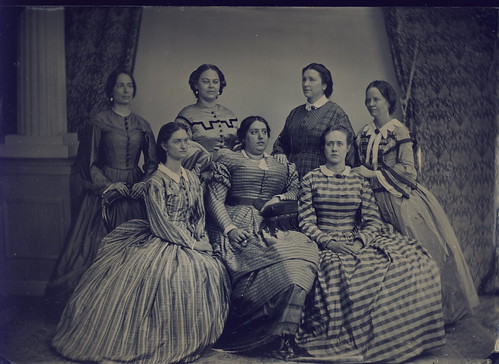
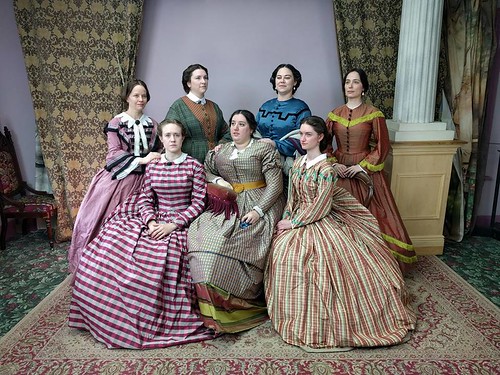
A group of friends and I went to Gettysburg for Remembrance Day, where we spent most of our time at the fabulous Victorian Photography Studio. We also visited in 2015, but the new owner encourages social media and digital photography, which made the experience even more interesting as it was possible to take detailed comparison pictures in the same environment.

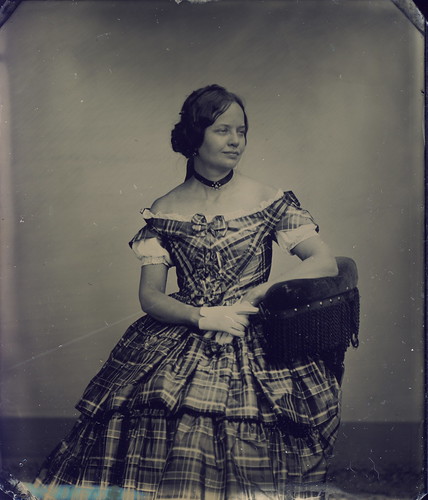
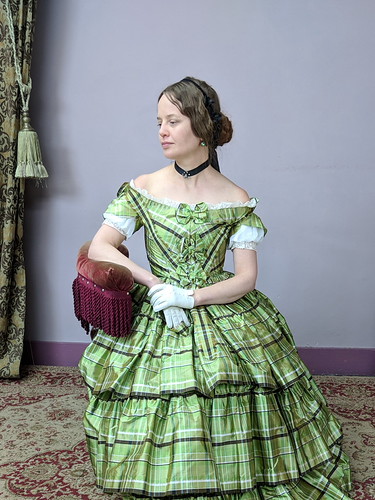
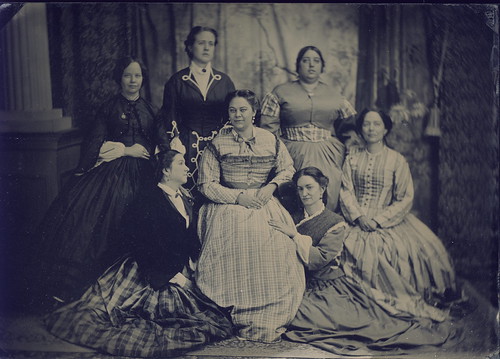
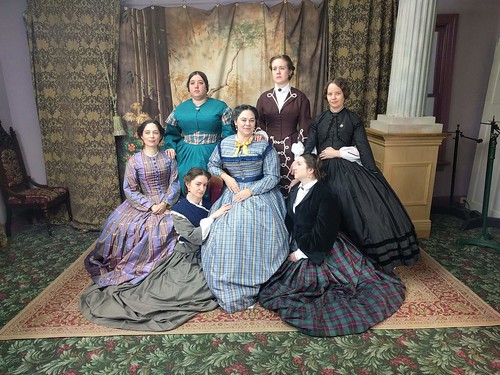
The above pictures were taken at nighttime, between dinner and the second half of the ball (yes, a few of us missed half the ball to have a few more tintypes made!). In period, photographers were dependent on daylight, but thankfully the studio has an excellent daylight mimicking light setup. All of the color pictures were taken with our cell phones and haven't been touched up, just cropped to help the comparisons a bit.

The ball gown I'm wearing is one of my older dresses. I made the skirt in 2007 and the bodice in 2010. I think the color shift in the wet plate was the most interesting of my dresses. The green in my skirt has quite a bit of yellow in it--it's shot with one of the threads a goldish color--and it darkened noticeably.
2017g10 FB_IMG_1510956026356


I love that we had such a variety of fabrics and patterns in our group shots. Some of our dresses shifted in expected ways--however, Leia's dress has a striking contrast of rust and chartreuse in real life, but faded into one color. Taylor's blue dress lightened considerably and the contrast with the black trim is even more pronounced than in reality. Adrienne's dress has lost definition in the check and appears more like a stripe.

My dress, Robin's wrapper, Alice's dress, and Amanda's dresses look more like what you'd expect in black and white photography with the contrast in colors remaining consistent with reality.
2017g7FB_IMG_1511277798759

In our second group shot, I think the most striking change is the lightening of blues--and Leia's plaid looking like a stripe.
2017g2 23847855_10101636152010189_959287820_o

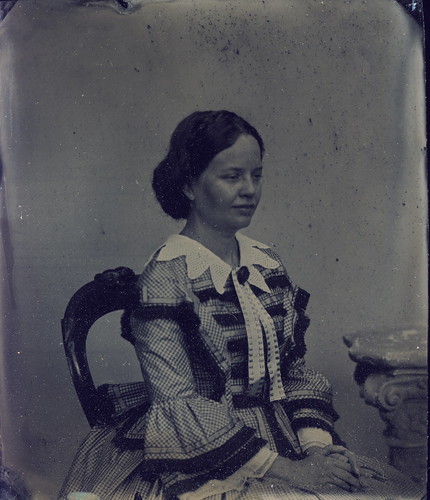
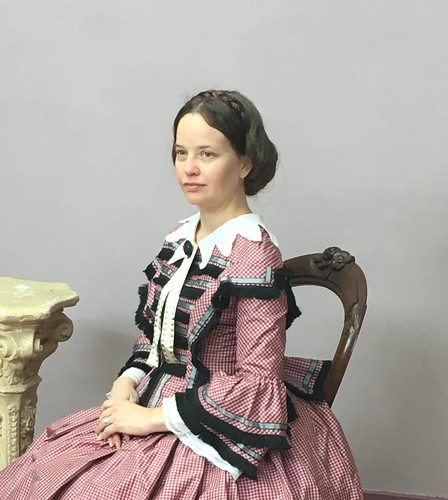
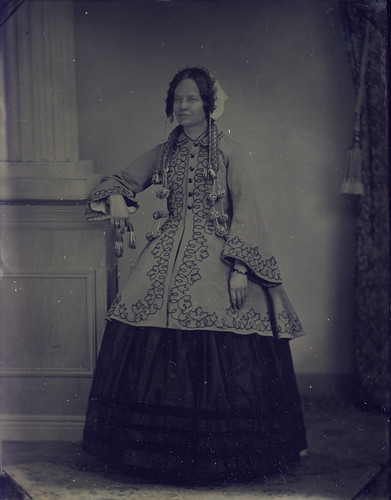
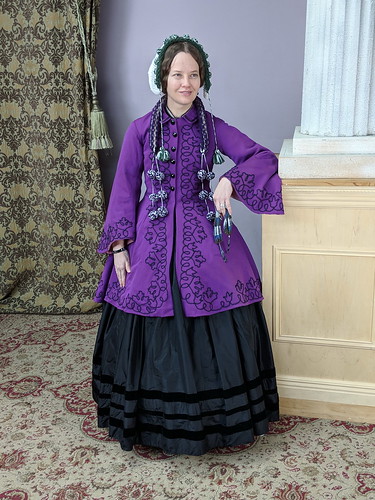
For this dress, I copied a period photograph and tried to get the details as close as possible to the original. Though it's impossible to know, I'm glad that the colors I chose had similar contrast to the original. The ribbon on my dress is strips of white and black shot taffeta with fringed edges, which reads as grey. The center is a bit darker than the original, though the darkness of the soft edges is similar. The eyelets in my collar stand out a little more in the tintype. Please note, I took my rings off in between the pictures--they didn't disappear!
2017g9 IMG_20171117_125729

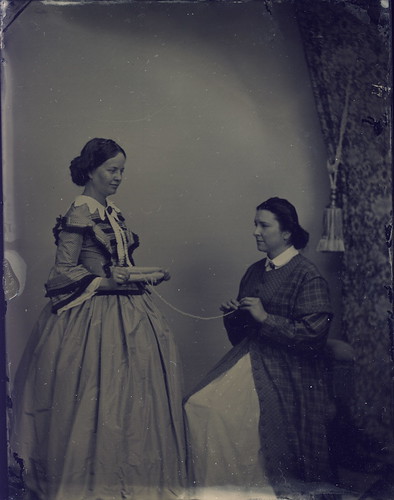
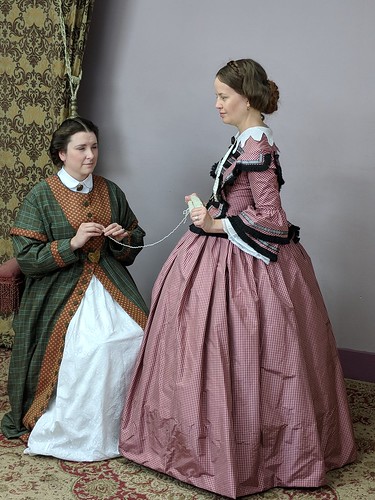
This pose is inspired by an original photograph. Though portraits are the most common, many photographs also showed people doing activities--or at least pretending to!
2017g3 IMG_20171118_115435

Even though I brought my paletot, I didn't expect to take a tintype with it. Saturday though, it was pouring rain, so wearing it with my silk dress was a necessity. I couldn't resist finding out what the soutache trim would look like, and I wasn't disappointed. Though the purple and black contrast well, it's even more defined in the tintype.
2017g8 IMG_20171118_114315

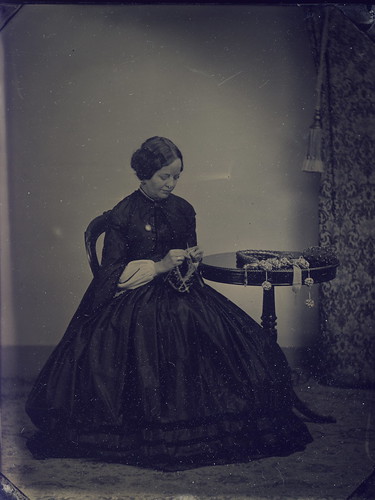
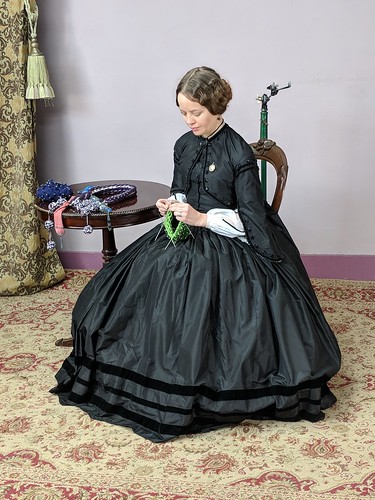
Many photographs featured knitting, and since I not just love period knitting, but have a knitted bag in progress, I decided that I needed to recreate such a scene. This photograph was my main inspiration, though I decided to pose with more knitting instead of a book. I've included two miser's purses, princess royal scarf, Robin's pineapple, and Adrienne's pence jug.

The white brooch on my chest isn't actually white--it's a miniature of President Obama that I made for a reenactment just before the 2008 election. It has a glass covering, which reflected the light so you couldn't see the picture--his official senate picture. I do wish it had shown up!
23847814_10101636152065079_26515139_o 38478070086_ab54c9d418_o

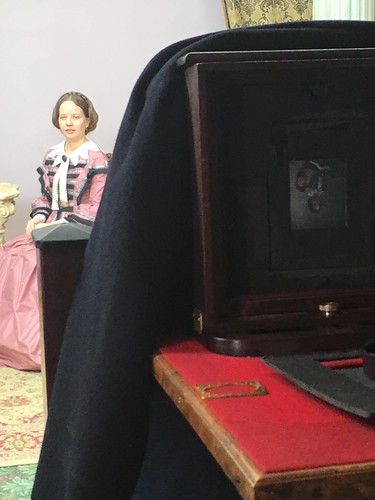
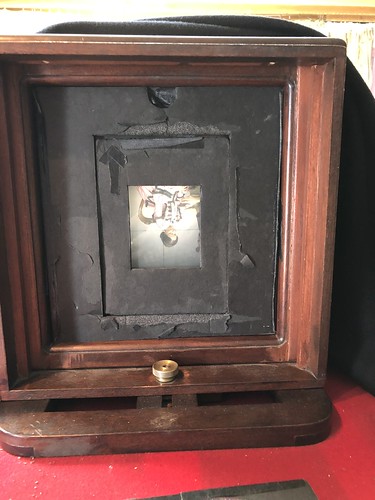
Looking through the camera was fascinating! In addition to the photograph being flipped, the image is upside down.
24662058708_f5f9fdf467_o 38502180652_e1cc325a44_o

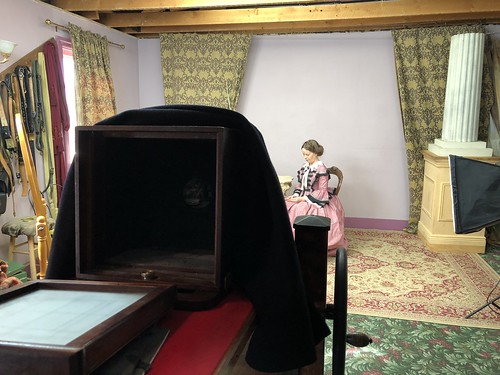
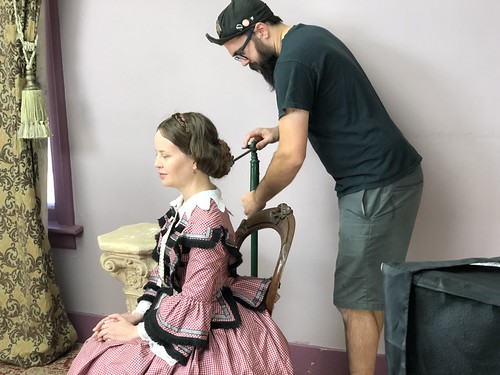
The camera is positioned a good distance away. All of our pictures with our phones were taken much closer, yet had similar or wider angles. The exposure time was 15 seconds, half of the 30 seconds of our previous session in 2015. Though this wasn't a very long time to sit, having the head clamp was very useful. Breathing and blinking are fine during the process.
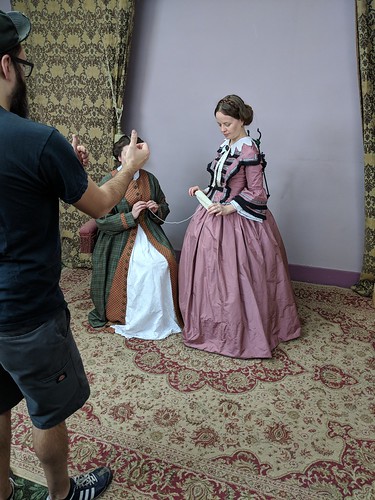
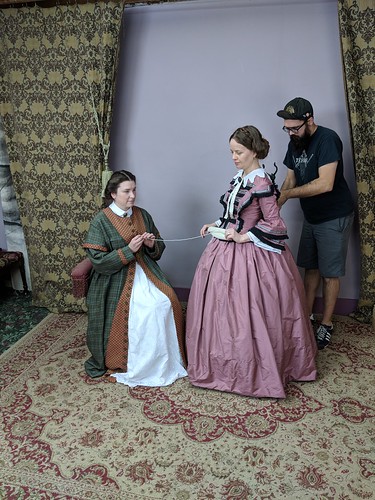
IMG_20171117_125127 IMG_20171117_125149

Setting up the yarn winding shot--getting in good distance of the camera, and head support hidden behind me.
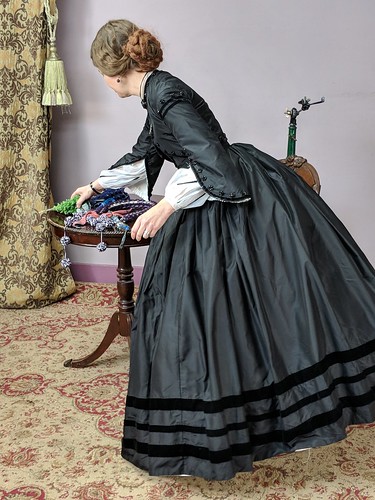
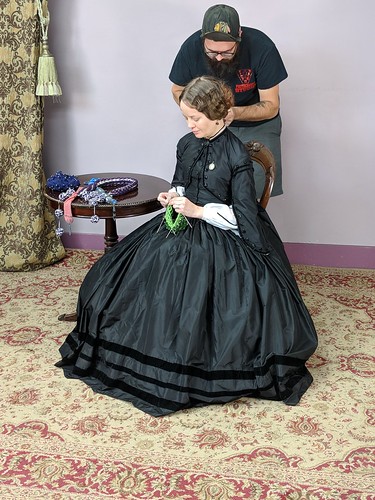
IMG_20171118_114138_1 IMG_20171118_114414

Setting up the table of knitting--trying to make everything look as natural and distinct as possible. I left off the talma wrap and mariposa hood that I also brought on the trip. And once again, having the head clamp positioned. It's really quite comfortable--your neck just rests on it.
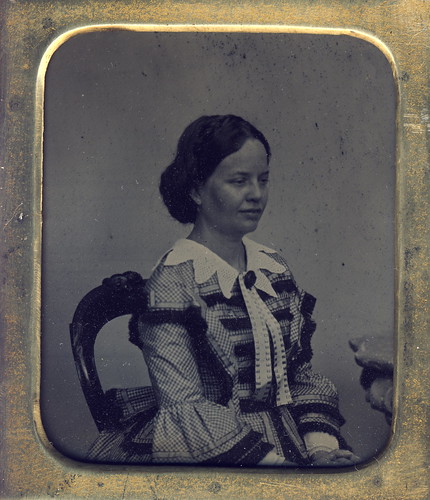
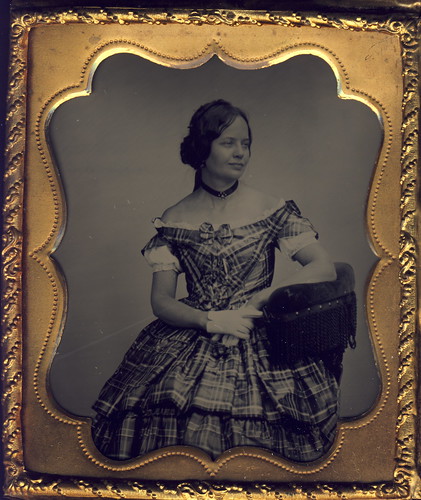
2017g1 2017g6

Two of the tintypes in cases--I think they really add to the authentic look!

If you ever have the chance to have a tintype made, do it! It's really an amazing experience and helps to imagine what people in the past experienced. The picture emerging is fascinating to us--just think what it would've been like 150 years ago! And I couldn't recommend the Victorian Photography Studio more. They were professional, friendly, took beautiful photographs, and even had delicious cinnamon rolls. What more could you ask for!


And speaking of the photographs emerging, below are videos of the developing process. They start as negatives, and then all is revealed!

VID_20171117_122020 from Katherine on Vimeo.


VID_20171117_130032 from Katherine on Vimeo.


VID_20171118_112635 from Katherine on Vimeo.


VID_20171118_114955 from Katherine on Vimeo.


VID_20171118_120121 from Katherine on Vimeo.


VID_20171118_215427 from Katherine on Vimeo.


Thursday, December 25, 2014

A Knitted Muff from 1847

DSC_9815a

I'm going through a little bit of a knitting phase right now (active projects--an 1857 Princess Royal's Scarf, a cobweb weight nubia (giant scarf thing) on size three needles, an 1860s Mariposa Hood), and as I often do while in knitting phases, I read period knitting patterns. How Dumbledore of me. Anyway, I came across The Child's Muff of Two Colors in The lady's assistant, for executing useful and fancy designs in knitting, netting, and crochet work. by Jane Gaugain and was intrigued. The pattern was interesting--the look of netting over a ground, the technique was interesting--knitting two colors after another instead of back and forth, and just why is it a child's muff? It's the same size as the muff in imitation of black Siberian lamb's-skin on the page before. That one is just ribbed and we all know ribbing looks just like lamb's skin, right?

The pattern is surprisingly simple. It's a four row repeat. I've included a picture of the pattern at the bottom of the post, but I rewrote it so it was a little easier to follow. I used Cascade Aran weight yarn for the 9 ply fleecy in the pattern, and size 8 needles. The pattern calls for a modern size 7, but I have a 6 and an 8. Size 6 was too small, but the size 8 worked nicely. I also increased the number of stitches cast on from 35 to 47. It needs a repeat of three plus two for the selvages. This PDF--Everyone His Own Knitting Needles by Colleen Formby--at raggedsoldier.com is a great source for figuring out period to modern equivalents.

A link to my Ravelry page for the muff, though this post is more detailed.

Instructions below the cut! I've included a very detailed and a straightforward version.

Thursday, October 10, 2013

A Knitted Miser's Purse

This is an historically inspired purse. Yes, at first glance it does look like millions of other miser's purses out there; however, I haven't come across one of this style knitted in the round. Crocheted, yes, but knitted? Sadly, no. I wanted to knit a miser's purse of this style though, very much enjoyed doing it, and now I have a pretty thing that I made. Would I love to find a knitted one in the round? Of course! But I won't be broken up if one never appears. There is one fully beaded purse I found that says it's twisted stockinette and appears to be knit in the round, but without seeing it more closely, I don't know if it's what I did for mine. This is also the purse that inspired the leafy design on mine. Knitted miser's purses did exist, but they were knit flat and sewn.

Long story short, I have no documentation. But I do have a pretty purse!

Now that that's out of the way :)

DSC_6796

The completed purse! It's made from Purely Silks size E beading cord with size 15 rocailles by Miyuki of Japan. The pattern is essentially the knitted star bag I made earlier, only with six points instead of eight, and obviously much longer! The lacy section in the middle is k2tog, yo, repeat and p2tog, yo, repeat endlessly row after row. I'm a little sad that I didn't look at more patterns (I extended this one from a two row eyelet design on another bag) because the p2tog was rather brutal. But it's pretty, so oh well! The square end is closed with a three needle bind off as described here on Ravelry--post 46 in the thead-- which is a rather brilliant way of doing it.

I used adjustable toe rings for the rings, and they work perfectly. You need something quite small, which I found out when the size 6 rings I ordered didn't work. You also need something that won't catch on the beads and not go on, which attempt number four, small hematite rings did.

I did keep track of everything and will write it as a pattern, including directions on the fringe.

DSC_6800

Here's how the purse works. There's a slit in the middle section, which is knit flat instead of in the round. To put something in one end, slide the rings to one side, put something in, slide one ring back, and voila! safely stored things!

DSC_6799

And here that is on the other side.

And below are some detail pictures!

Thursday, May 9, 2013

A Knitted Star Bag

The Lady's Assistant for Executing Useful and Fancy Designs in Knitting, Netting, and Crochet Work (1847) by Jane Gaugain is an incredible book. Not only does it have a pattern for the rather famous pineapple (I've knit one! Blog post eventually!), but it has many clear, easy to understand, followable patterns! Amazing for Victorian knitting. One that I found particularly intriguing was the Knit Bag of Purse Twist and Steel Beads. So, I made it, and even though the pattern was clear, made a chart and wrote the directions out more fully, complete with charts and row by row instructions.

star bag 14 star bag 13

Knitted and crocheted bags with star motifs at their bottoms were popular during the Victorian era. And why not? Not only are these stars attractive, but they’re one of those deceptively simple things to knit. Once you get past the probably most awkward knitting ever—casting on eight stitches over four double pointed needles—it’s incredibly logical and the design progresses quickly. Don’t be intimidated by the 5/0 needles. They’re remarkably quick to adjust to. They’re quite the conversation piece as well—who doesn’t occasionally like impressing others with knitting?

star bag 1 star bag 11

Adjustments to original: Mrs. Gaugain’s original pattern was remarkably clear. The only adjustment I’ve made to it is to add a row of eyelets near the top to thread a drawstring though. She makes no mention of how the bag should be finished. Contemporary bags in museums often have a row of eyelets, so I decided to include them. My bag—like many originals—is lined. I used a tube of silk taffeta, gathered at the bottom and whipstiched into place just below the eyelets.

star bag 8 star bag 6

Here's a link to my Ravelry project page.
And here's a link to the pattern page on Ravelry.

The pattern is below the cut!

I'm also going to include a PDF of the pattern. I can't do it on my almost seven year old computer though, and will post it once I can do it at work :)

And a PDF of the pattern! I downloaded an app for my phone--I'm surprised I didn't think of that first!

Friday, April 22, 2011

Knitted Pinballs

About a year ago now, I found out about knitted pinballs--little round pincushions that 18th century women wore from their waists--and of course, had to have one. I had wanted a fabric one for years, ever since first seeing one in Fitting and Proper and later seeing my friend Sarah's on a lovely silver pinball ring from Williamsburg.

It wasn't until seeing the knitted version that that want became need. It helped that there were original knitted pinballs that used ribbon or the same thread as they were knit with instead of a silver ring. Not that I didn't want a silver ring, but rather I couldn't find one. I tried to buy one during Under the Redcoat, but they no longer had them. The following year though, I was able to buy a ring. It's been sitting in a drawer for almost a year now, with nothing in it. Isn't that sad?

Back to knitted pinballs though. I bought this book, Tokens of Love, which has images of knitted pinballs as well as charted designs. It's not clear if they're exact charts of 18c pinballs or if they're inspired by, but it's a lovely book and the charts fit my needs.

And so I knit a pinball! It's green soie d'alger embroidery thread knit on 000000 needles. I used pink ribbon to cover the join. These colors came directly from the pink and green court dress that I was working on when I bought the thread. Though I did choose a softer pink :)

And here's the pinball!

Pinball Front Again Pinball Back

A public Ravelry link to the pinball.

Not to be stopped there, I decided to knit a pinball for Sarah. Hers was a copy of one in Williamsburg's collections.


I even posed it (hooray for bad photoshopping!) similarly to the original :)

A public Ravelry link to the Williamsburg pinball.

And now, with Costume Con sewing coming to a close, I decided to take things a little slowly, use that silver pinball ring, and make a copy of pinball 6974 on this page. Well, and wish I could get the original too!

So tonight I charted the pattern. I doubt it's exact, but it's as close as I could count, and I decided to not put initials on it this time. There is a place on the pinball ring for engraving though!

Pinball Chart

A public Ravelry link to the strawberry pinball.

So tomorrow, I'm going to buy more silk thread. Dark brown for the ground and pink for the strawberries and green for the leaves. I'm so excited to start this. I've been wanting to knit something for quite some time now, and this should satisfy that urge :)