Showing posts with label robe a la piemontaise. Show all posts

Saturday, July 30, 2016

A 1780s Robe a la Piemontaise

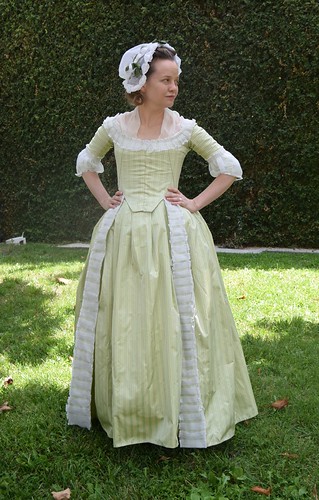
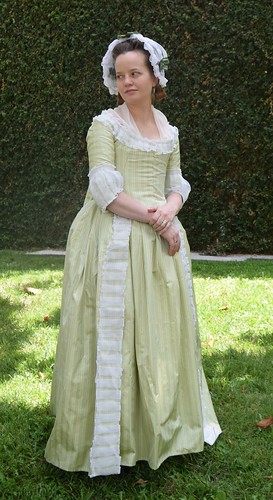
IMG_20160730_172839 IMG_20160730_173152

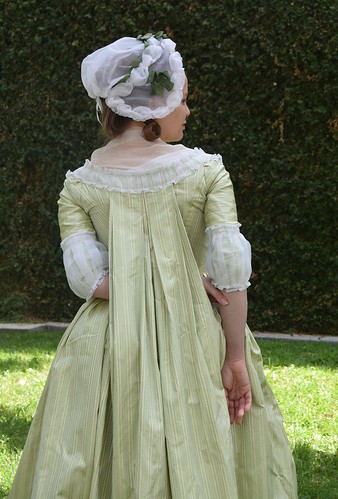
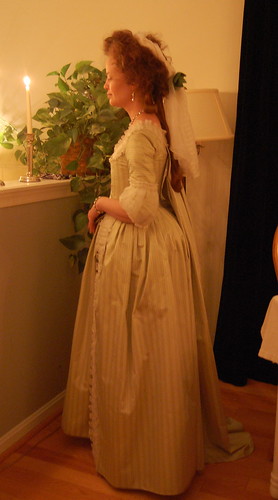
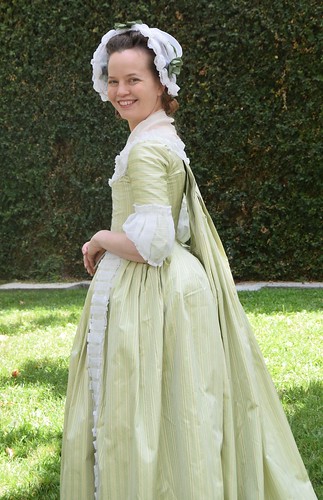
At long last, after wearing my piemontaise to a wonderful candlelit dinner, I wore it to Costume College and have pictures that show more of the dress and less of the atmosphere.

The robe a la piemontaise was a style from the 1780s that is something of a combination of a sacque and robe a l'anglaise, with a fitted bodice, pleats that attach at the shoulder and the skirt and are loose in between. I have a post documenting construction, based on an extant example here. It includes links to the pattern and other extant dresses.

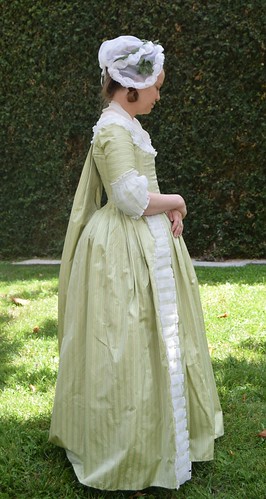
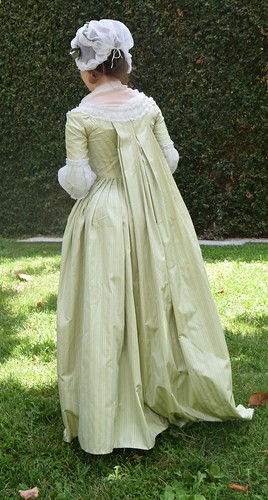
IMG_20160730_172759 IMG_20160730_173120

The loose pleats in back are really what make this dress so fun to wear. While not as dramatic as a sacque, it somehow feels new and fashionable, despite being centuries old. Part of the fun of this hobby is trying out different styles, just how women in the past would have!

There are a few other reproductions out there, including a lovely one made by At Her Leisure. Miss Philomena also made one and posted her information on Live Journal.

Tensioning the pleats was a bit more fiddly than on a sacque, but not difficult, and I've noticed they sit differently depending on how my petticoats are sitting.

IMG_20160802_003533

I'm wearing the dress over a split bumroll, which is perfect to emphasize the space between the bodice and the pleats (more information at A Fractured Fairytale), and the standard shift, stays and petticoats.

IMG_20160730_172927

The pleats are great for optical illusions!


Sunday, August 16, 2015

Robe a la Piemontaise--Tutorial and Construction!

piemontaise5

A piemontaise was a fashionable gown of the 1780s. It was similar to a sacque in that it had pleats from the shoulder to the hem, but unlike a sacque, the pleats were loose over the bodice. Extant robes a la piemontaise include this dress in the Imatex database, this dress, also in the Imatex database, this dress, in the Danish National Museum, and this dress from liveauctioneers.com. All links are to Pinterest.

Thankfully, the Danish National Museum has a pattern draft which helps explain how robes a la piemontaise work. They're made essentially like gowns with separate bodices and skirts, but with extra fabric at the center back of the skirt that attaches at the center back neckline. It would be a very easy dress to alter if styles changed. This dress is best worn over a split bumroll, as seen on Aubry's blog, as a regular bumroll pushes the back out and makes the distinction between the pleats and bodice less noticeable.

This tutorial is for draping the back and skirt. I have a tutorial for making the bodice here, although any method of making a bodice would work, and a very short cuff tutorial can be found here.
DSC_9423

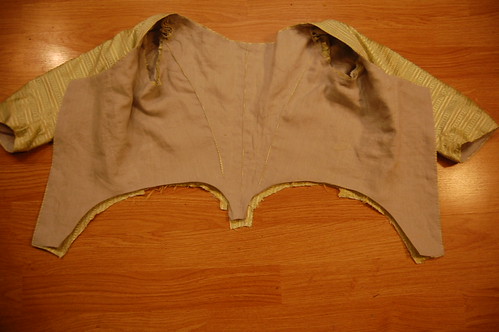
My bodice tutorial ends here, with a finished bodice with an unfinished bottom edge. When I was working it out, it seemed like the method where you insert the skirt between the bodice and lining would work best for the piemontaise.
DSC_9424

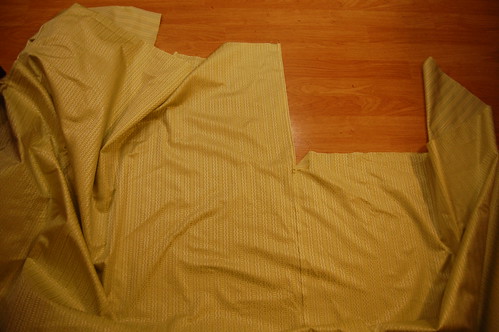
After the bodice is done, the next step is to prepare the skirt. The side panels of the skirt should be your waist to hem measurement, and the center back panel should be a little longer than your neck to hem measurement--including any train you want. I used the diagram linked above for the widths of the panels.

The top inch or so of the seam should be left unsewn, and the skirt edge should be folded into a little triangle. This makes pleating the skirt to the bodice easier. The raw edges of the neck to hem panel should be hemmed since they do show a bit in the finished dress.
DSC_9425

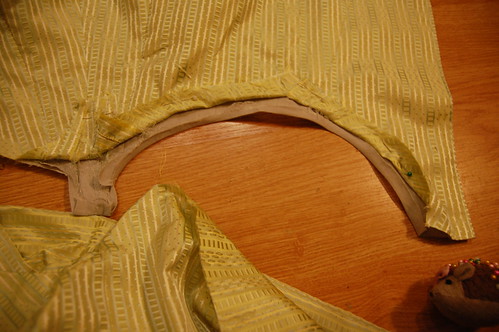
To prepare the bodice for the skirt, finger press the lining seam allowance up, and pin the silk seam allowance out of the way.
DSC_9426

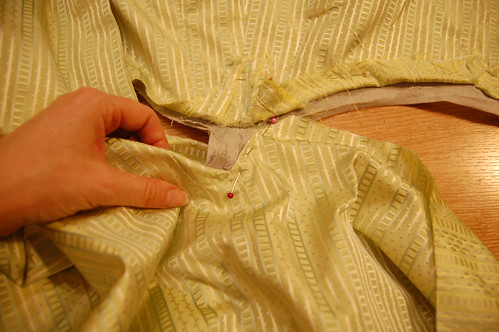
Start by pinning the little folded triangle to the point of the skirt. Ignore the neck to hem length.
DSC_9427

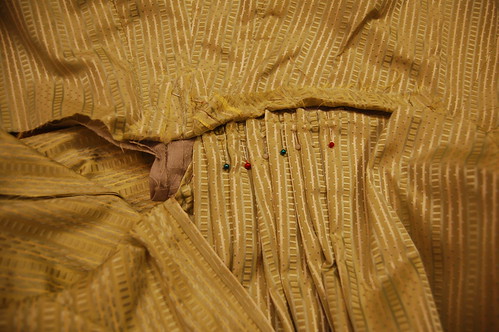
Then pleat!

DSC_9428

Continue to ignore the neck to hem length, and repeat the skirt pleats on the other side.
DSC_9430

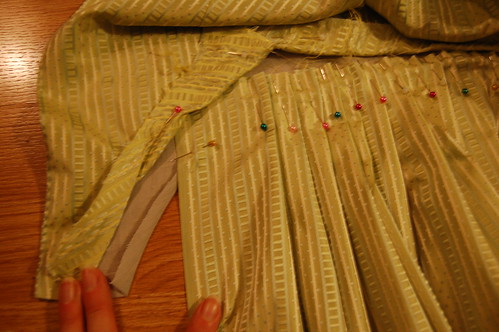
An easy way to level the skirt at the center front point is to just keep pleating straight. Ignore the point, and keep the top of the pleats level. When you sew it, you sew the edge if the lining to the skirt, so the fabric over the point just becomes excess fabric. With a lightweight fabric, you don't even need to trim it which is useful for any remodeling you may wish to do.
DSC_9431

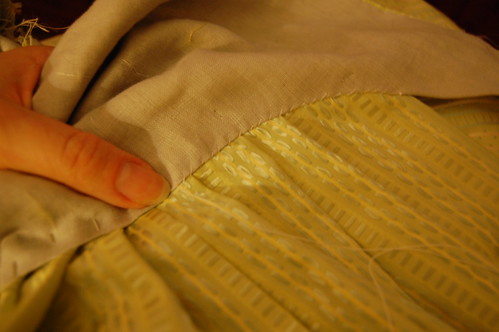
Then turn the skirt over, and whipstitch the pleats to the edge of the bodice.
DSC_9432

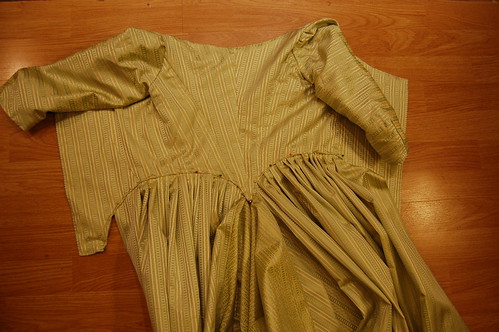
Then turn it back over, and topstitch the silk over the pleats. I used a spaced backstich.
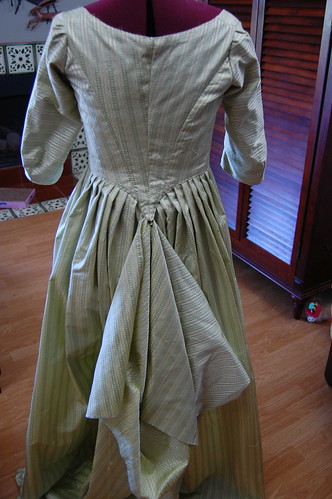
DSC_9436

I find draping the back easier on a dressform. My dressform is only somewhat me sized, so you don't need to worry about an exact sized form, as long as your bodice fits. The dressform is mostly so gravity can help you out.
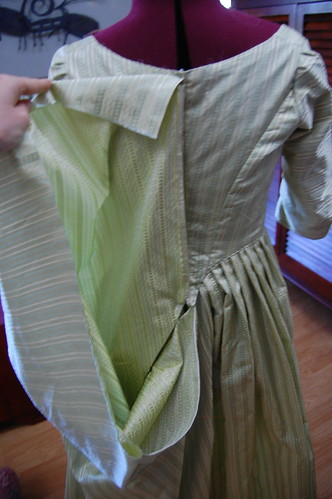
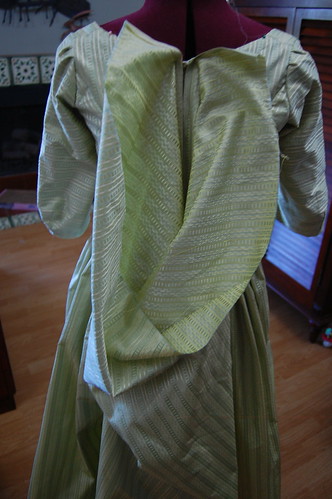
DSC_9437DSC_9438

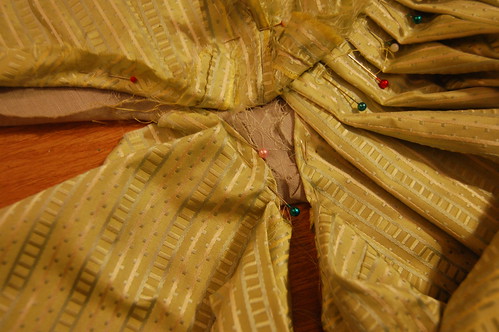
To start the back draping, pin the edges of the neck to hem panel to the center back neckline. You'll notice the extra fabric there--that's for wiggle room. It's much easier to cut away then piece your fabric!
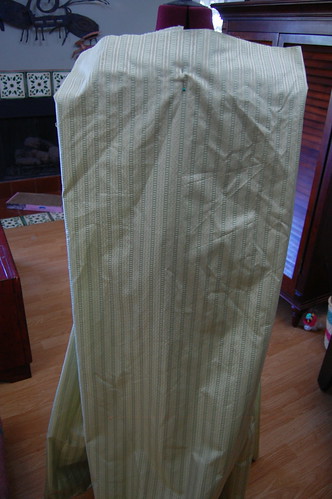
DSC_9439

Now, pin the center of the neck to hem panel to the center back.

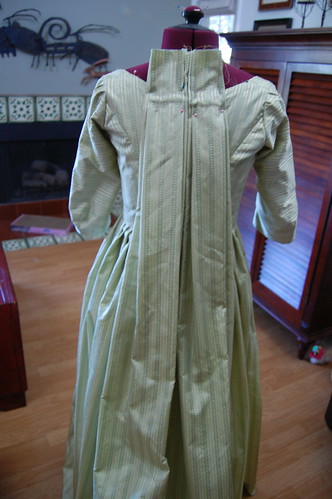
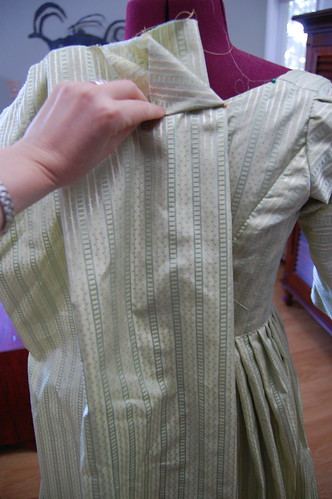
The pleating on this is similar to that on a sacque--you want two layered box pleats. Depending on the width of your fabric--I suspect some of the examples I linked had narrower panels--you might do it differently than I do below.
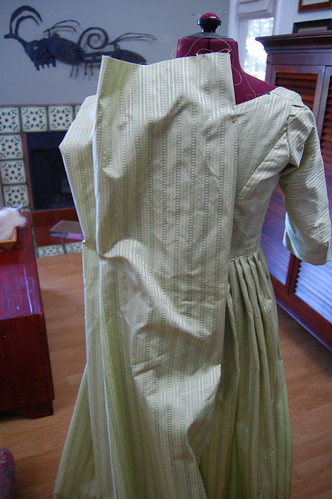
DSC_9440 DSC_9442

To start, pleat your fabric just slightly narrower than you want your back panels. Then, make a second pleat just slightly wider than this. (With a narrower panel, you could skip the inner pleat. This pleat is often found on sacques, and lets the fabric drape more elegantly.)
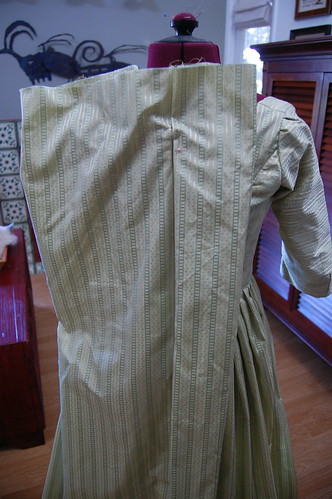
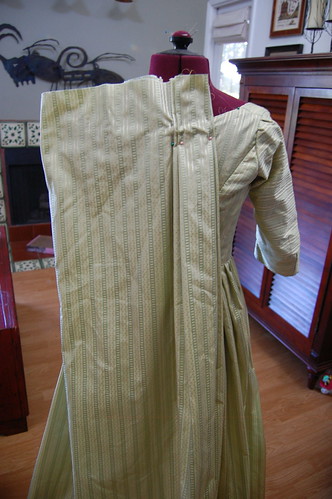
DSC_9443 DSC_9444

Next, form a box pleat by pleating your fabric towards the center. Then, take the leftover fabric and make a box pleat. The leftover box pleat should stop short of the underpleats, so you can see a little of each edge sticking out.

It's fine to have underlap below the pleats--it's what you can see that matters!
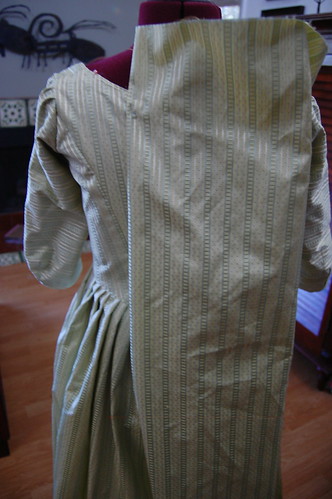
DSC_9445 DSC_9446

Repeat on the other side! Don't worry about getting the pleats exactly the same as the first side--especially underneath. As long as they look the same, it's fine.
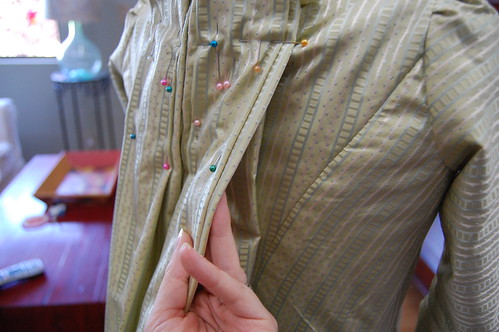
DSC_9450

I took it off the dressform to smooth everything out, tried it on, found I needed to pull up the pleats a tiny bit, and put it back on the dressform.

The pins that you see here mark where it needed to be sewn to keep the pleats smooth. The underpleat was left loose, but the visible pleats looked better sewn together. I used a spaced backstitch along the pinned lines.
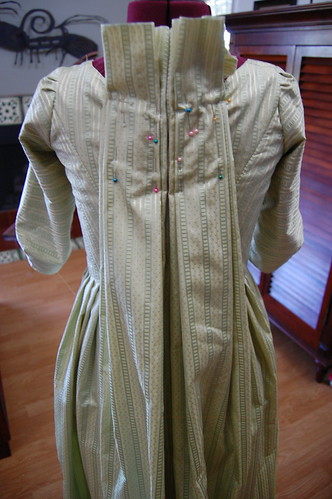
DSC_9451

After sewing down the pinned parts, I trimmed the excess fabric and bound the neckline using a straight of grain strip of the silk. My apologies for not having pictures of this step. I then trimmed the neckline and sides of the skirt with box pleated silk organza.
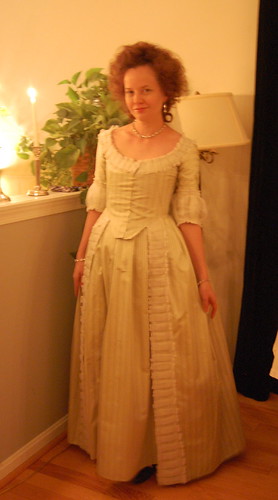
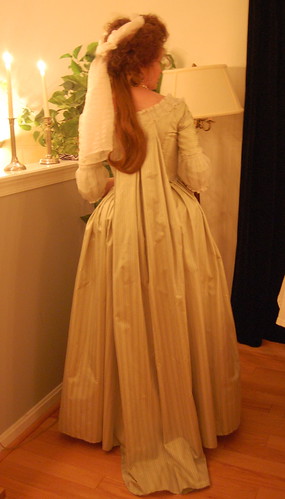
piemontaise4 piemontaise6

And the completed dress! At this time, my only pictures are by candlelight (or very bad first try on pictures! I hope to take better pictures in the not too distant future!

A 1780s Bodice, the Start of my Robe a la Piemontaise--A Tutorial

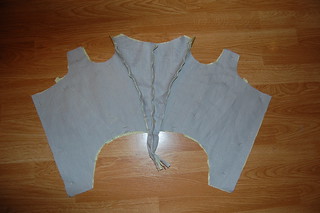
The bodice of a robe a la piemontaise, one of the many variations of high fashion dress in the 1780s with pleats from the shoulder, loose over the back, and attaching at the skirt, was essentially done in the same manner as gowns with separate bodices and skirts. I based the patterning of my piemontaise on this pattern draft from the National Museum of Denmark. I added the cutaway front of this piemontaise. For the pattern itself, I started with my standard 18c base pattern, which is based off the 1770-80 dress in Patterns of Fashion.

I sewed the bodice using the wiggly stitch that Abby describes on her blog, Stay-ing Alive. I love this stitch and the definition it gives to seams.

Draping the back of the piemontaise can be found here--coming soon, and a very short tutorial on cuffs can be found here.

DSC_9337 DSC_9338

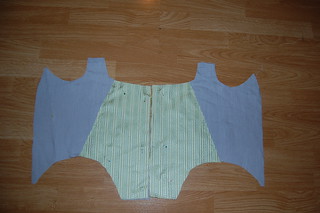
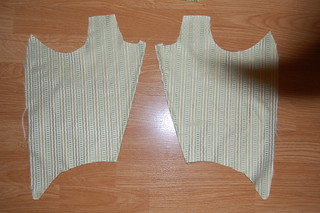
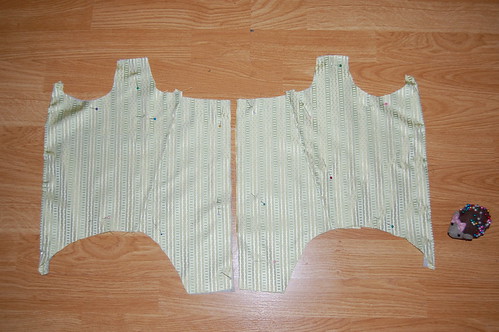
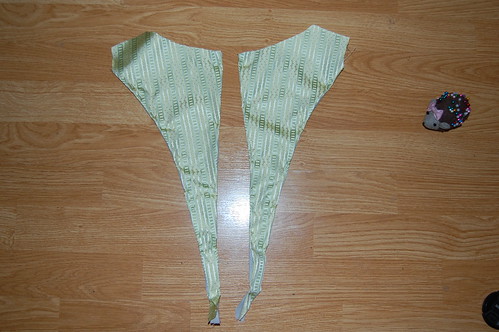
To make the cutaway front, I decided what shape I wanted it to be and cut two pieces based on that--the center front that I edgestitched to the linen lining using point a rabbatre sous la main, and the cutaway. The pieces overlap, and the diagonal front of the cutaway is hemmed.

DSC_9340

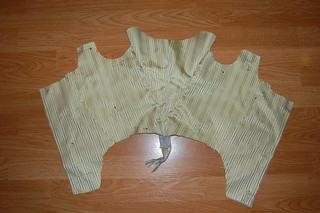
To combine the two pieces, I just laid the cutaway on top, pinned it around the edges, and sewed the hemmed edge to the lining with a running stitch. To prepare for sewing, I turned the seam allowances of the lining and silk towards each other and pinned.

DSC_9341

Similarly, to prepare the center backs, I folded the seam allowances of both silk and lining towards each other.

DSC_9342 DSC_9343


Here's the whole thing pinned together, from the back and the front. When sewing the back seams, it's important to not sew the lining together for the top inch of the seam (so you can turn the neckline in for finishing) and, depending on your skirt style, the bottom edge of the seam so you can insert the skirt between the silk and lining.

For some skirt styles, you can finish the edge and whip the pleats to the finished edge, but I found enclosing the pleats was easiest--for me at least--with the piemontaise.

1790s_seams10

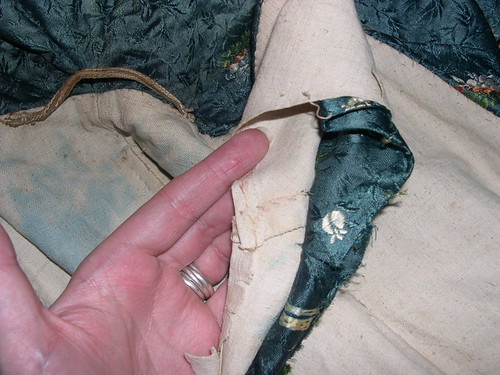
Here's a picture of my original 1790s bodice that shows the lining and silk sewn separately.

DSC_9422

After sewing the side and back seams, I added the shoulder straps. I folded the seam allowances under on the silk and topstitched them to the silk layer only of the bodice, and then I folded the seam allowances of the lining under, and whipstitched them to the lining layer only.

To finish the neckline, the lining and silk are turned towards each other and edgestitched.

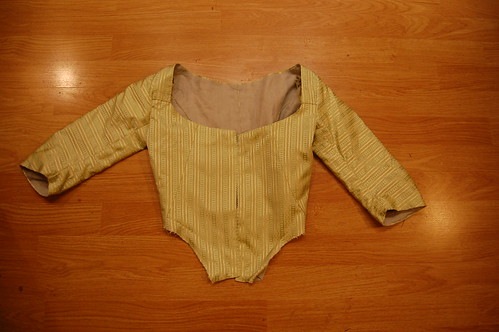
I then added the sleeves. The examples of piemontaises that I found had modern set sleeves, so it was very straightforward. An option would be to sew the sleeve between the silk and lining and cover the seam allowance with the lining as in my original 1790s bodice, but I chose not to do that here.

DSC_9423

And here's an inside view, showing the separate lining and silk, ready to have a skirt added!


18th Century Pleated Cuffs--A Tiny Tutorial!

DSC_9522

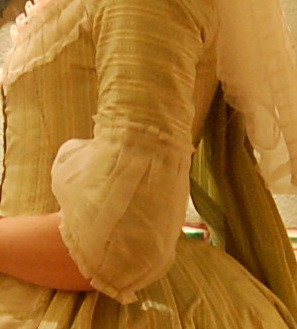
Cuffs were popular on late 18th century dresses, and are extremely easy to make. Some cuffs were gathered, some tacked down in a pleasing manner, and others, like the cuffs on my piemontaise, were pleated.

Here's an example of a pleated cuff that matches the dress, and here's a sheer cuff in a fashion plate. Here's an amazing set of cuffs--separate from the dress--that have been tacked down. I haven't seen an extant dress with sheer pleated cuffs like these, but I decided that pleating would go best with my trim, and is plausible with what might be happening in some fashion plates, including the one I linked which shows definite pleats on the top portion of the cuff. The middle section, as seen in the picture of me wearing my cuff, does puff out with wear.

DSC_9463

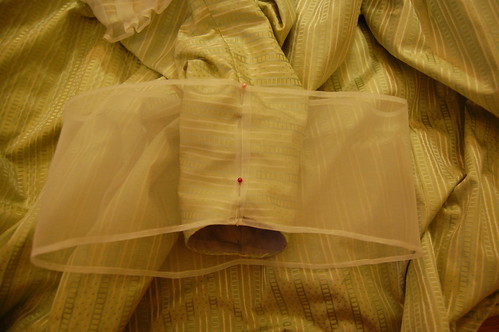
The cuff is added to an otherwise finished sleeve. I hemmed a tube of silk organza (similar to 18th century silk gauze) about three times as wide as my sleeve bottom. It was slightly longer in back than in front to account for the elbow shaping in the sleeve seam. I then pinned the center front and center back into place.

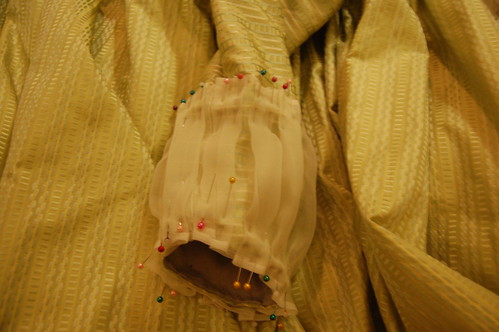
DSC_9465

Then I box pleated it. Since it was divided in half, it was a very small area to work with and quite easy. The only thing left was to tack the pleats down with two rows of running stitch, a little ways from the edge so as to form a small ruffle, on both the top and bottom.