
I'm going through a little bit of a knitting phase right now (active projects--an 1857 Princess Royal's Scarf, a cobweb weight nubia (giant scarf thing) on size three needles, an 1860s Mariposa Hood), and as I often do while in knitting phases, I read period knitting patterns. How Dumbledore of me. Anyway, I came across The Child's Muff of Two Colors in The lady's assistant, for executing useful and fancy designs in knitting, netting, and crochet work. by Jane Gaugain and was intrigued. The pattern was interesting--the look of netting over a ground, the technique was interesting--knitting two colors after another instead of back and forth, and just why is it a child's muff? It's the same size as the muff in imitation of black Siberian lamb's-skin on the page before. That one is just ribbed and we all know ribbing looks just like lamb's skin, right?
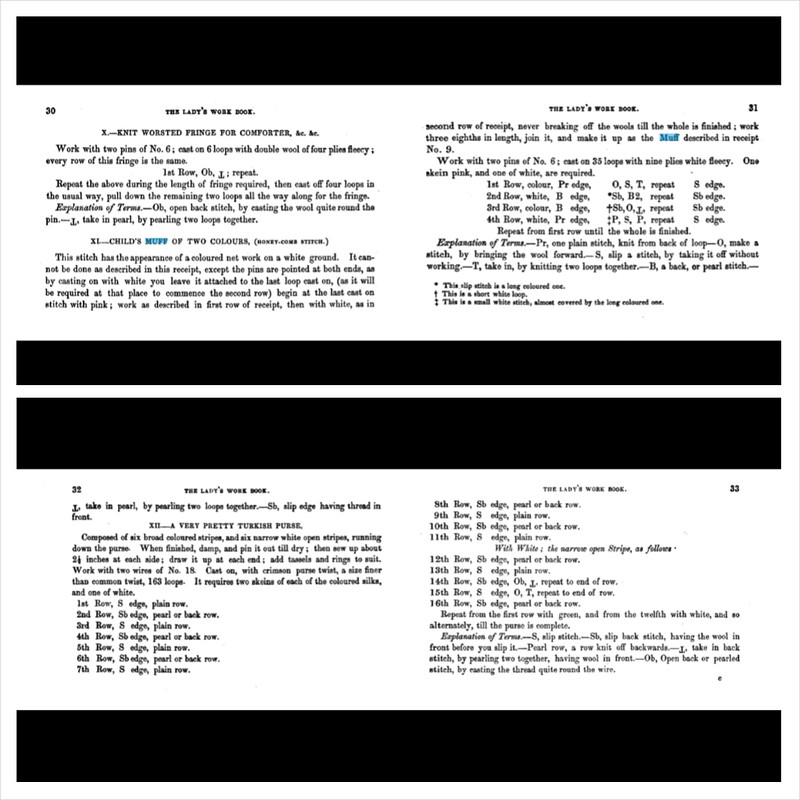
The pattern is surprisingly simple. It's a four row repeat. I've included a picture of the pattern at the bottom of the post, but I rewrote it so it was a little easier to follow. I used Cascade Aran weight yarn for the 9 ply fleecy in the pattern, and size 8 needles. The pattern calls for a modern size 7, but I have a 6 and an 8. Size 6 was too small, but the size 8 worked nicely. I also increased the number of stitches cast on from 35 to 47. It needs a repeat of three plus two for the selvages. This PDF--Everyone His Own Knitting Needles by Colleen Formby--at raggedsoldier.com is a great source for figuring out period to modern equivalents.
A link to my Ravelry page for the muff, though this post is more detailed.
Instructions below the cut! I've included a very detailed and a straightforward version.
Cast on 47 stitches in white (or any combination of 3+2). You need to use a long double pointed needle or a circular needle as you work two rows in the same direction before turning your work.
Row 1, pink--Knit 1 through the back loop (Yarn Over, Slip 1, Knit 2 Together, repeat) Slip last stitch
Starting with row 5, this means you slip a regular white stitch and knit the pink yarn over and a regular white stitch together.
Row 2, white--Slide the work back to the other end of the needle, where the white yarn is hanging. Your first stitch will be the last stitch you cast on, just as it was on the pink row.
Purl (Slip with yarn in front, Purl 2, repeat) Slip last stitch with yarn in front
The way this works out is you slip the previous row's yarn over purlwise, then purl two, then slip the yarn over, then purl two. Remember, you're always slipping the yarn over.
Row 3, pink--Now you turn the work--use the pink where it's hanging.
Purl (Slip with yarn in front, Yarn Over, Purl 2 Together) Slip last stitch with yarn in front.
On this row, you slip a regular white stitch, and the purl 2 together is the pink yarn over with a white stitch.
Row 4, white--Again, slide your work back and use the white where it's hanging.
Knit 1 through the back loop (Knit 1, Slip 1, Knit 1, repeat) Slip last stitch
On this row, like row 2, you're slipping the yarn over each time. The other stitches are knit. Be careful on this row, as the first stitch you knit has a tendency to hide under the yarn over.
Repeat these rows until it's about 18 inches long, or to fit the circumference of your muff. (Mine is 16 inches.)
Now, as that's hardly a simplified set of instructions, here's a simplified version!
Cast on 47 stitches with white.
Row 1, pink-- K1 tbl (YO, S1, K2tog, repeat) S1
Row 2, white (slide back to where the white thread is hanging)-- P (S1 purlwise, P2, repeat) S1 purlwise
Row 3, pink-- P (S1 purlwise, YO, P2tog, repeat) S1 purlwise
Row 4, white (slide back to where the white thread is hanging)-- K1 tbl (K1, S1, K1, repeat), S1
Repeat these rows until it's about 18 inches long, or to fit the circumference of your muff. (Mine is 16 inches.)
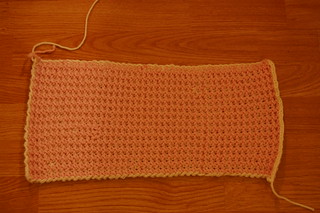
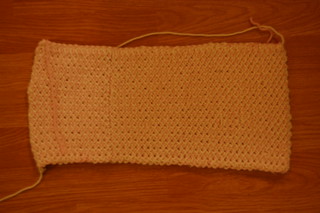
The finished knitting. The back side looks rather like the back of regular stockinette!
To make the muff itself, I made a base like I did for my 18th century muffs, and covered it essentially the same as the cover, only I just had to sew the back seam and thread the cords and tassels through the knitting itself.
I don't know if this is how a knitted muff would've been made, but after thinking too much about it, it seemed most logical. It was the only way that I could think of to just gather the ends of the knitting and not sew them to the lining in an awkward way. The patterns I found were of little help, expecting that you would know how do make a muff, I suppose!
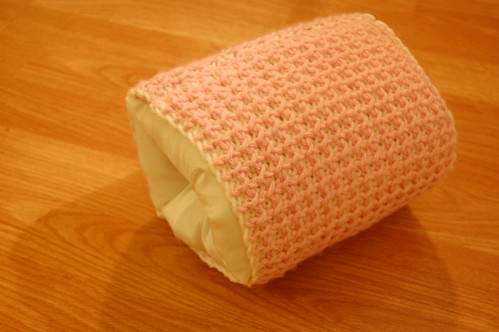
I put the sewn cover onto the muff before threading the cords through.
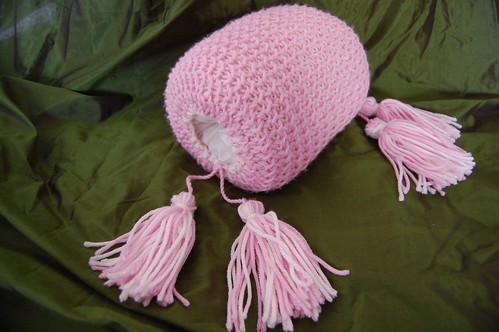
The cords are twisted pieces of yarn. I just sewed through the edge and gathered, then sewed the tassels on. The tassels were made by winding pink and white yarn fifteen times around my phone and tying off. Quite technical!
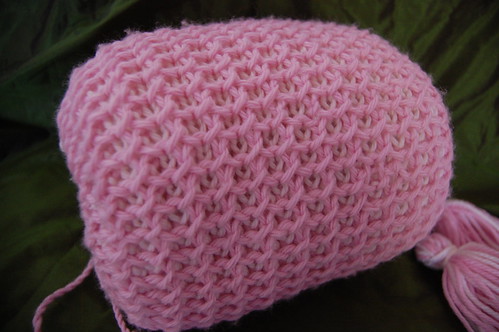
And a little closer view of the pattern.

So wonderful! I want one! :) Thanks for sharing your pattern and notes.
ReplyDeleteHappy new year,
Quinn
That is magnificent! Thanks for sharing the pattern.
ReplyDeleteI am delighted to find this blog, found your site a few years ago and I love the dresses.
ReplyDeleteHi Katherine, I found this online, you might like it. Lots of wearable 1920s sweaters etc. http://www.antiquepatternlibrary.org/pub/PDF/6-JA038Corticelli18.pdf
ReplyDeletePS I particularly love pattern 7A, the 'hemstitched blouse'. ;-)
ReplyDelete