The dress is going to be fairly straightforward. A sleeveless bodice with a squared neck, drop waist, pleated skirt and belt. It's going to be trimmed with hand hemstitching. My dress is mostly inspired by this dress at the V&A, with a little of this dress on Etsy thrown in.

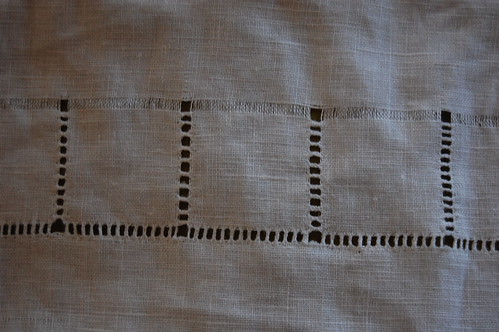
I've started the hemstitching on the dress, at the waist level. I pulled five threads since my trial run (of about two inches) in four threads was slightly narrow. I then sewed the pulled threads in sections of five. What I discovered though, as seen on the leftmost vertical bar, is that five vertical threads did not equal five horizontal threads. On the next bar, I pulled a sixth thread and kept up the square theme by sewing six threads at at time. Though the width was closer to the horizontal hemstitching, the bars were faced too far apart. I tried sewing five threads, and still a little too far. I tried again with four threads--the rightmost vertical bar--and they matched. I'm very happy that for once, I started in the least visible place. I don't mind several slightly different sized bars at the side waist, but it wouldn't have worked at the neckline!

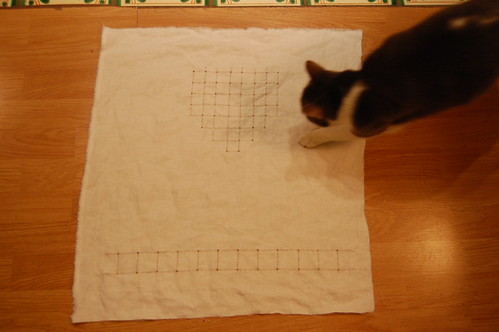
I once again learned from my 1927 Butterick's Art of Dressmaking. Hand hemstitching really is quite simple, if not as fast as machine hemstitching! To do it, you pull threads in the shape of your design, which does limit you to straight lines. Here you can see Petal investigating my work.
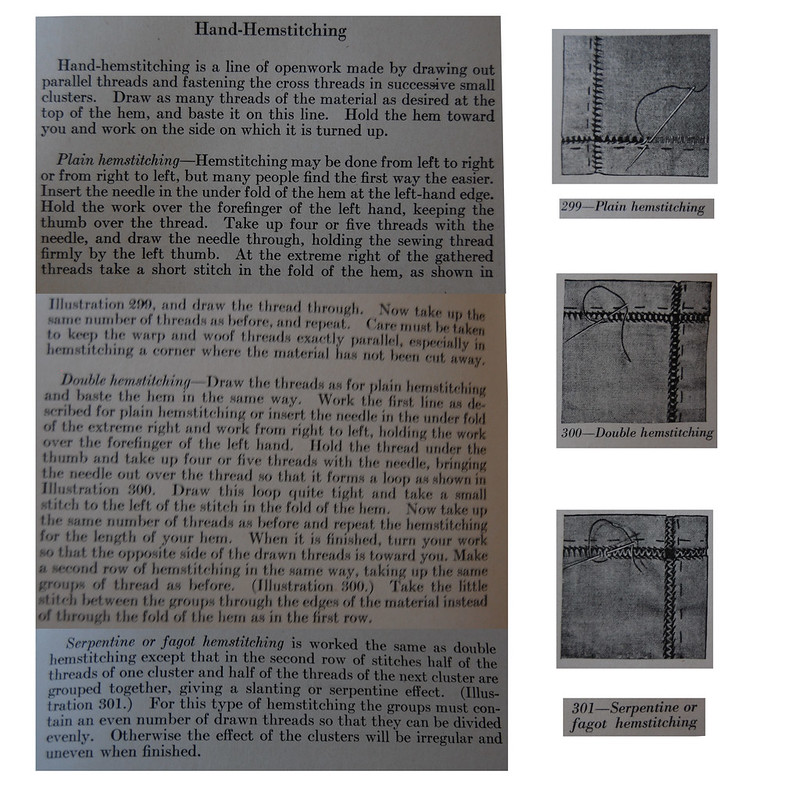
Then you secure your thread at the bottom left of a row of pulled thread, and working left to right, wrap your needle around however many threads, pull them into a little bunch, and sew a stitch at the bottom right, and continue. Then go back and do it in the other direction. Or leave the other side alone, or do half a bunch at time on the other side for serpentine hemstitching, which I haven't tried yet.
You do the hemstitching on the wrong side of the work. That way the wrapping thread doesn't show as much.
And because the book can probably explain it better than I can, below the cut you can see a badly Photoshoped picture of all the information I used. I'm doing the double hemstitching which is really just sewing the bunches of threads on each side. The directions are for hemming, but you can of course pull threads anywhere for your design.


wow that looks a bit complicated, or maybe just really time consuming. it looks like its turning out really well though. I have wondered how people do that, so your info was great. can't wait to see pictures of your finished dress. it looks like its going to be so cute.
ReplyDeleteThank you!
DeleteAnd once you get the hang of it, it's amazingly simple. It is a little time consuming, but I've done worse!
Hi! I live in Brazil and I'm trying to make a tudor hood, and I found your website and everything look quite easy. The problem is that i can't find this 'buckram' fabric anywere here. Do you know if there is any site that sells it?
ReplyDeleteSorry for my bad english, have a nice day!
Your English is fine!
DeleteI've ordered buckram from Lacis before--http://lacis.com/catalog/data/AA_SpecialtyFabricsCraft.html#JT14
I don't know their international shipping though. Good luck!